- Obtain the URL of your Facebook Page by visiting it in a browser and copying the URL in the address bar.
- Open the Facebook developers plugin page.
- Enter the URL of your Facebook page that you copied in Step 1 into the Facebook Page URL field and select any other desired settings.
- TIP: Leaving the height and width blank will produce a widget that will automatically adjust its size from 180px up to 500px which will fit nicely in a “sidebar area of most websites.
- After you have made your selections scroll down and click the blue Get code button.
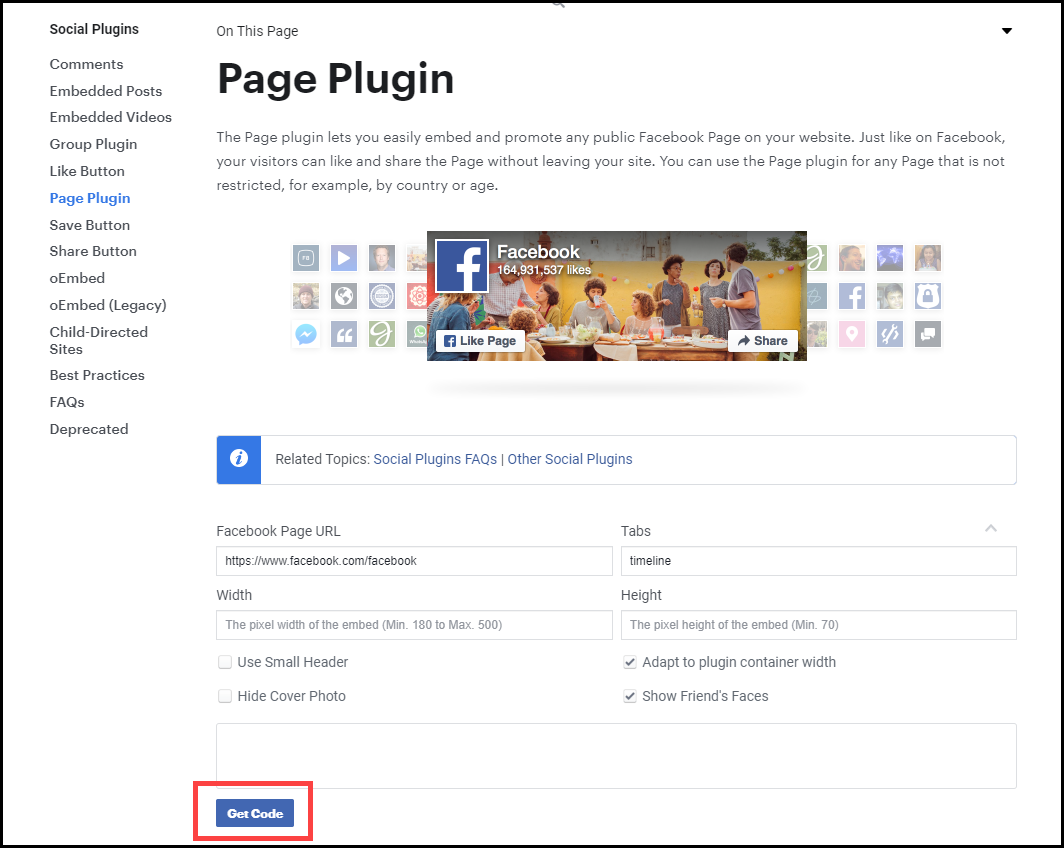
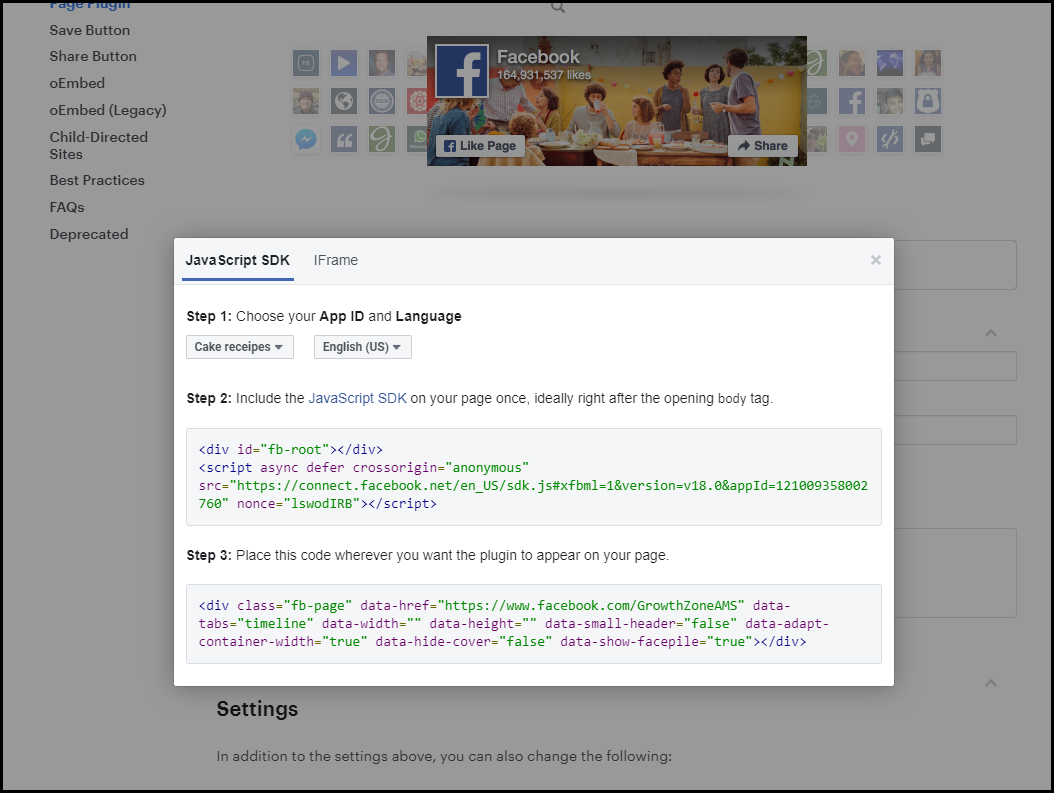
- This will open a popup window with the code in it – don’t do anything with it yet, just leave it open.
- Open a new tab or window in your browser and log in to your SmartCMS website.
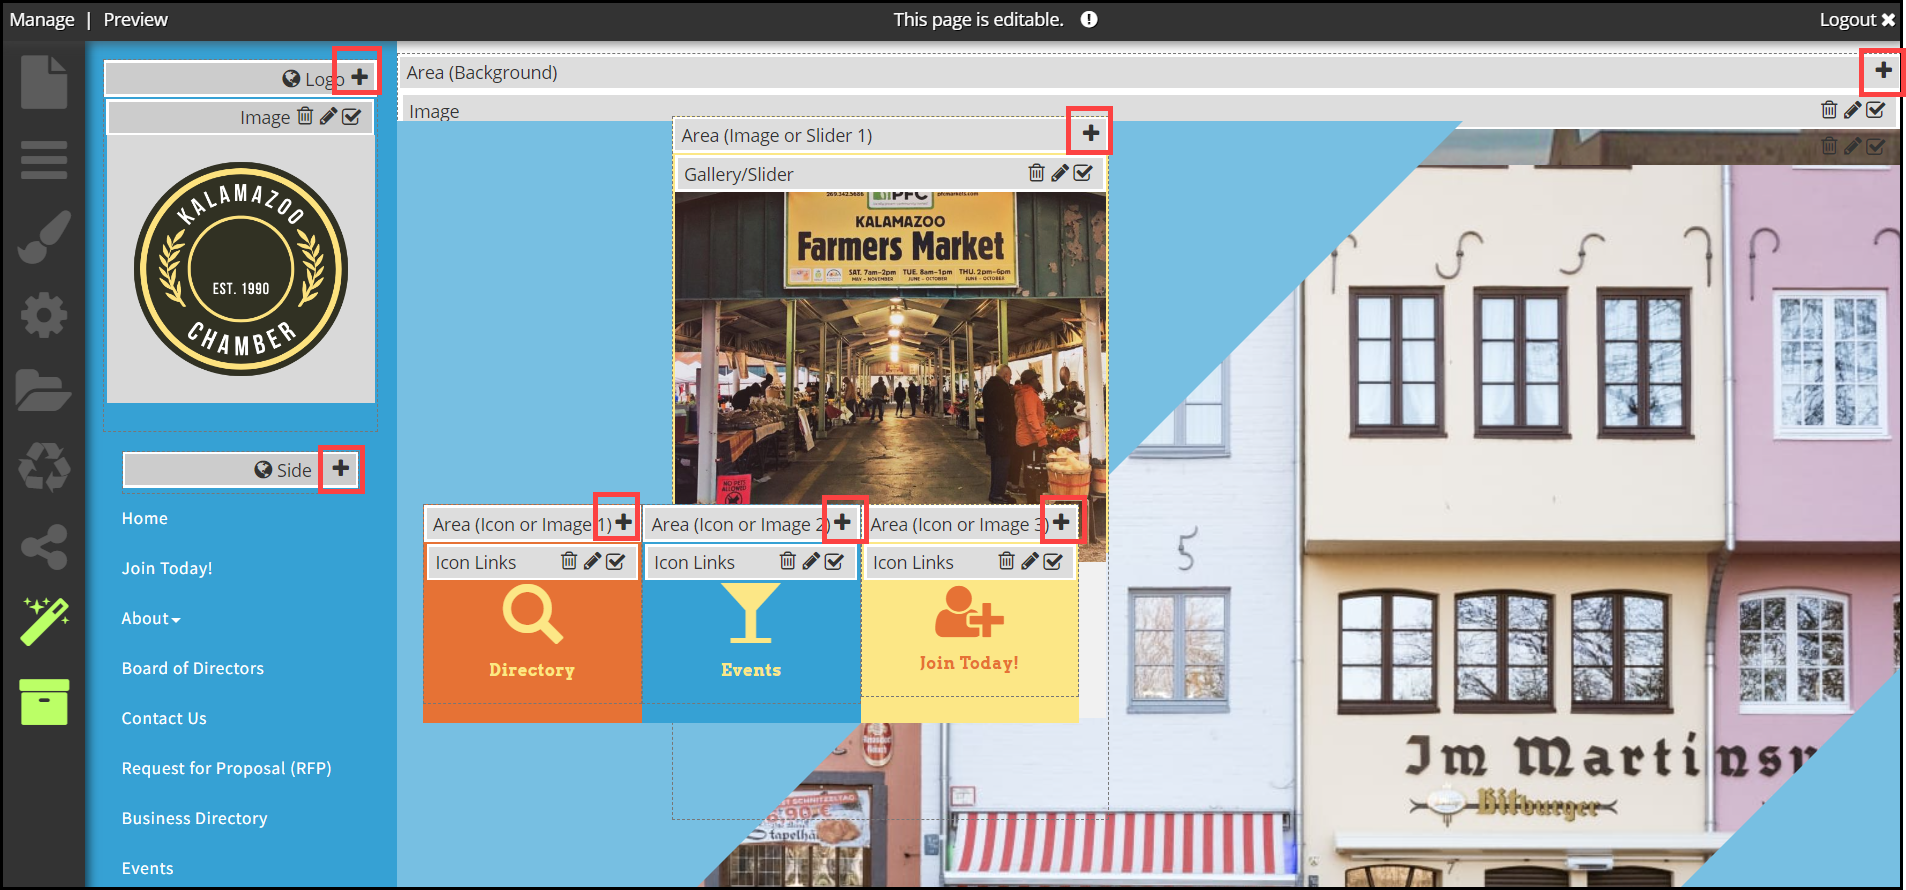
- Locate the area of the website where you would like the Facebook Page plugin to appear and click the Add button in the far right of the content area heading bar.
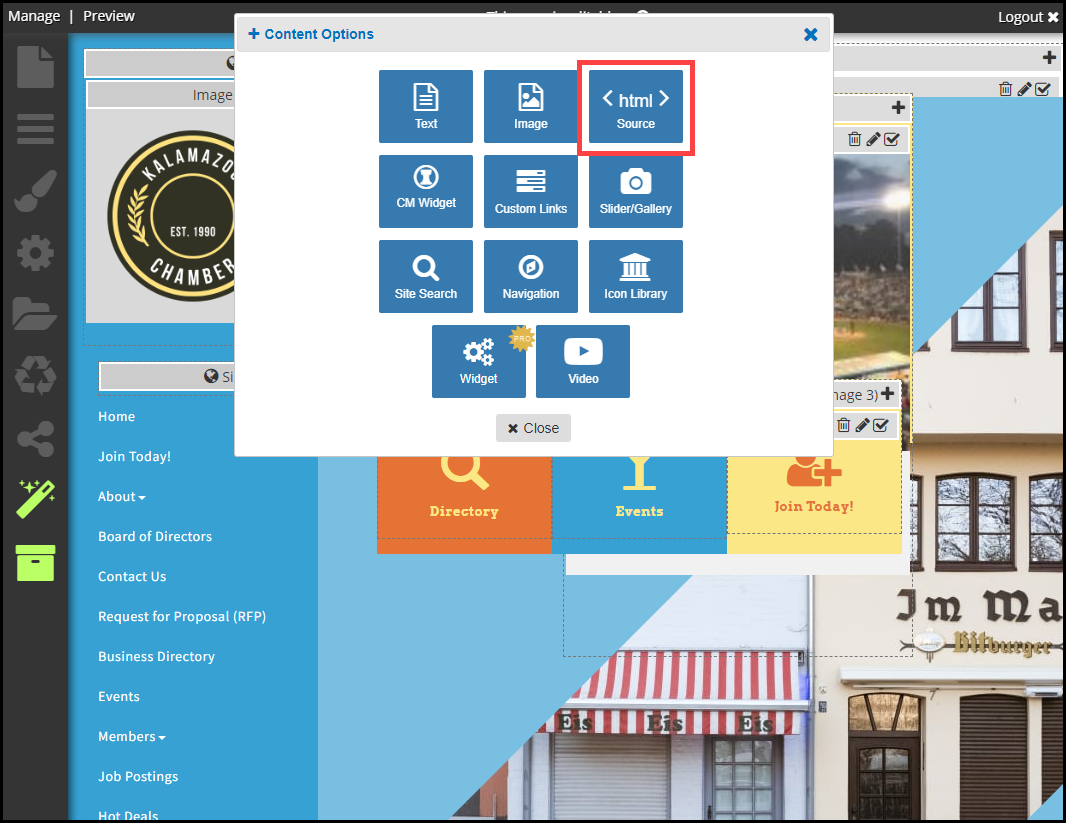
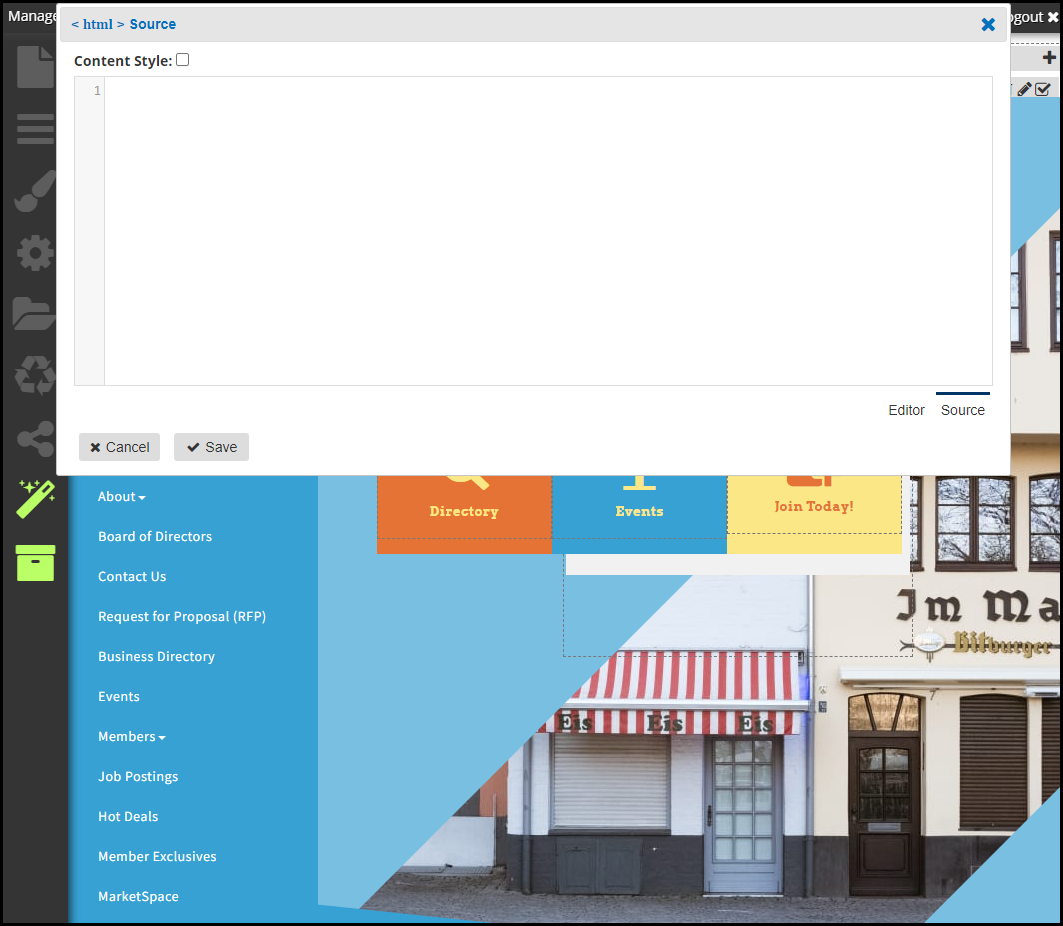
- Select the < html > source option and remove the placeholder paragraph in the window that pops up.
- Leaving that window open, go back to the tab or window you have open with the Facebook widget code and copy section 1.
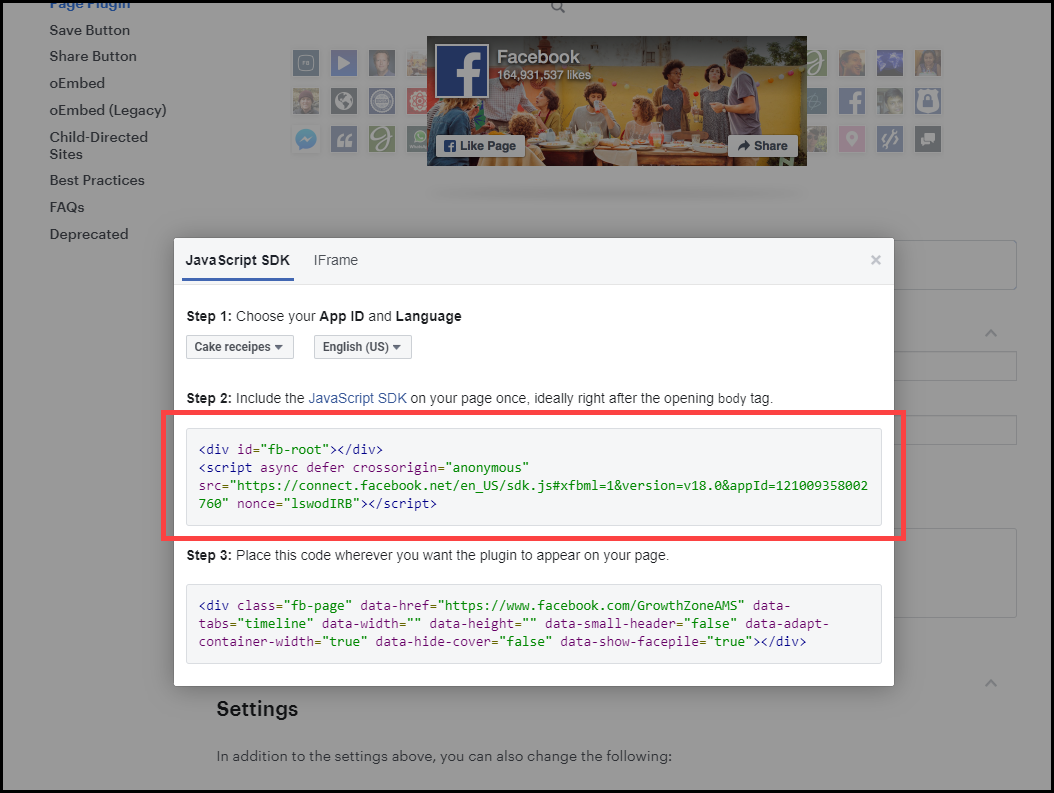
- Paste the code from section 1 at the top of the new < html > source item you opened on your SmartCMS site.
- Go back to the Facebook code and copy section 2.
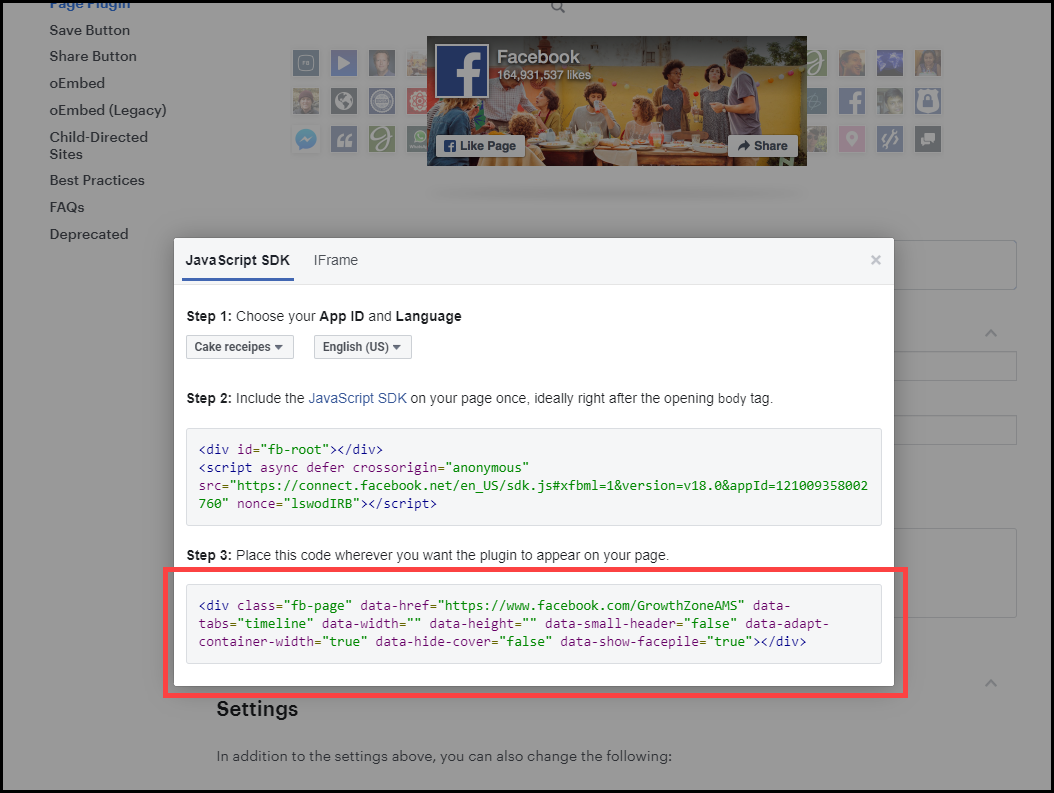
- Paste the code from section 2 below the code you pasted in previously and click Save.
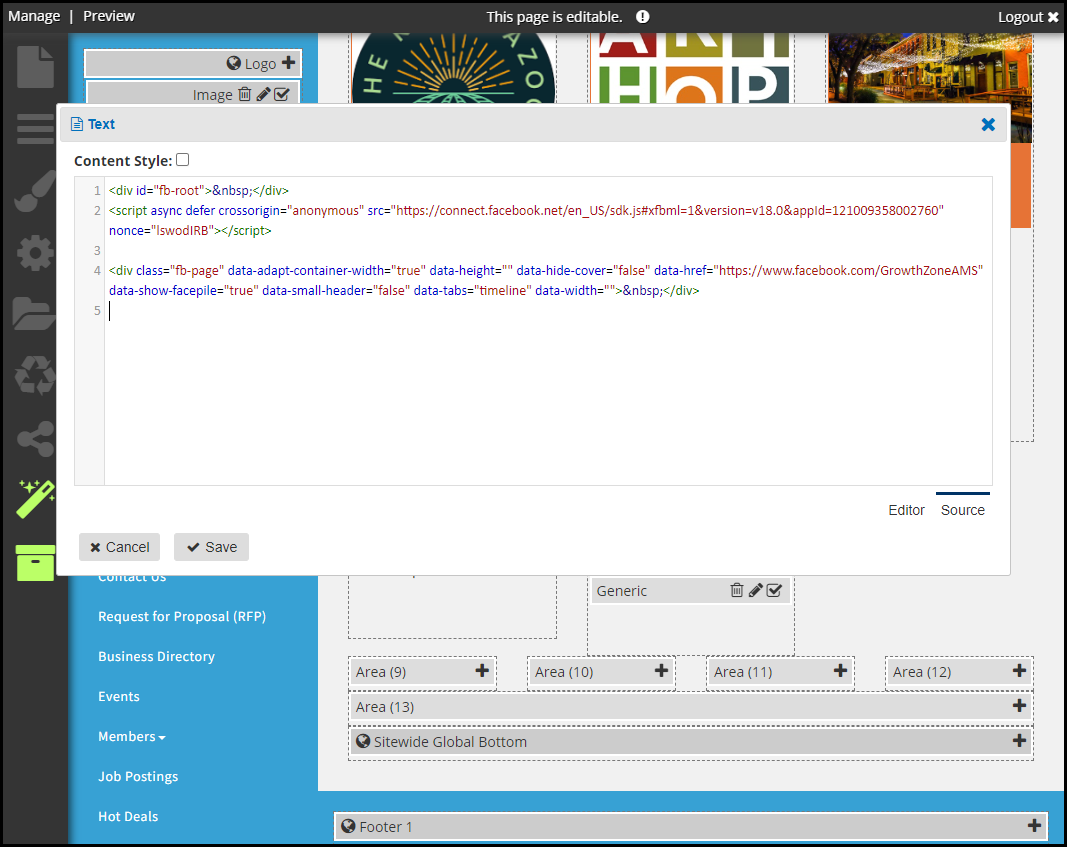
- Check to be sure that the Facebook Widget is working as expected and sit back and watch the likes roll in…


