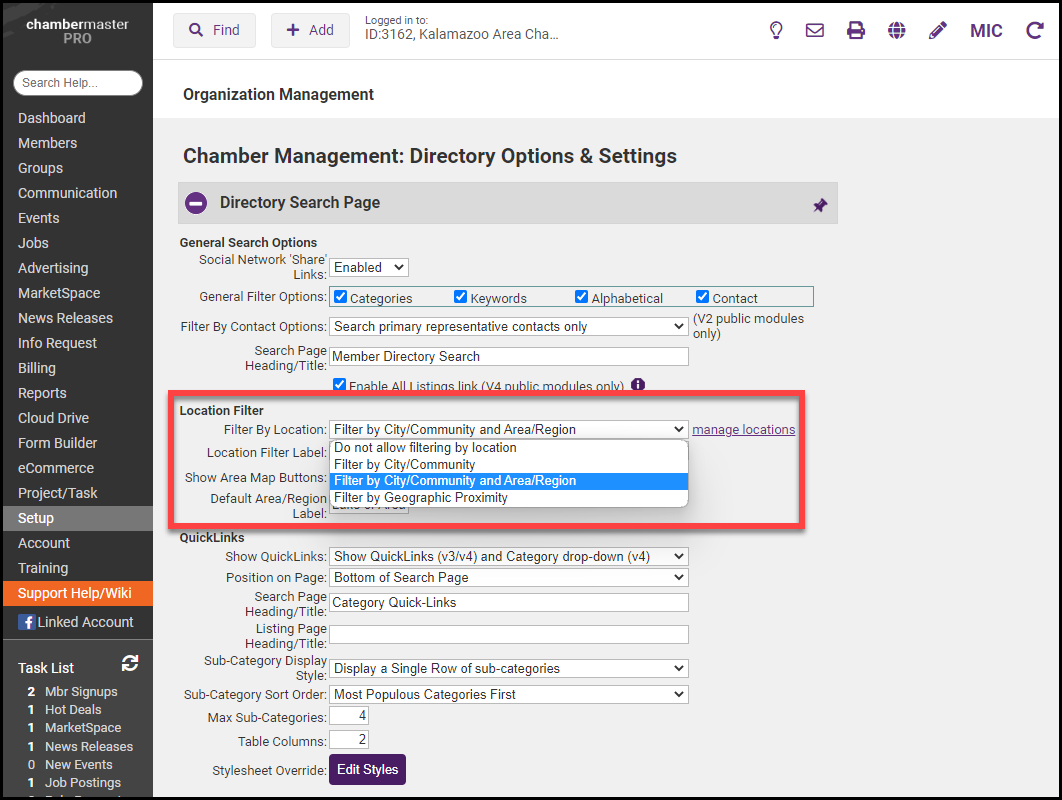
Locations can be assigned to a member to further designate the community/area where the member is located. Using this location field within reports or when sorting, staff may distinguish the membership by location. This field may also be used to narrow the search for consumers as they search for members in the online directory. Click here for a demonstration.
Add a Location
- Click Setup in the left-hand menu.
- Select Define Locations in the Member Options section.
- Check the box Enable Location Assignment.
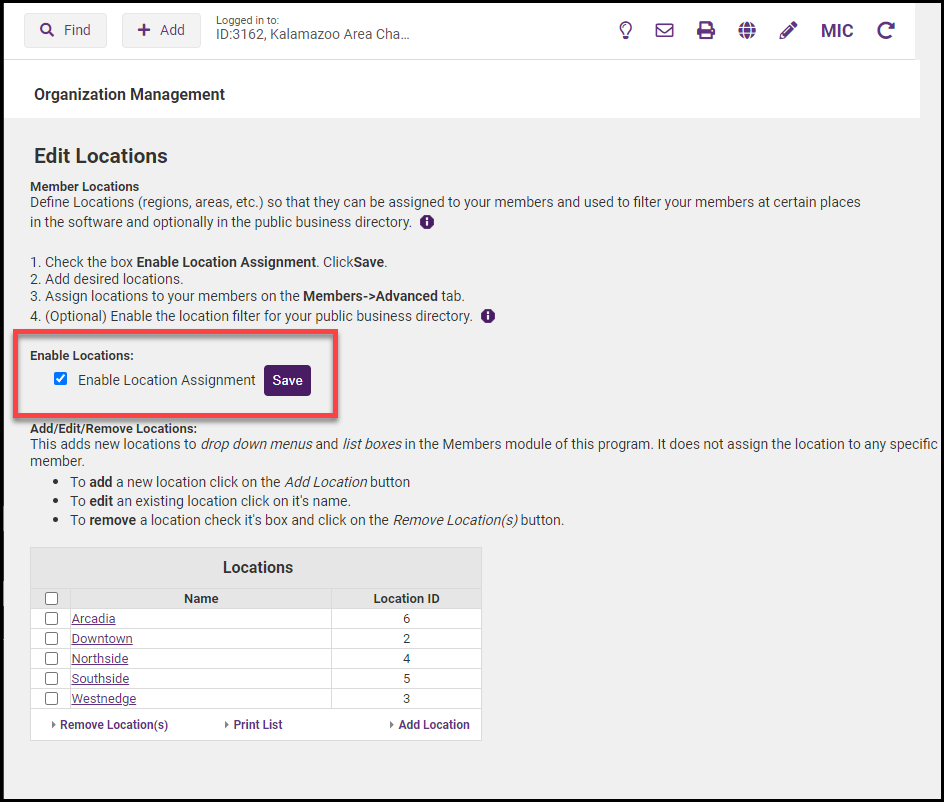
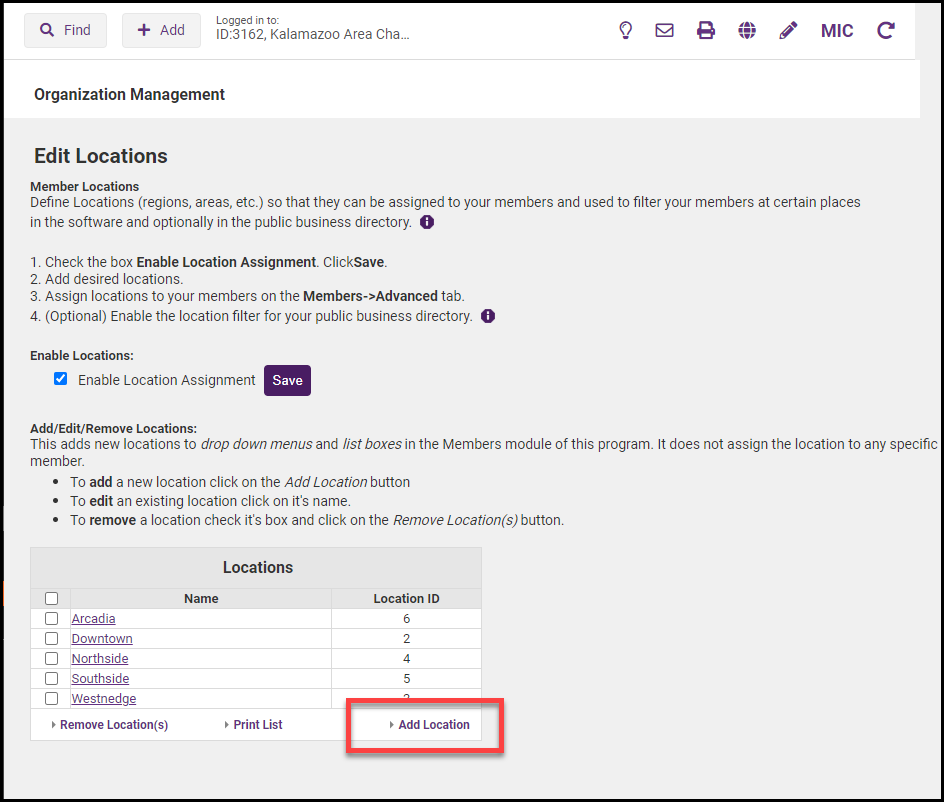
- Select Add Location and enter the names of the locations, regions, or defined areas.
- Locations can then be assigned to members in their member records.
Assign a Location
- On the Advanced tab, click Assign Location in the Locations area.
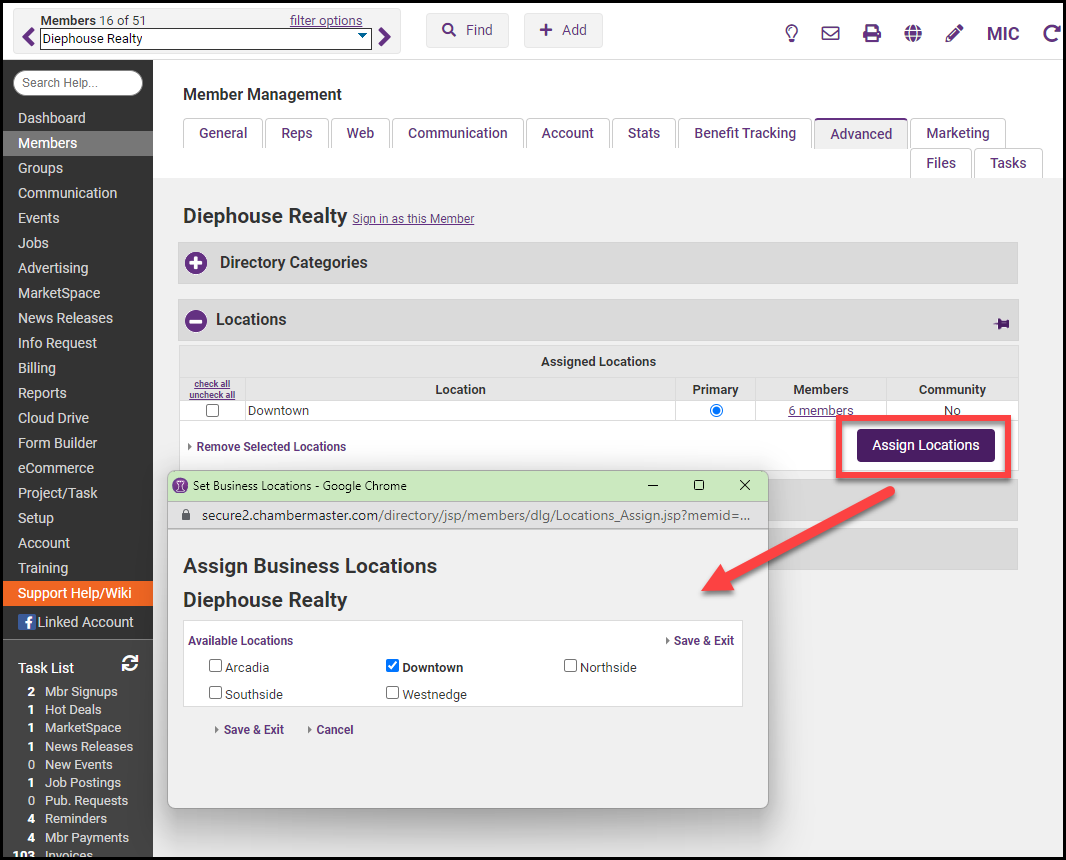
- Click the check box(es) in front of the desired location(s).
- Click Save & Exit.
Note: Administrators may create new location selections by selecting Define Locations from the Setup menu.
Remove a Location
Note: If you remove a category on a member's Advanced tab, the member is removed from that category. The category itself is not removed.
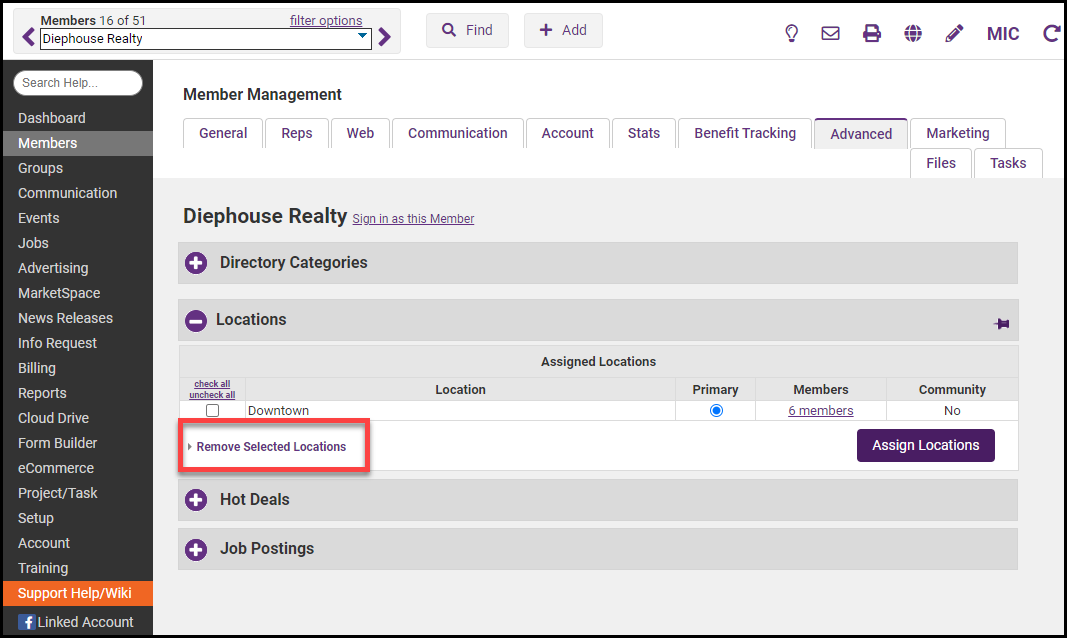
- On the Advanced tab, click to select the check box in front of the location that you wish to remove in the Locations area.
- Click Remove Selected Locations.
Change Primary Location
- On the member's Advanced tab, click Primary next to the desired location in the Locations area.
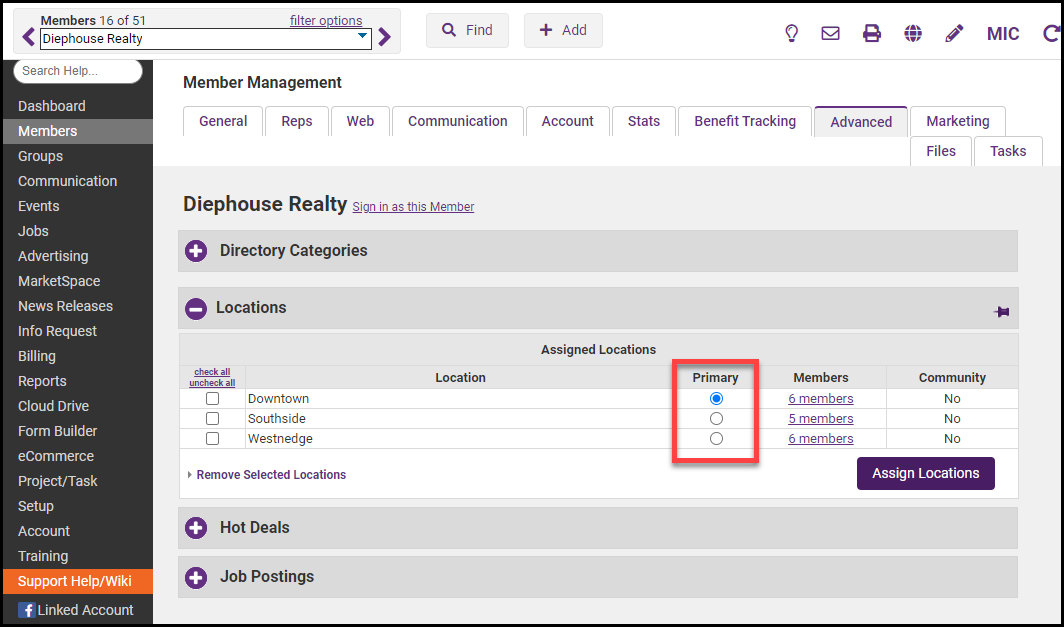
- A member can only have one assigned Primary location.
- If the Locations section is unavailable in your software, contact Customer Support for information on making this available.
Filter by Location
Turn on the ability to filter by location on your public Business Directory.
- Click Setup on the left-hand menu.
- Select Directory Control Panel under Association Options.
- Under Location Filter, select how you would like to filter by location in your Business Directory.
