Membership Application Custom Fields

Add a Custom Field
-
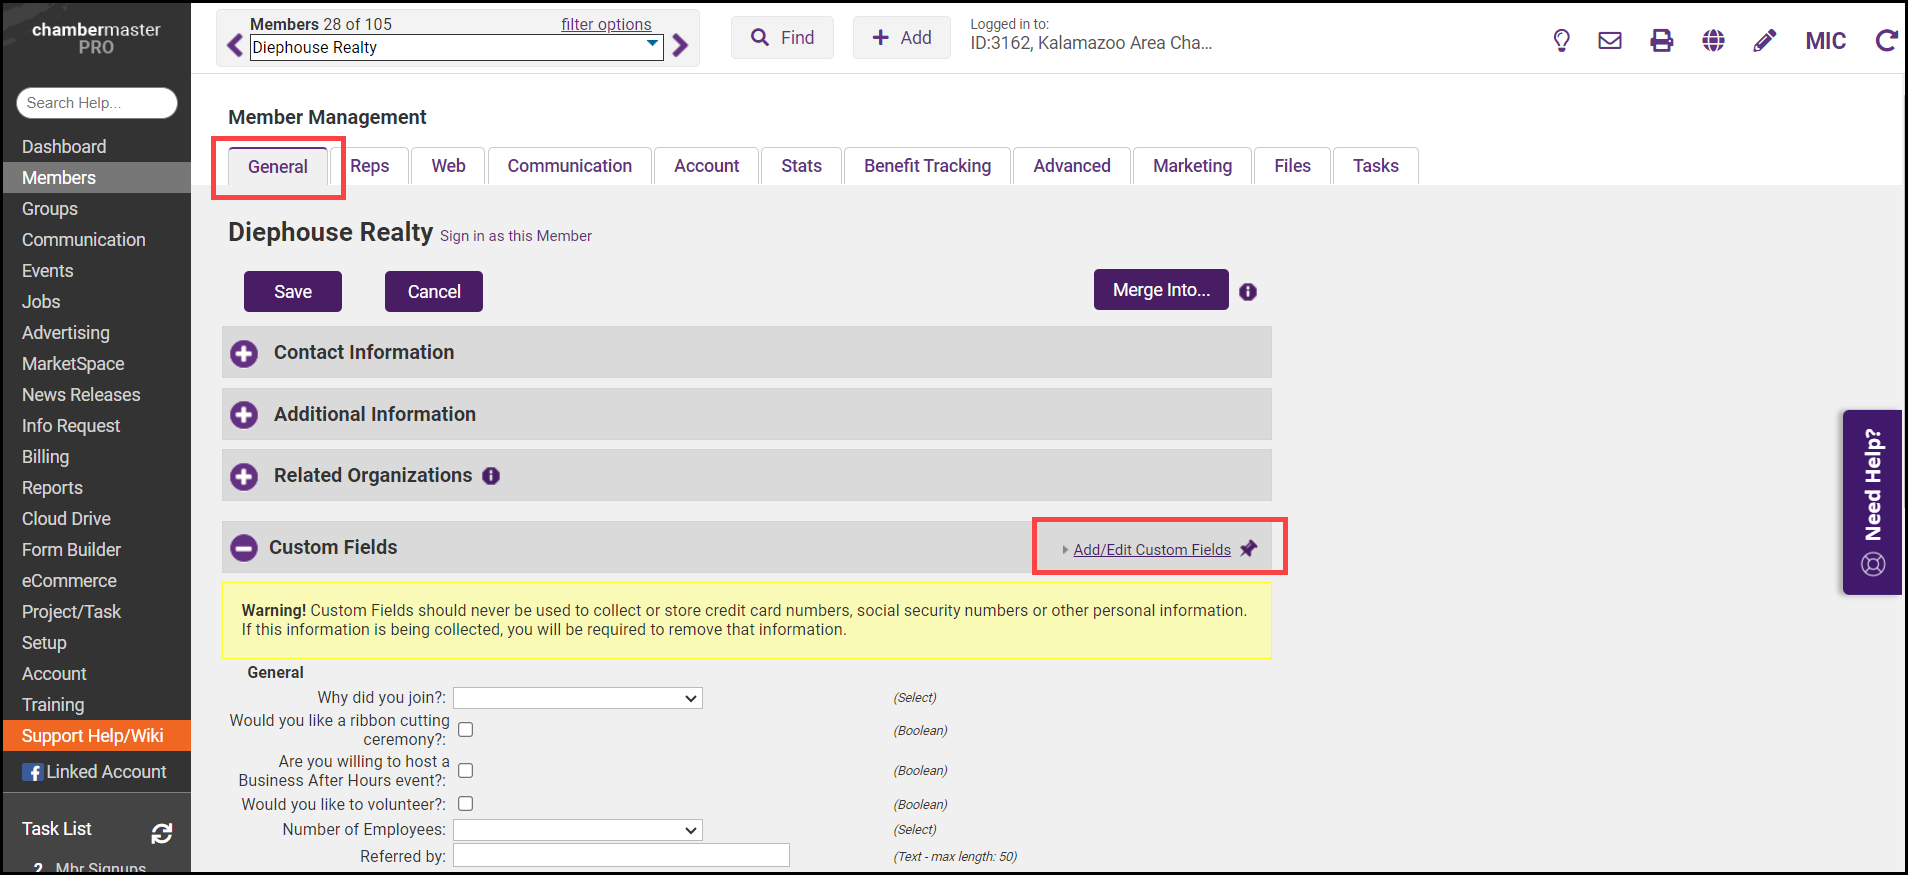
On any member's General tab click Add/Edit Custom Fields in the Custom Fields area.
-
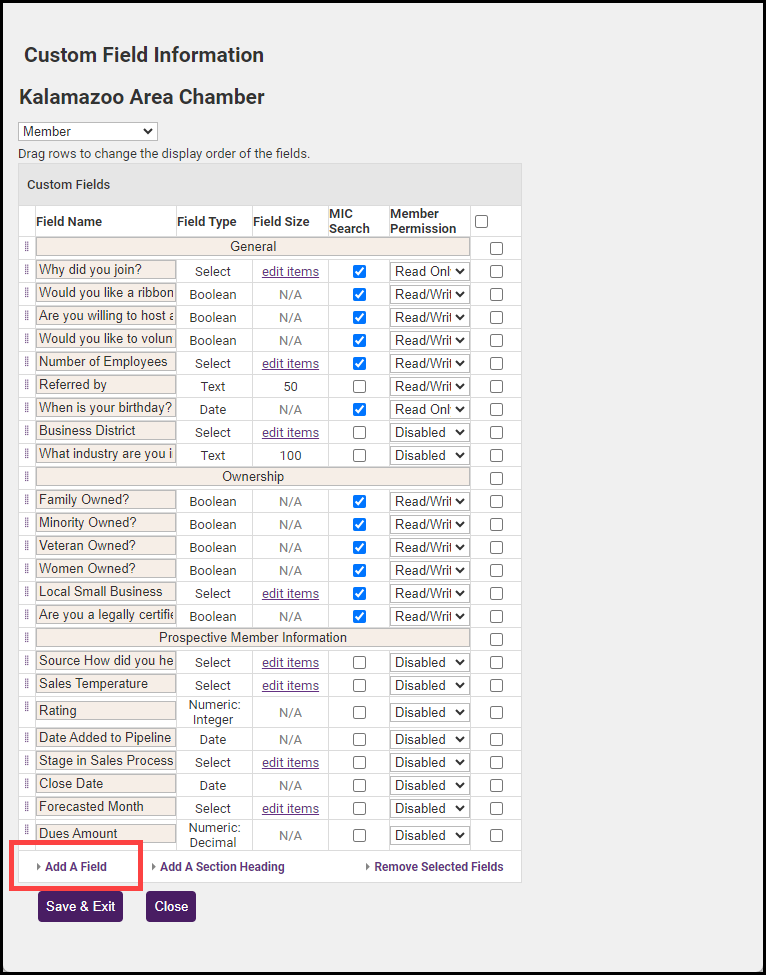
Click Add a Field.
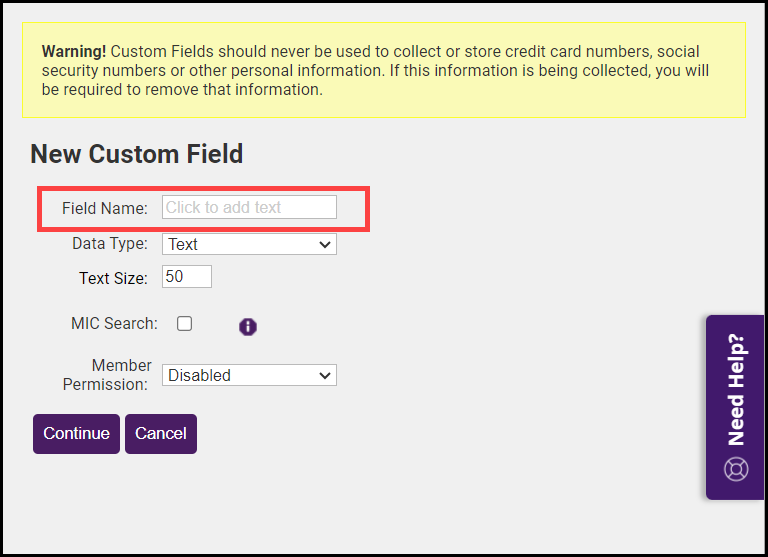
- In the New Custom Field window, enter the desired Field Name (Maximum characters: 128).
-
Select how you want to collect the data using the Data Type dropdown menu.
- If the selected data type is Text, enter the desired Text Size.
- If the selected data type is Drop Down List, enter the desired list of items.
- Click Continue.
- Click Save & Exit. If you have many custom fields, you can create section headers to organize them.
Add a Custom Field to the Membership Application
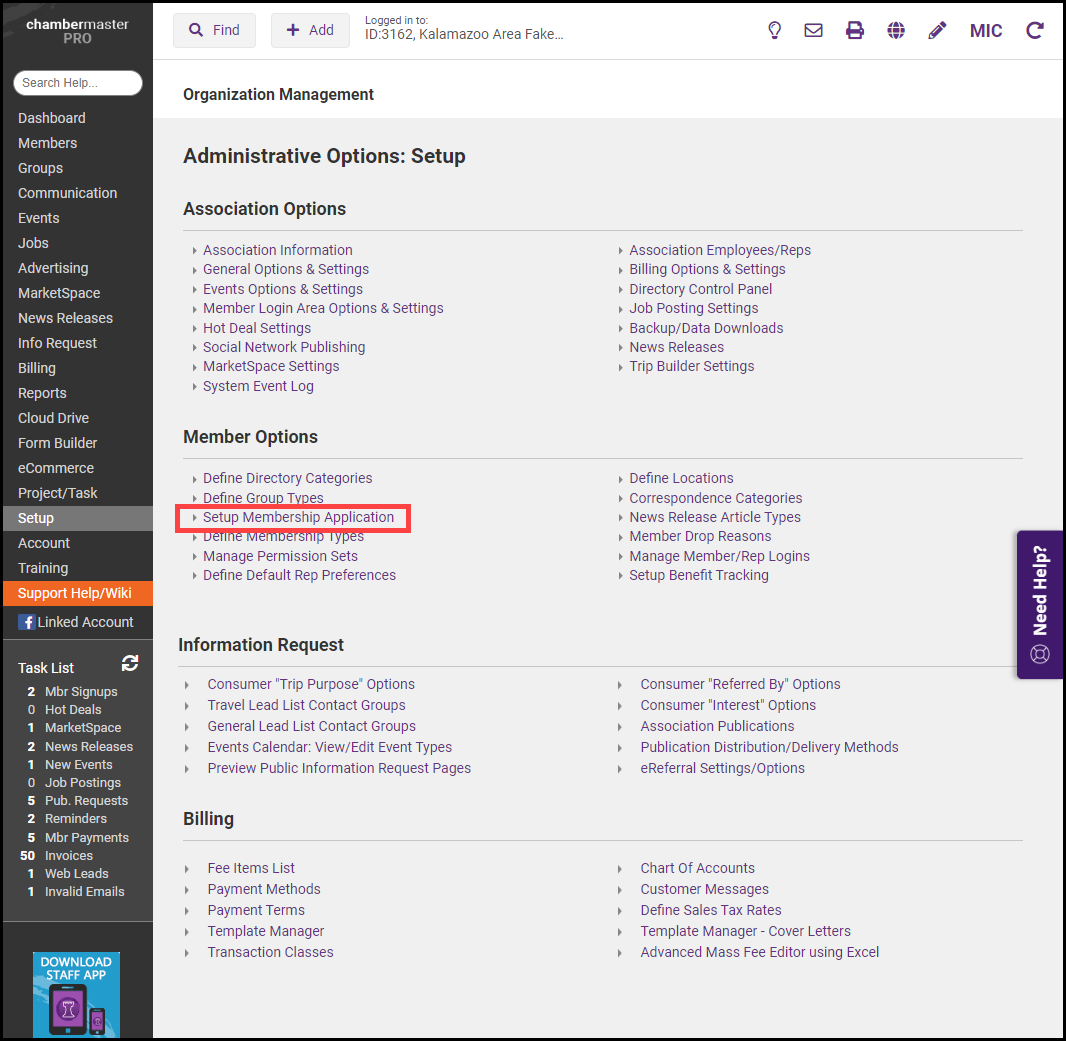
- Once the Custom Field has been created using the steps above, select the Setup module on the left-hand menu.
- In the Member Options section, click Setup Membership Application.
- Select the Custom Fields tab. The Member Custom Fields that you have created will be displayed.
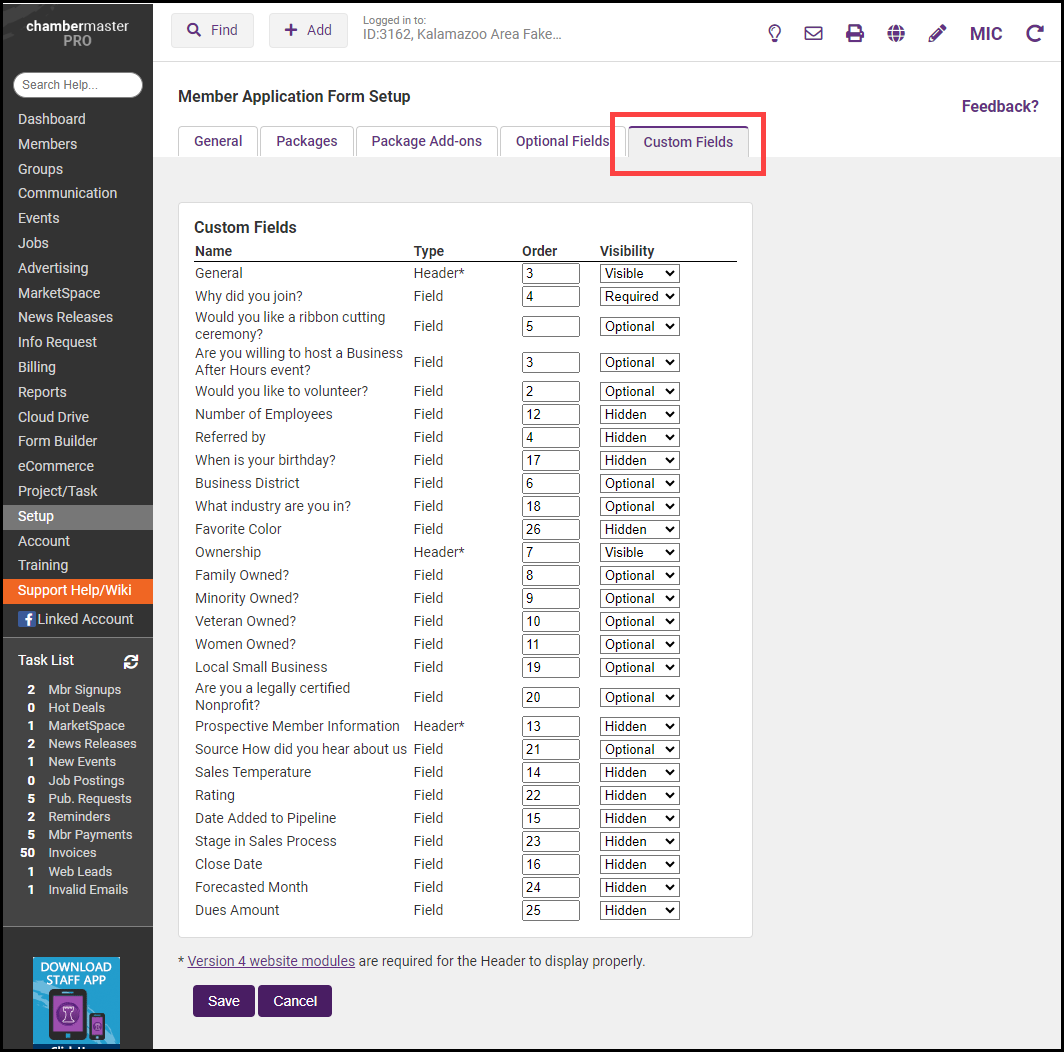
-
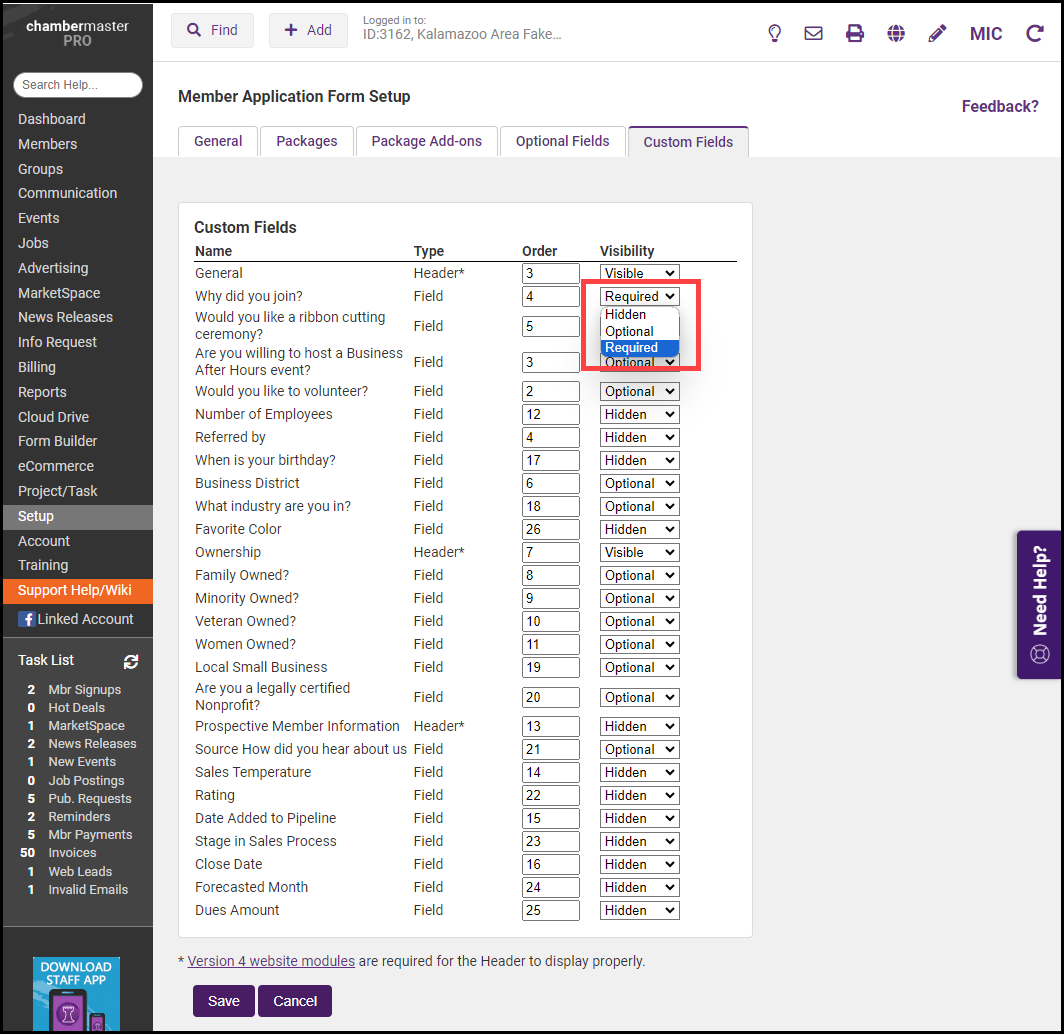
Use the dropdown menu for each custom field to select if it should be Required, Optional, or Hidden.
-
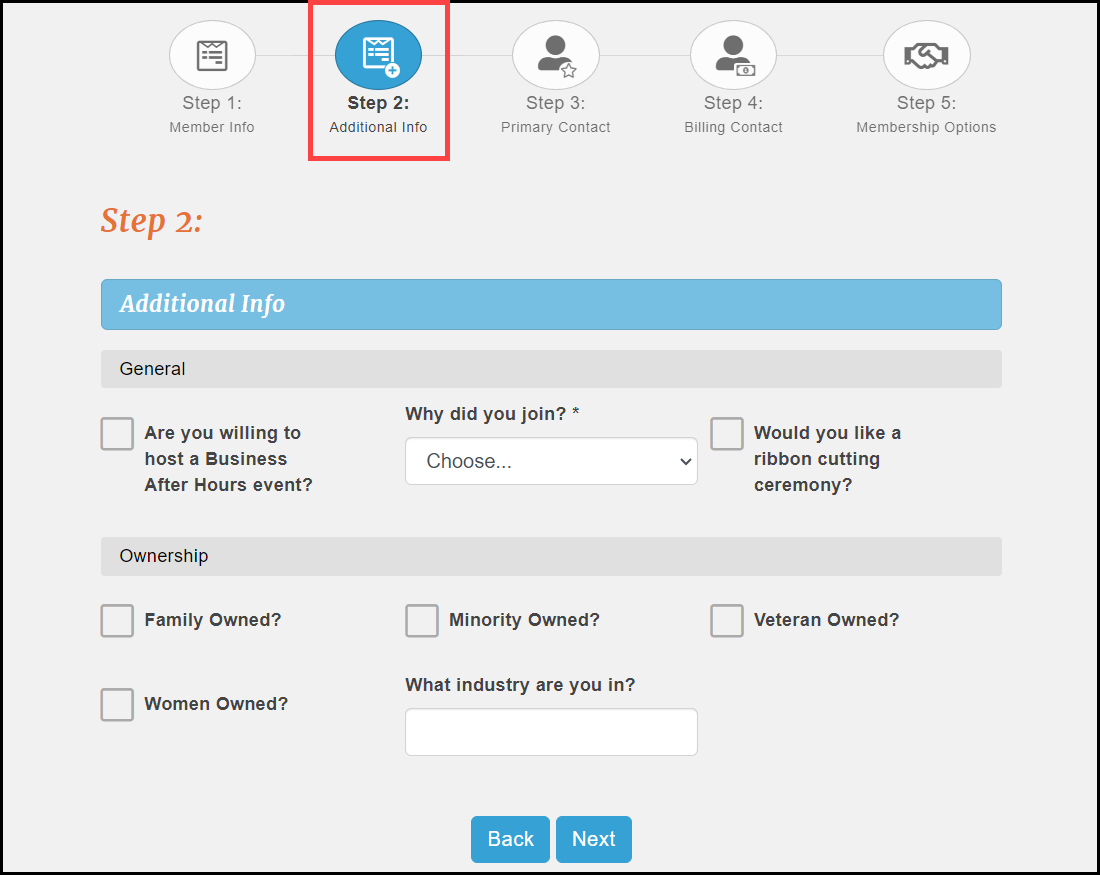
Click Save. Your custom field can be found in Step 2: Additional Info of the Online Membership Application.