-
Click on Reports in the left-hand navigation panel.
-
Enter Custom in the Report Finder text box.
-
Click Search.
-
Click the green arrow icon adjacent to Custom Representative Report.
-
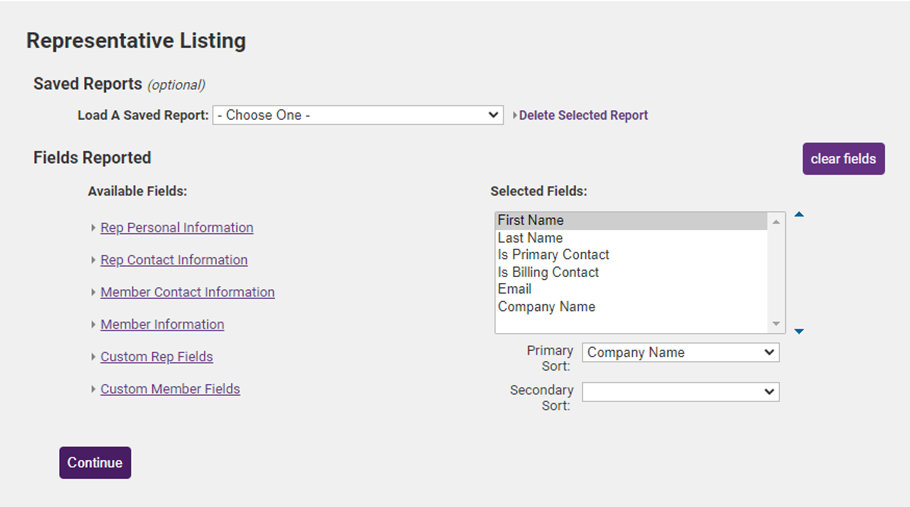
Click the link for the Rep Personal Information fields and check the following fields:
-
First Name
-
Last Name
-
Is Primary Contact
-
Is Billing Contact
-
-
Click the link for the Rep Contact Information fields and check the Email field.
-
Click the link for the Member Contact Information fields and check the Company Name field.

- (Optional) Select a Primary Sort from the drop-down list. This allows you to configure how the output of the report will display.
- For Example: If you wish to sort report output by the last name. If no selection is made the report will be sorted by the first item in the Selected Fields.
-
(Optional) Select a Secondary Sort option from the drop-down list. Use this option if you have selected a Primary Sort and then wish to sort by a secondary option.
-
Click Continue.
-
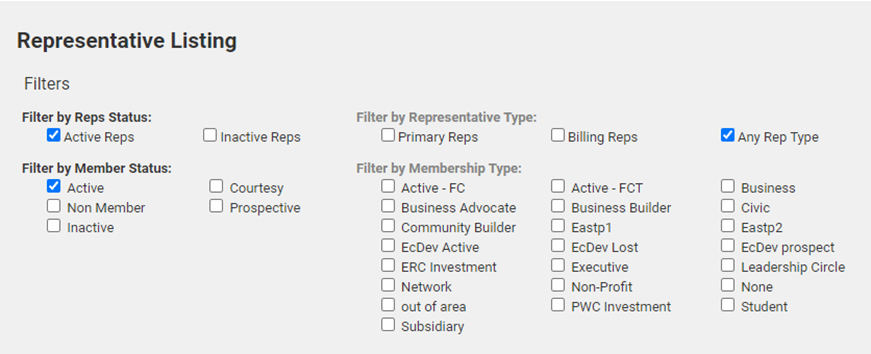
Select any additional filters that you would like to (Optional):
- Filter by Reps Status: Select the desired status(es) of the reps to include in your report.
- Filter by Representative Type: Select the desired representative type(s). For Example: If you wish to only include billing reps in your report, click the Billing Reps check box.
- Filter by Member Status: Select the desired member status(es). For Example: If you wish to only include prospects in your report, click the Prospects check box.
- Filter by Membership Type: Select the desired membership type(s) to limit the report output to just those types.
- Filter by Group: Select a group, if you wish to filter the results to just a specific group.
- Filter by Sales Rep: Select a sales rep, if you wish to filter the results to a specific sales rep.
- Filter using Additional Criteria: This option allows you to filter based on additional criteria. For Example: if you wish to view all reps that do not have an email address, set your filters as shown below.

-
Select a desired report format:
-
Table Style: Select this option to display each field in the report in a separate column, as shown below.
-
Directory Style: Select this option to display each field in the report on a new line. Click Show field names for all data reported if you wish to include the names of the fields in your report.
-
-
Click View/Print Report.


