You are using an unsupported browser. Please update your browser to the latest version on or before July 31, 2020.
close
Autopay for Your Members
print icon

Click here to download a PDF of these directions to share with your members.

Storing Credit Cards in the MIC


Click here to see how to store a payment profile in the Member Information Center (MIC)

  1. In the MIC, click Account Settings in the upper right corner.
  2. Click Billing.
  1. In the left-hand navigation panel, click Payment Profiles.

  2. Click Add a New Payment Profile

  1. The Credit Card radio button is enabled by default. Enter all required credit card information.
  2. Click Add Profile

Storing Bank Account in the MIC


Click here to see how to store and verify a bank account in the MIC to use later.

  1. In the MIC, click Account Settings in the upper right.
  2. Click Billing.
  1. In the left-hand navigation panel, click Payment Profiles.
  2. Click Add a New Payment Profile.
  1. Click the Bank Account radio button.
  1. Complete the form with all the required fields.
  2. Click the Add Profile button. The new bank account will be listed as Un-verified on the payment profiles screen.

Complete Bank Account Verification

To verify your bank account, look for two small deposits in the account. Once these deposits have been made, return to the MIC to complete the verification of the account.

  1. In the MIC, click Account Settings in the upper right.
  2. Click Billing.
  1. In the left-hand navigation panel, click Payment Profiles. Click the un-verified bank account, to expand the details.
  1. Enter the dollar value of the two deposits in the *Deposit Amount text boxes.
  1. Click Update Profile. The bank account will now be available for use. 


Select Payment Profile for Autopay


Click here for a short video on setting yourself up for Autopay within the MIC.

  1. In the MIC, select Company on the left-hand side.
  2. Select Billing and then select Autopay & Billing.
 
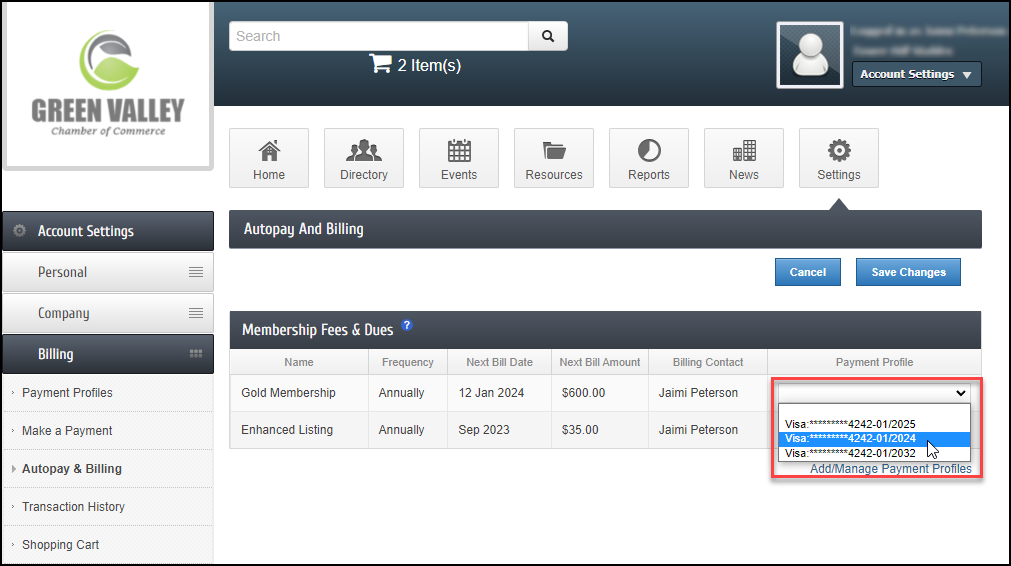
  1. Information about your active Membership Fees & Dues will be displayed:
    • Name
    • Frequency
    • Next Bill Date: This date is a reminder of when the next invoice to be initiated.
      • If an item is assigned a Payment Profile, this will show the date of the month in which the invoice and payment will be initiated. 

      • If an item is not assigned a Payment Profile, this is only a reminder of the month this fee should be billed, not a specified date.

    • Next Bill Amount

    • Billing Contact

    • Payment Profile: Will display the type and last 4 digits of the card/account number, and the expiration date if it is a card.

  2. Select Add/Manage Payment Profiles to add a Payment Profile to be used for Autopay. Selecting Manage Autopay will also open the Payment Profiles.
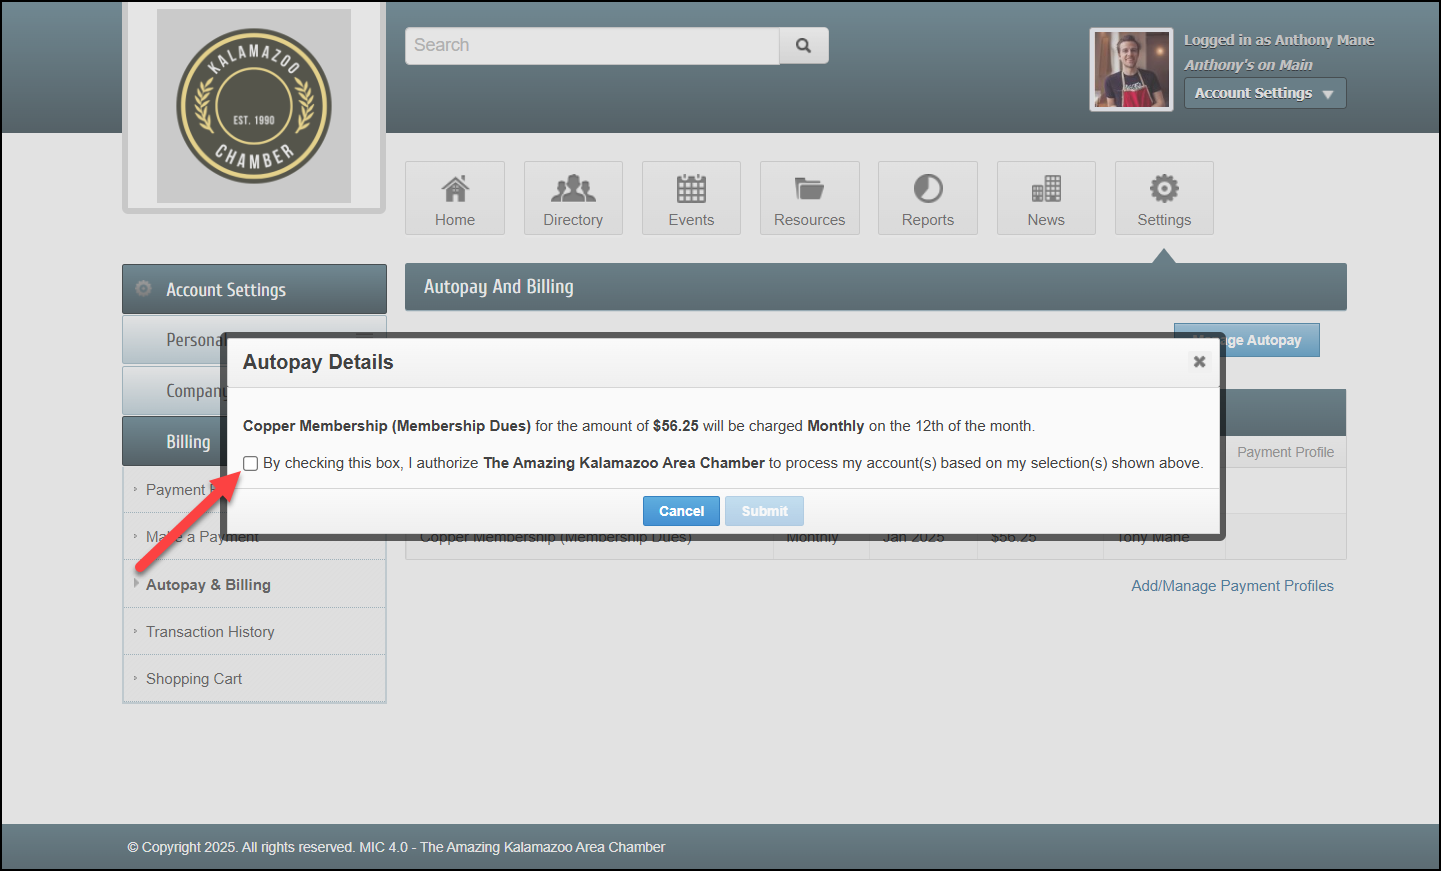
 
  1. Once a Payment Profile has been added, select Save Changes.

Manage Autopay in MIC


Within the MIC, you have the ability to see your stored Payment Profiles and change those Payment Profiles if necessary, including deleting a payment profile.

  1. In the MIC, click Account Settings in the upper right.
  2. Click Billing.
  1. In the left-hand navigation panel, click Payment Profiles.   
  1. To delete a Payment Profile, click the trashcan icon
  1. You will receive a popup message indicating this Payment Profile is configured for Autopay and will need to confirm you wish to delete this Payment Profile by selecting Continue.


Feedback
1 out of 1 found this helpful

scroll to top icon