
Using Info Request assists in gathering pertinent information from consumers that may also be passed on to designated members if set up properly. Lead List groups must be created and designated to receive the leads from both the General Interest check boxes and from the Travel Dates area on the Info Request form.
Setup Lead List Groups
Check boxes selected in the General Interest area and information entered within the Travel Dates area are set to generate a consumer lead, informing targeted members of the consumer’s information. These targeted members are specified by creating appropriate groups within the Groups module and associating them with the desired interest(s) or designating them as travel contact. When viewing consumer information on the Lead Management screen, selections exist to pass the lead onto these designated contact groups.
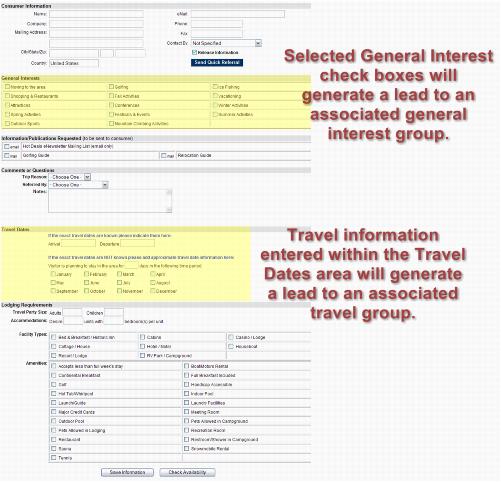
For example, selecting the General Interest check box Moving to the area could generate a lead to the associated Relocation group, and checking a travel month of June will generate a lead to the associated travel contract group(s). Travel leads may also be passed on immediately upon saving the information if an Instant Travel Lead group is specified in the Travel Lead List Contact Groups screen.
Create a General Interest or Travel Lead Group
- Click Groups in the left-hand navigation bar.
- Click Create a Group.
- Complete the Add a New Group screen.
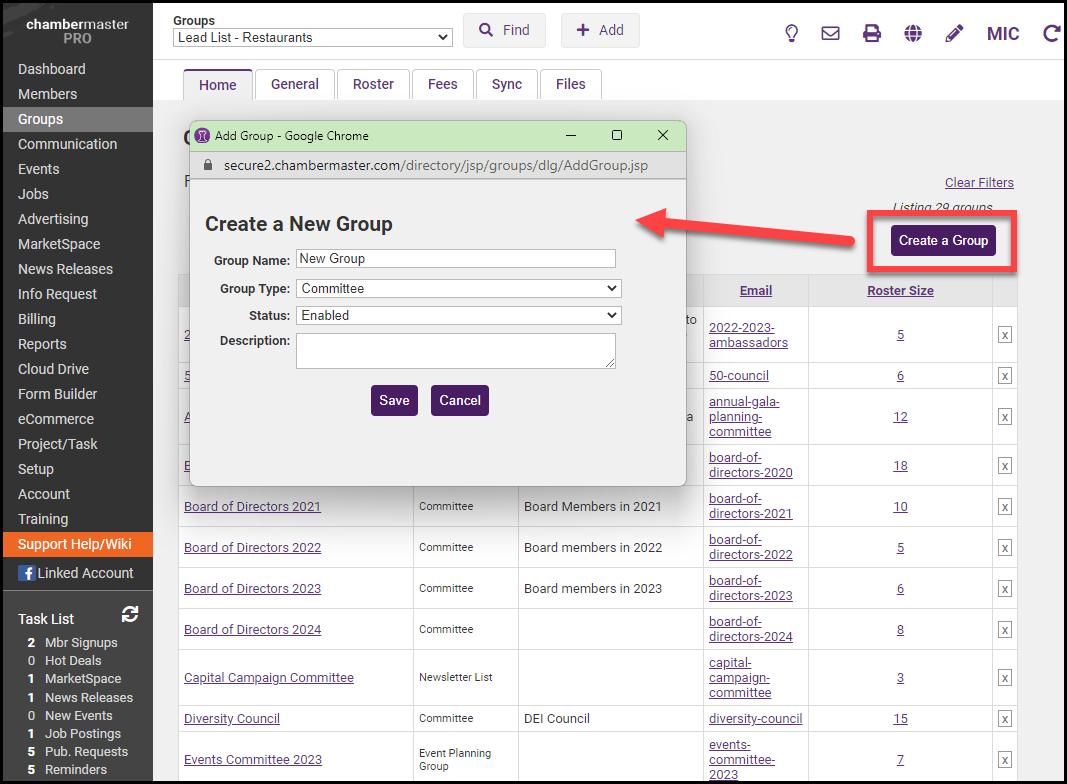
- Click Save Group. Group Type indicates a group category that may be used when sorting and locating your groups. ChamberMaster may have defined a group type of Lead List Mailing Groups that can be used for this purpose. However, you may wish to create your own group type that is assigned to all your lead list groups. Click here for more information on creating group types.
- If desired, click Group Membership Roster to proceed to the screen to add group members and follow the steps in the next section.
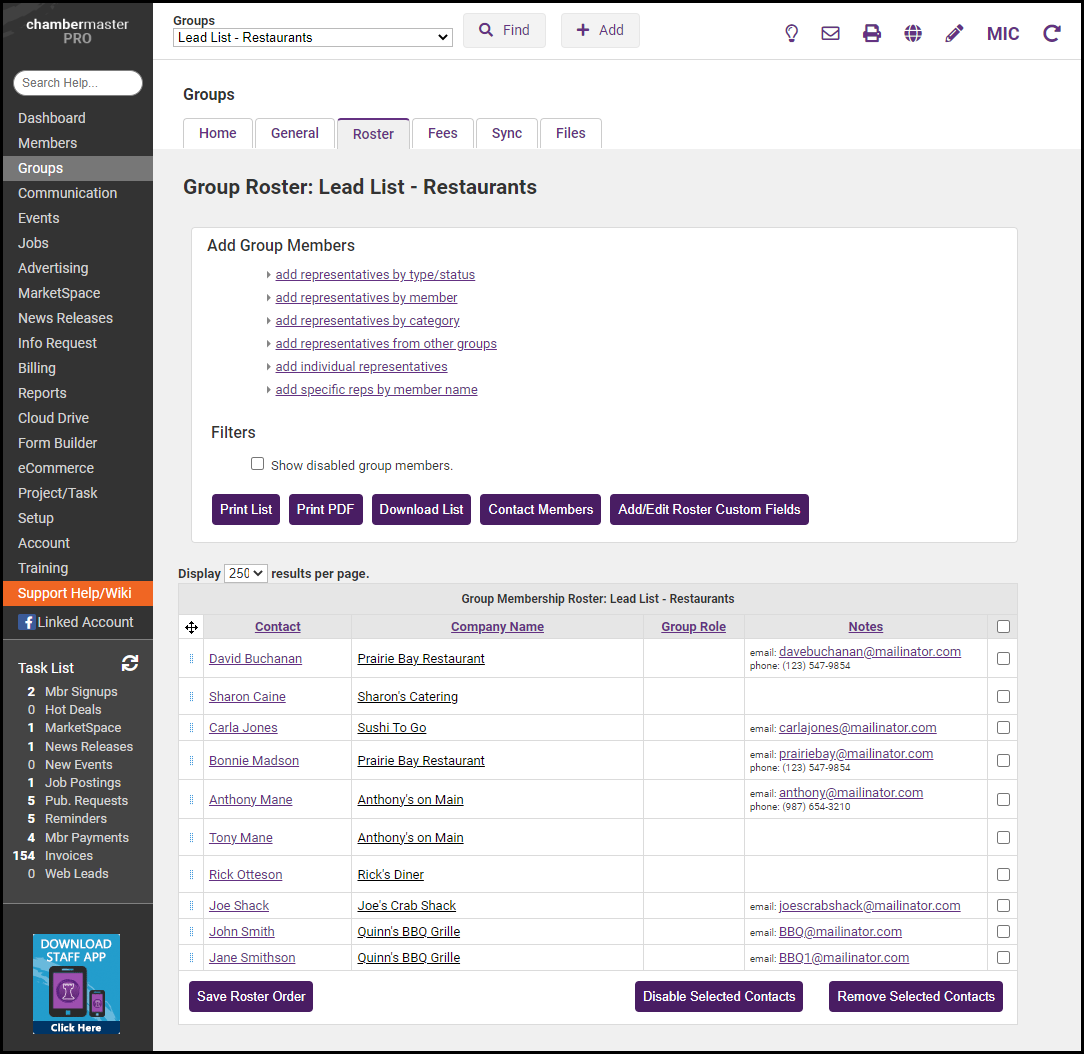
Add Members to a Lead List Group
If you were already in the process of creating your group, you may be able to start at step #3.
-
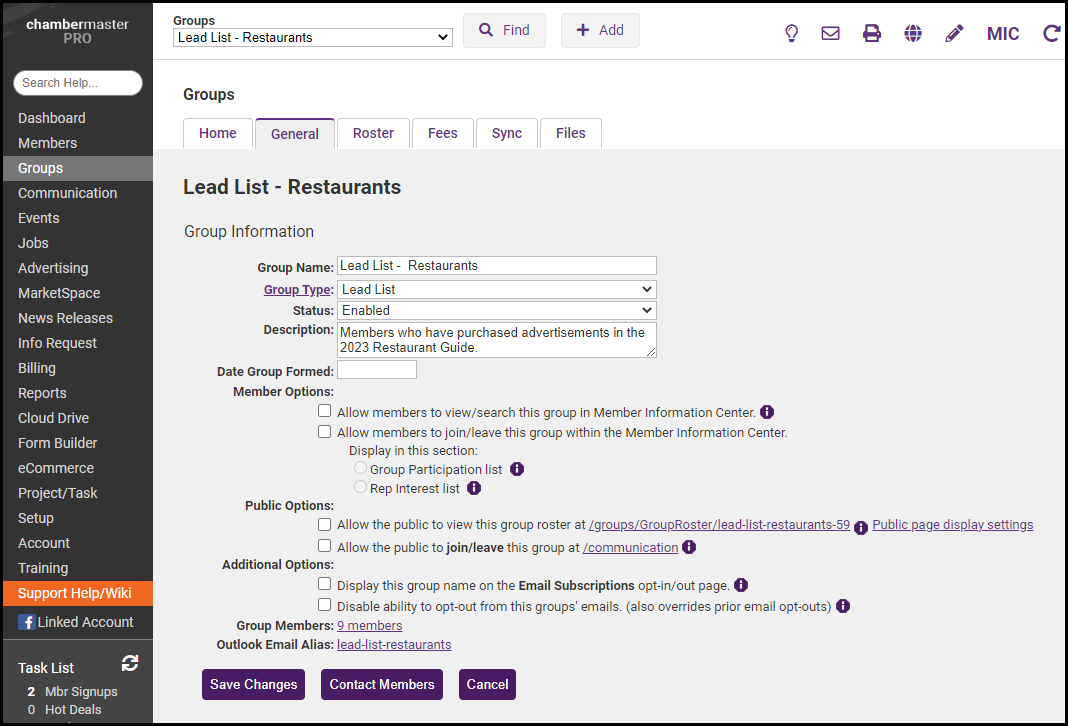
Click Groups in the left-hand navigation bar.
- Click the Group Name title of the desired group.

- Click the Roster tab.
- Click the desired selection in the Add Group Members area and follow the instructions on the screen to add your group members.
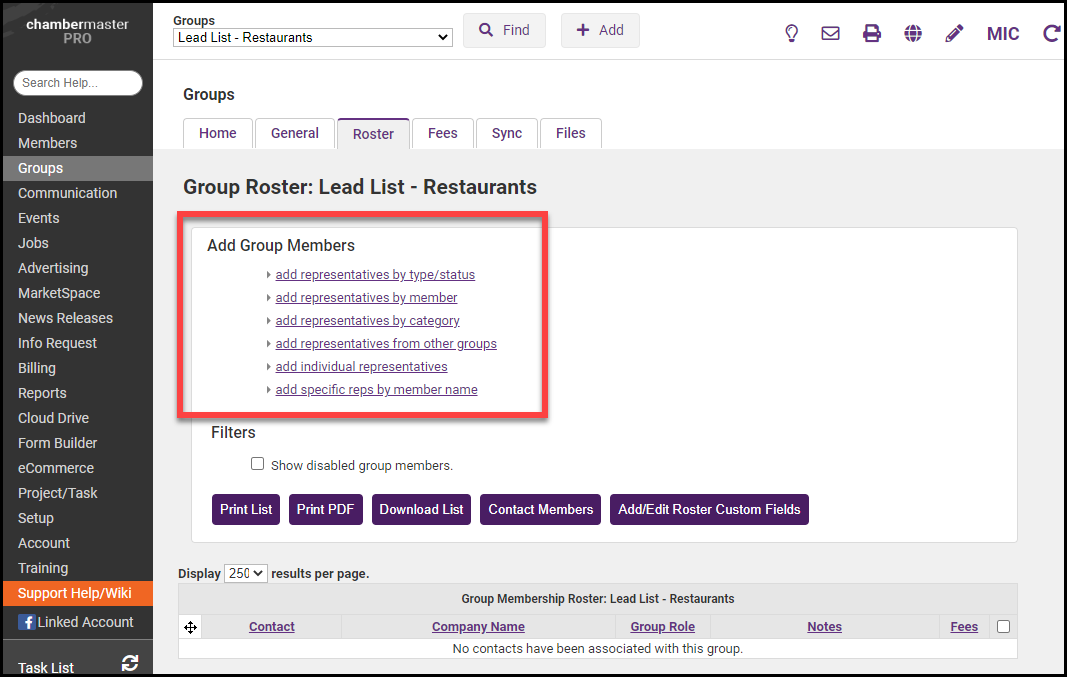
- Continue to add group members using this method until your roster is complete.
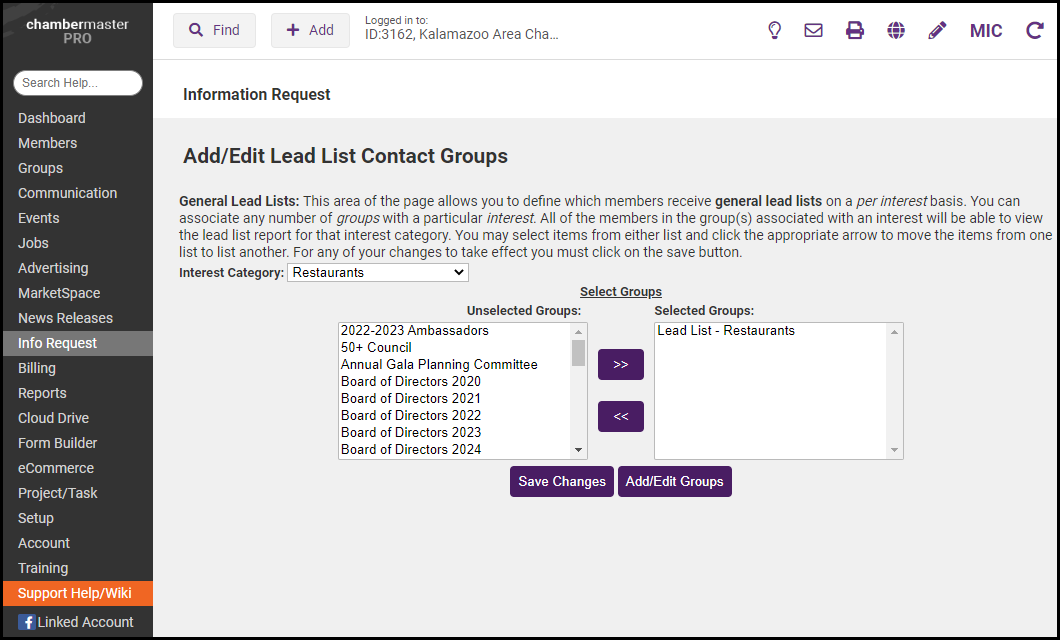
Associate a Group with a General Interest
Once a group has been created, it must be associated with a specific general interest in order to have the lead generated for that member in the General Interest area of the Info Request screen.
- Click Setup in the left-hand navigation bar.
- Click General Lead List Contact Groups in the Information Request area.
- Click the Interest Category arrow and select the general interest that you desire to associate with your group.
- Click the desired group in the Unselected Groups list.
- Click the top-most double-headed arrow.
- Click Save Changes.

Remove Group from Associated Interest
- Click Setup in the left-hand navigation bar.
- Click General Lead List Contact Groups in the Information Request area.
- Click the Interest Category arrow and select the general interest that you desire to associate with your group.
- Click the desired group to be removed from the Selected Groups list.
- Click the bottom-most double-headed arrow to move the group to the Unselected Groups list.
- Click Save Changes.
Designate Group as Travel Lead List
Once a group has been created, it must be designated as a travel lead list group in order to have the lead generated for that member in the Travel Dates area of the Info Request screen. If a member would like to receive the travel lead information immediately each time an Info Request screen is saved, assign them to the group that will receive the Instant Travel Leads.
- Click Setup in the left-hand navigation bar.
- Click Travel Lead List Contact Groups in the Information Request area.
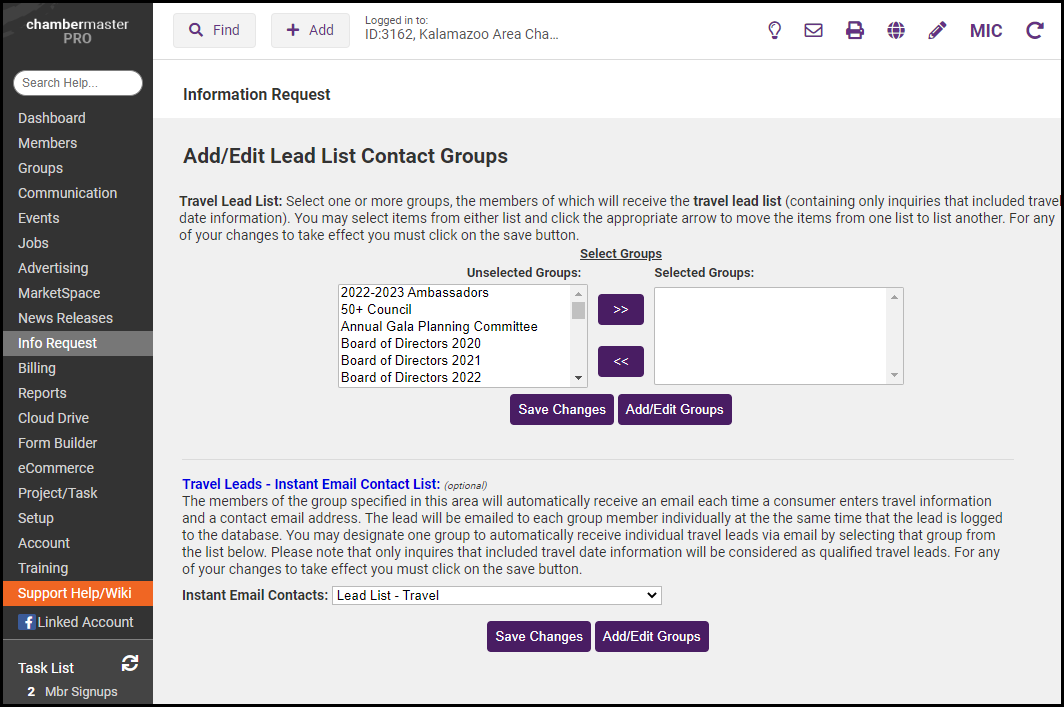
- Click the desired group to receive travel leads from the Unselected Groups list.
- Click the top-most double-headed arrow to move the group to the Selected Groups list.
- Click Save Changes.
- Repeat steps 3-5 above for any additional groups that should receive travel leads.
Remove Designated Group from Travel Lead List
- Click Setup in the left-hand navigation bar.
- Click Travel Lead List Contact Groups in the Information Request area.
- Click the desired group to be removed from the Selected Groups list.
- Click the bottom-most double-headed arrow to move the group to the Unselected Groups list.
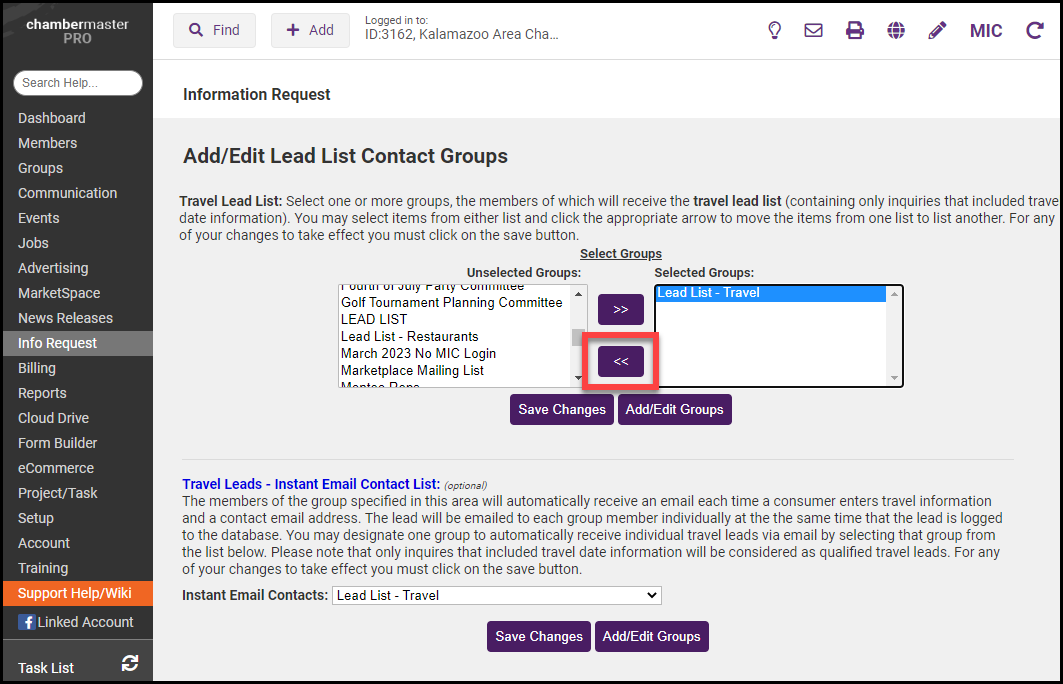
- Click Save Changes.
- Repeat steps 3-5 above for any additional groups that should be removed from the travel lead list.

