
After your account has been enabled by customer support, you will need to complete the configuration of GrowthZone Pay by signing up and entering the necessary bank account information. View the GrowthZone Pay Resource Guide.
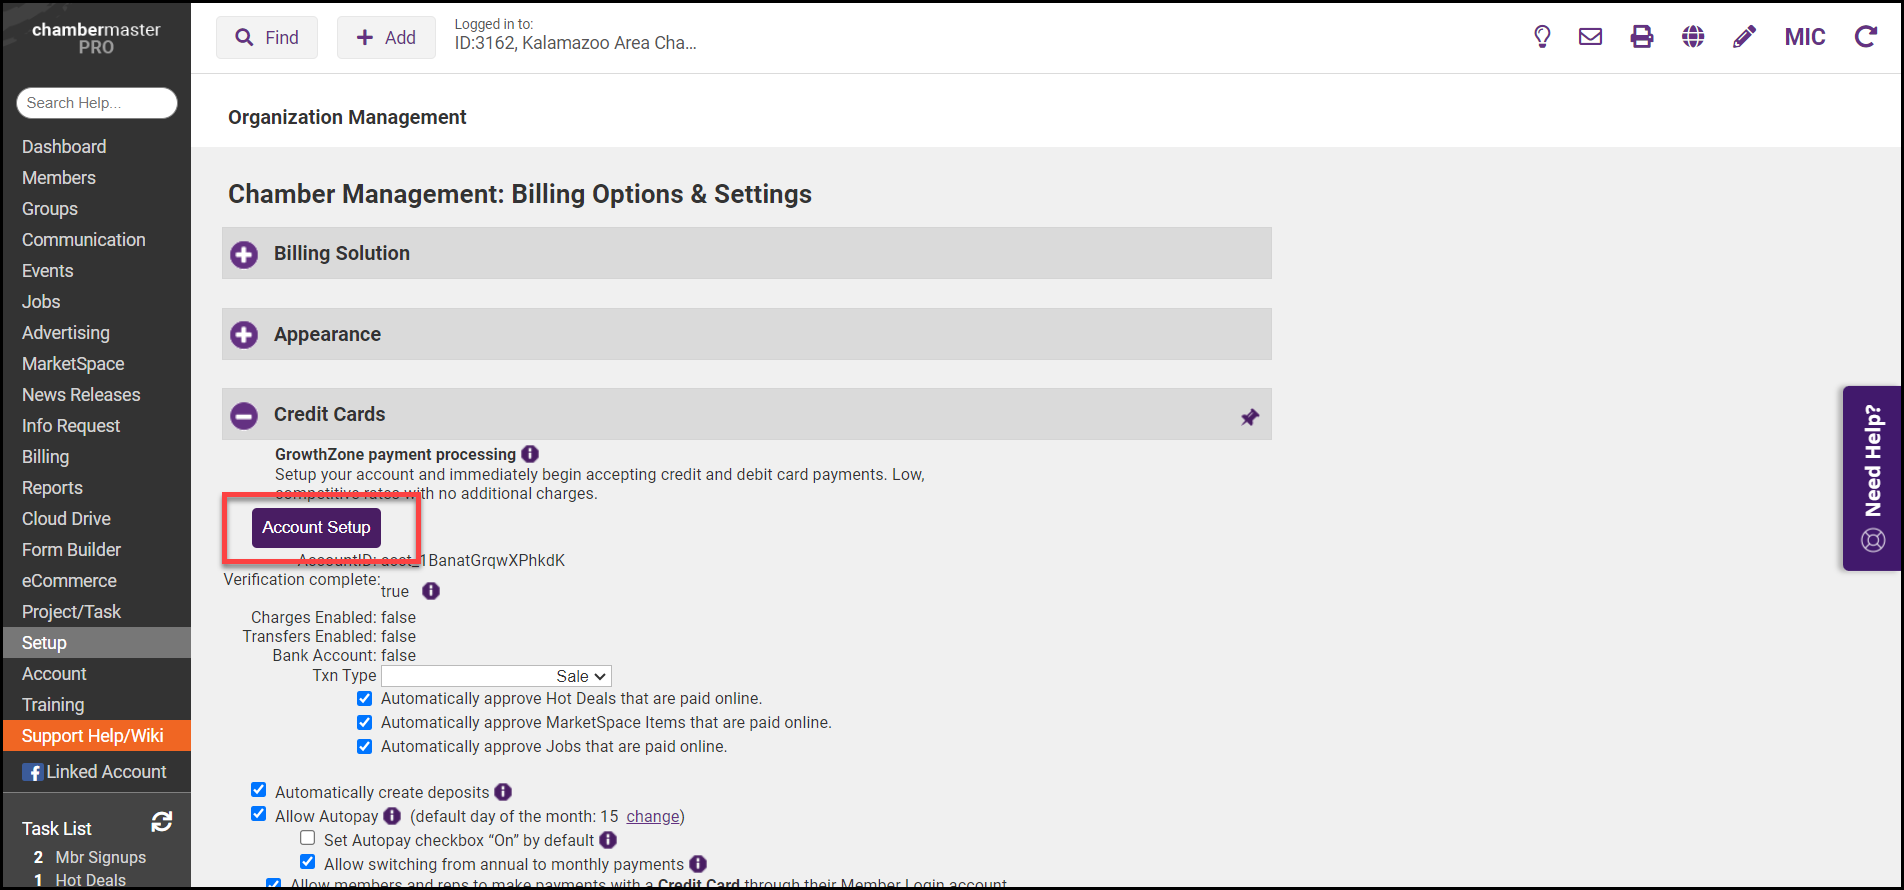
- Click Setup in the left-hand navigation panel.
- Click Billing Options & Settings.
-
In the Credit Cards section, select the Account Setup button.
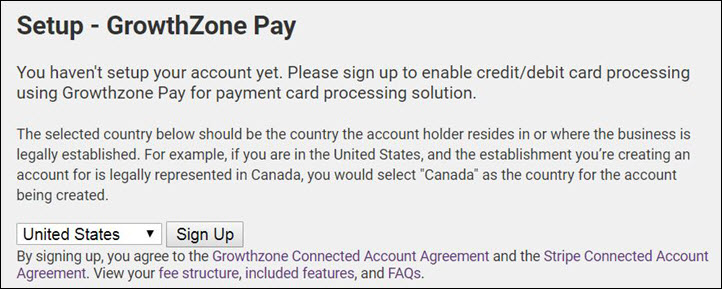
- Select your country from the drop-down list and select Sign Up.
Note: GrowthZone and Stripe's terms and conditions can be viewed on this page. These terms and conditions can also be viewed on the Billing Setup page at any time. Additionally, you can access information about your fee structure, PCI Compliance, features, and FAQs.
- The name of your organization will be automatically populated.
-
Statement Descriptor: This is the name that will be displayed on statements. To avoid disputes, the best practice is to ensure that the descriptor provides sufficient information so the purchasers recognize your organization. Max length: 22 characters. The following characters are not allowed: greater than, less than, single quote, double-quote, or symbols (>, <, ', ").
-
Product Description: Optional - provide a general description of what you are selling; and what purchases will be made on this account: i.e.memberships, event registrations, sponsorships, etc.
-
Public Contact Info: Enter a phone number, email, and public website URL for your organization.
-

- Settings
- Country: The country will default to the country previously selected.
- Decline Charge On: Select when credit card charges should be declined. CVC Failure and/or AVS Failure.
- Bank Accounts: Click the Add Bank Account button to enter the bank account where your payments will be transferred. If setting up a Canadian bank, please enter the Transit # XXXXX and Institution # YYY in the Transit/Routing Number field as follows: XXXXX-YYY.
-
- Click Save.
- Fill in the required Account Holder information.
-
- Click Save. Once submitted, this information is reviewed by Stripe, the company we partner with to bring you GrowthZone Pay.
- While still in the Credit Card section of Billing Options & Settings, verify the Credit Card settings are configured as needed.
- Click Save.


Once you have completed the GrowthZone Pay setup, be sure to set up an email for dispute notification. See Set Up GrowthZone Pay Dispute Notification Email for more information.
|
|
NOTE: If the Canadian user is setting up GrowthZone Pay, but they don't have a properly formatted routing number they likely have a Canadian MICR Number in the format of BBBBB-AAA. To use this MICR Number it needs to be converted to a routing number format which would be Routing Number - 0AAABBBBB. |
An email will be sent to the email address entered when you fill out your Account Setup information when your account has been verified. NOTE: If no email address was entered, then the email address listed under Billing ➝ Reports ➝ Payment Processing Reports ➝ Other Reports, Features and Settings will be used, or lastly the email address under Setup ➝ Association Information.
To verify the status of your account:
- Click Setup in the left-hand navigation panel.
- Click Billing Options & Settings.
- If needed, expand the Credit Cards section.
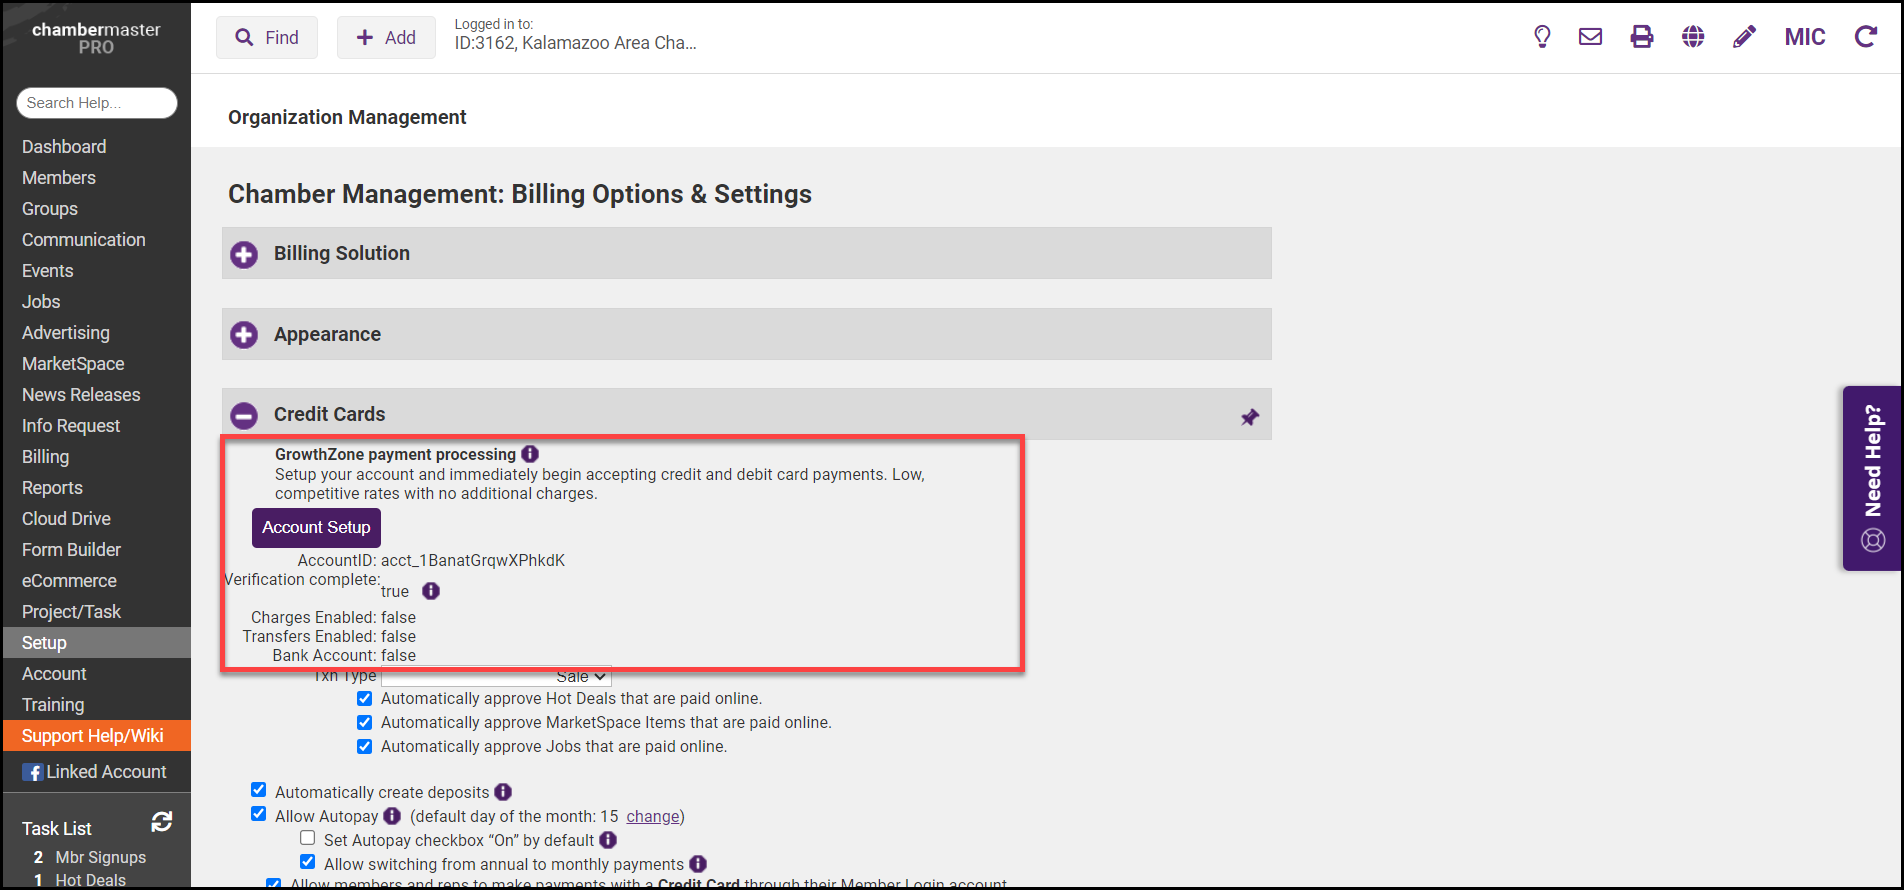
- Verification Complete: This will indicate (yes/no) if the required verification by Stripe & GrowthZone has been completed.
- Charges Enabled: This will indicate (yes/no) whether charges may be processed through the gateway.
- Transfers Enabled: This will indicate (yes/no) whether transfers to your bank account have been enabled.
- Bank Account: This will indicate (yes/no) whether your bank account information has been successfully verified.
|
|
NOTE: If more information is required for verification, you will be notified by email. The status will automatically change to Verification Complete = true when your account has been marked verified by Stripe, Inc. They may simply be processing your information or waiting until you have a greater amount of charges before requesting more verification information. |

