
Within the Security & Privacy Settings, you can set optional password requirements as well as configure optional terms and conditions that your members must agree to in order to apply for membership and access the MIC. These settings are optional.
Password requirements are optional. If enabled, these settings are enforced at all locations where passwords are created for member logins (i.e. MIC login page, Membership Application, Event Registrations, etc).
|
|
NOTE: When you make changes to password requirements, existing users aren’t affected until the next time they change their passwords. |
- Select Setup in the left-hand navigation panel.
- Click General Options & Settings.
- Expand the Security & Privacy Settings section.
-
- To require specific password conventions, click Enable Password Requirements.
- Enter the conventions you wish to enforce for the following (you are not required to enter a selection for each of the settings):
- Required Password Length: The minimum number of characters required for a password. The default is 8 characters.
- Required Alphabetic Characters: Enter the minimum number of required alphabetic characters. When this is populated, the Required Capital Letters field will be enabled.
- Required Capital Letters: Enter the minimum number of required capital letters.
- Required Numeric Characters: Enter the minimum number of required numeric characters.
- Required Special Characters: Enter the minimum number of required special characters. All standard keyboard characters are allowed.
- Password Settings: If you wish to ensure that your members change their passwords on a regular basis you may:
- Set the number of days after which a member must change password in the After "x" days text box.
- Set an exact date on which the member must change password in the On a specific date text box. Using this option might be beneficial if you have made recent changes to your password requirements, and want to ensure that all members are forced to update their credentials by a specific date.
- Set Password Reuse: If you to ensure that the new passwords created by the user are unique, you can set the number of previous passwords that may not be reused in the Do not allow reuse of the last <1-4> password text box. Valid values are 1, 2, 3, 4.
- NOTE: When Force Password Expiration settings are enabled, the user will be given the option to reset their password as soon as they are notified, or they will be able to click ‘’’Later’’’. If ‘’’Later’’’ is selected, the next time the user logs in, they will be prompted to change their password and will see the number of times they can hit later again.
- Click Save if you have made changes.

|
|
NOTE: In addition to setting password requirements, when Enable Password Requirements is checked, all locations where a password reset link is sent out, an expiration is set on the link (24 hours), with the exception of the initial email sent to a new representative with instructions to create their user name and password. |

Privacy Policy/User Agreement Report
The Privacy Policy/User Agreement Report provides a way for staff to see who has agreed to your policy (and to what version of the policy, etc). The report can also be a source for viewing if someone had agreed to an older version of the policy, in case there is a dispute. The report may be filtered on member status, rep status, and agreement version date.
- Click Reports in the left-hand navigation panel.
- Type Privacy in the Search by Keyword text box.
-
- Click Search.
- Click the green arrow next to the Privacy Policy / User Agreement Report.
-
- Select desired report criteria:
- Member Status
- Rep Status
- (Optional) Agreement Version: You will select an agreement version by the date it was created. Clear the None check box, then type the desired date in the <Chose Date> text box.
- Click View Report.


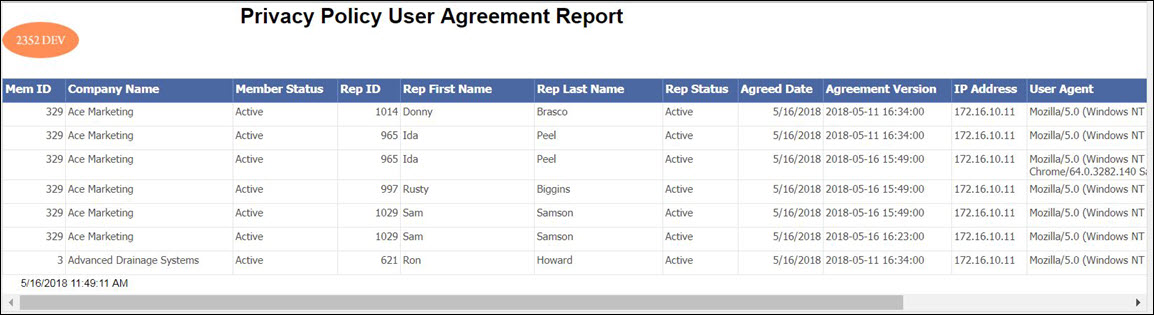
The report will include:
- Member ID
- Member Status
- Rep
- Rep ID
- Rep Status:
- Agreement Occurred on
- Agreement Version (version agreed to --Date and time of saved agreement copy)
- IP address
- Browser version
You may save the report in Excel or CSV format.

