Create a Single One-Time Invoice

Creating a single invoice may be done within the Billing Center or on a member's Account tab.
- Click Billing in the left-hand menu.
- Click the Billing Center tab.
-
- Click the desired member in the member list.
- Click the New Invoice button.

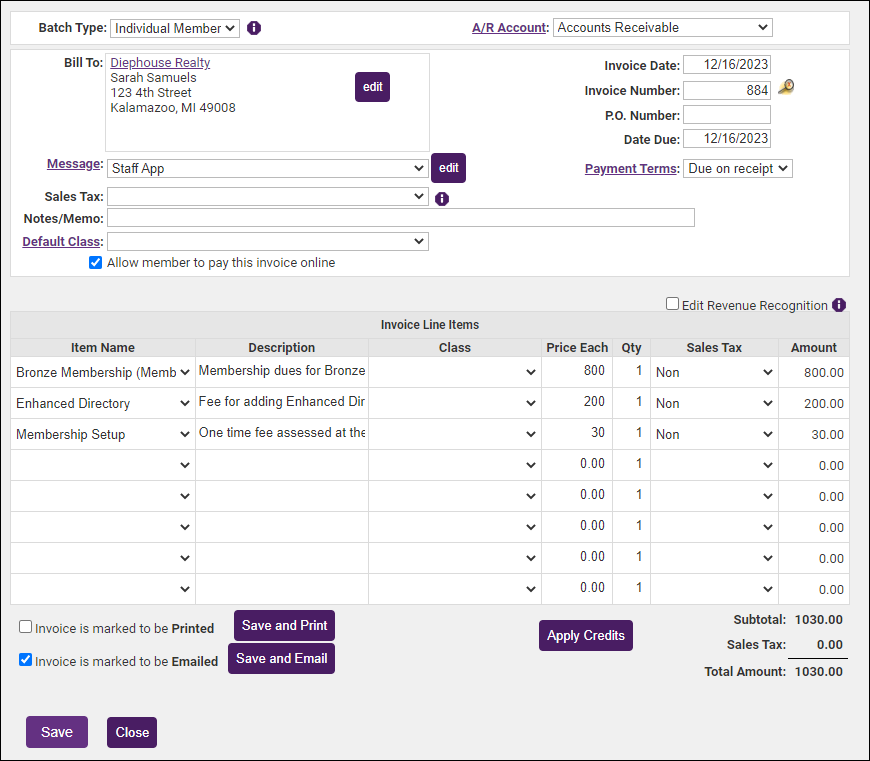
- Configure the following as necessary:
- A/R Account: Select the A/R account you wish to use for this invoice. The default you selected under Billing Options & Settings will be displayed, but you may change this as needed.
- Invoice Date: The invoice date will default to the current date, but you may change this as needed.
- Invoice Number: The system will automatically generate the next invoice number for you.
- P.O. Number: If you have a PO Number you may enter it here. If you receive the PO Number after you have sent the invoice, this field may be updated.
- Date Due: The date due is calculated by the Payment Terms described below. If you wish to specify a date due, you may enter it in this field and it will override the payment terms.
- Payment Terms: Select the payment terms for this invoice. The payment terms you set as default under Billing Options & Settings will be displayed, but you may change this as needed. Click the Payment Terms hyperlink to add or edit payment terms.
- Message: Select a message to display on your invoice. The message you set as default under Billing Options & Settings will be displayed, but you may change this as needed. The drop-down list will contain all messages you created in the Billing Options & Settings. Click the Edit button if you wish to make changes to a message.
- Sales Tax: If the items on this invoice are taxable, select Tax from the drop-down list.
- Notes/Memo: Enter any notes/memos you wish for this invoice.
- Item Name: Select the fee items that you wish to include on this invoice. The Description and Price Each will be populated with the defaults you configured when the fee item was created. You may change these if needed.
- Qty: Enter the quantity of the fee item to be included on the invoice.
- Sales Tax: If the fee item is taxable, select Tax from the drop-down list. The tax will be automatically calculated.
- Amount: The system will automatically calculate the total amount for the sale.
- If you wish to defer recognition of the revenue for this invoice, click the Edit Revenue Recognition, the # of Months Recg. column will be displayed. Enter the number of months over which you wish to recognize the revenue.
- If you wish to deliver the invoice immediately, click the delivery method: Save and Print or Save and Email
- OR
- If you wish to ready this invoice for delivery, select the appropriate delivery method Invoice is marked to be printed or Invoice is marked to be emailed. If you mark an invoice to be printed or emailed, you will be able to deliver the invoice by going to Billing > Reports > Receivables > Print/Email Invoices.
- (Optional): If the member has available credits, click the Apply Credits button.
- Click Save.
- Click Close.

