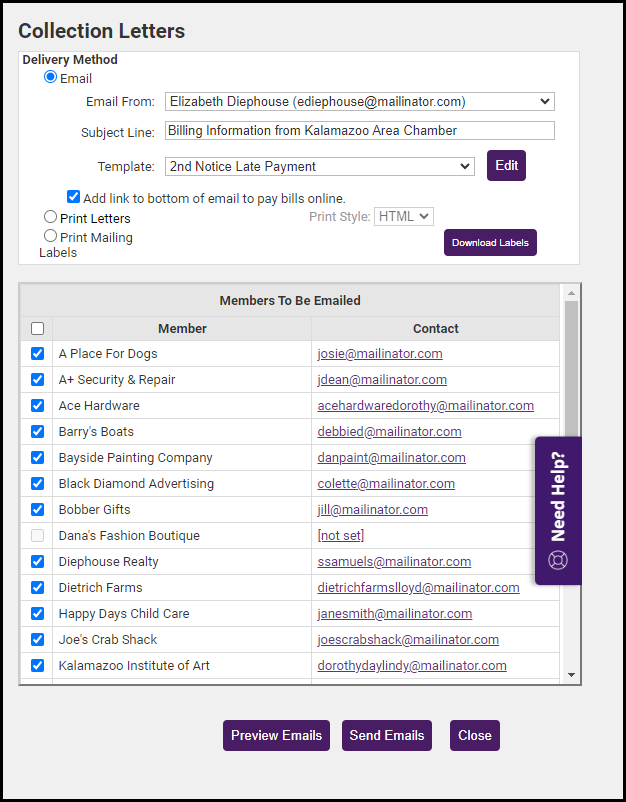
Collection letters are intended for those who have not paid their invoices. Select who should receive these letters and which letter they should receive by selecting the appropriate filter choices.
-
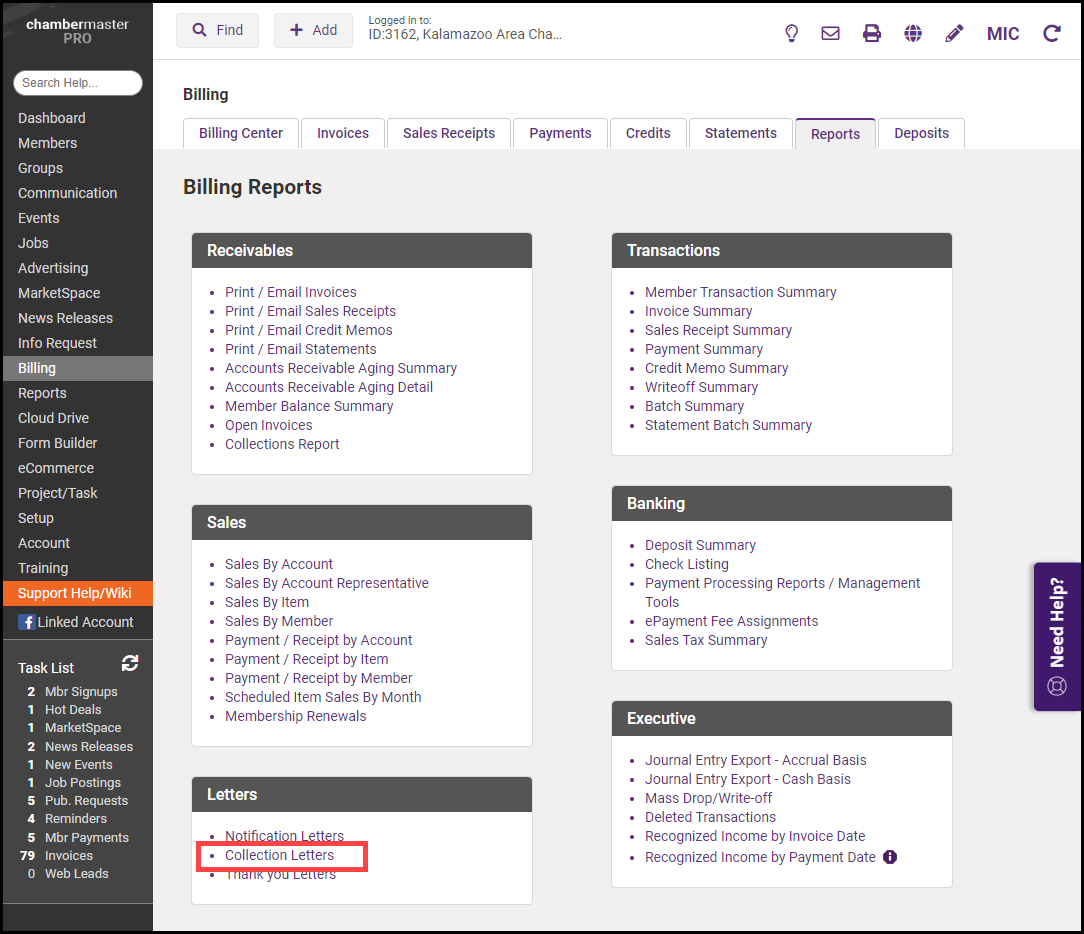
Click Billing in the left-hand menu.
-
On the Reports tab, select the Collection Letters link.
-
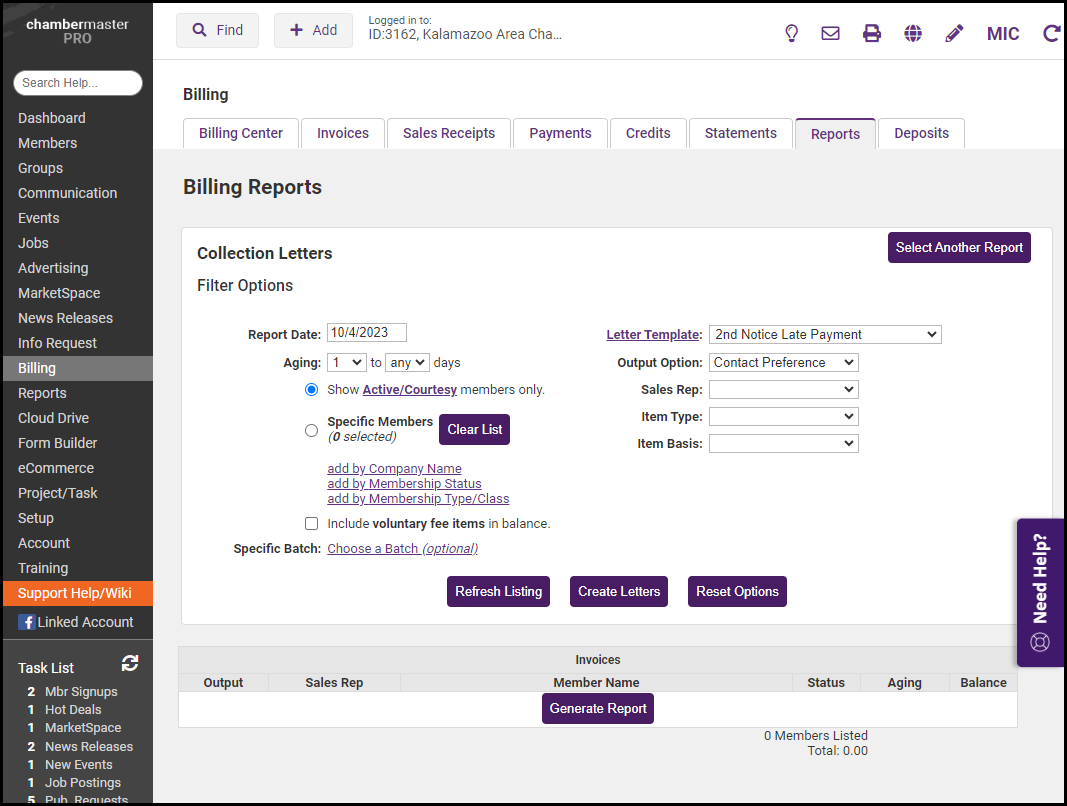
Complete desired filters:
-
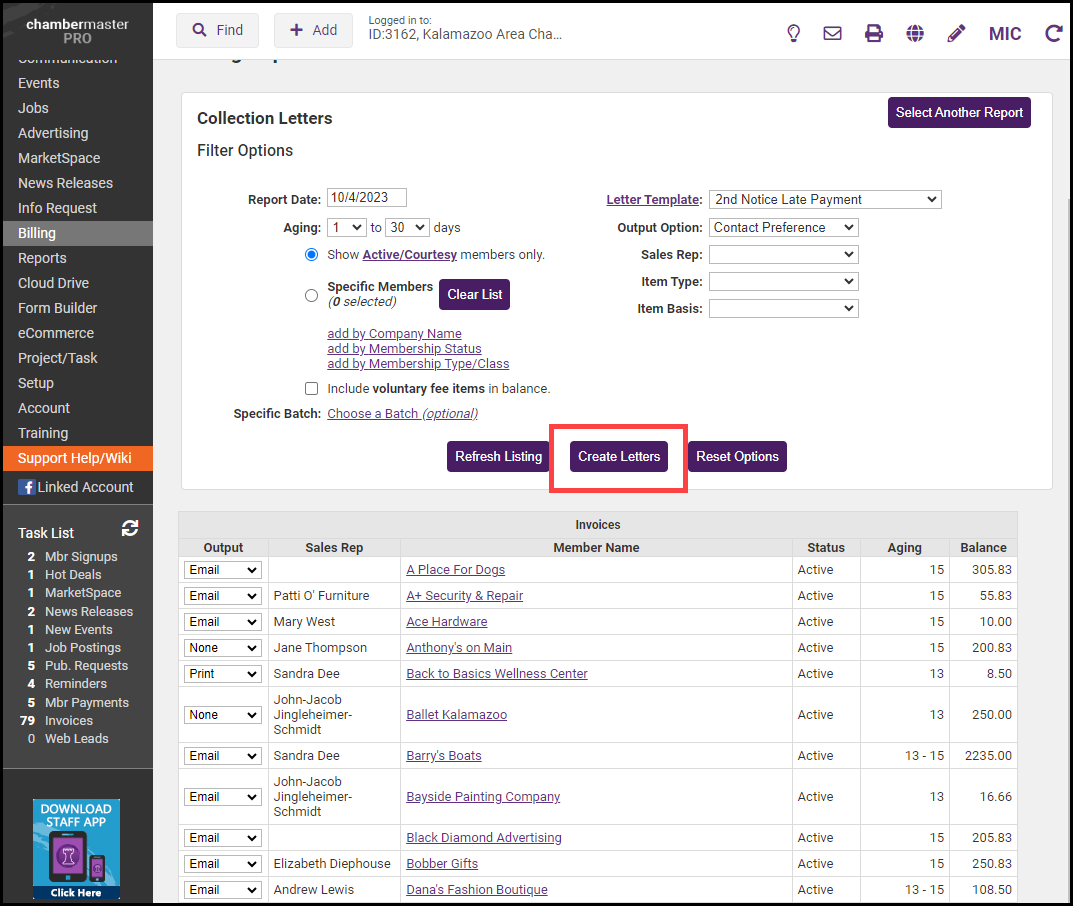
Output Option: Select the desired output option for the letters. Selecting Contact Preference will set the output to the preference configured on the Account tab for the member.
-
Aging: Select aging options if you want to filter the collections report to invoices that have aged beyond a certain number of days.
-
Show Active/Courtesy members only.: Clear this checkbox if you would like to include Dropped/Inactive, Prospects, and Non-members in the report output.
-
Specific Members: Click this radio button if you wish to generate the report for specific members. You can then click add by Company Name, add by Membership Status or add by Membership Type/Class to select members.
-
Specific Batch: If you wish to filter the report on a specific batch, click the Choose a Batch (optional) hyperlink and select the desired batch.
-
Letter Template: Select the Collections Letter template you wish to use. You may click the Letter Template hyperlink to edit the template.
-
Sales Rep: If you wish to generate the report by Sales Rep, select the desired Sales Rep from the drop-down list. This would be used if you wish to generate the report and send personal letters from sales reps.
-
Item Type: If you wish to generate the report by a specific item type, select the type from the dropdown list. For example, if you wish to only include membership dues, select Member Fees/Dues Only. Alternatively, you can filter the report to specific fee items by selecting Use Specific Fee Item, and then selecting the desired fee item(s).
-
Item Basis: If you wish to filter the report by Accrual or Cash, select the desired option.
-
-
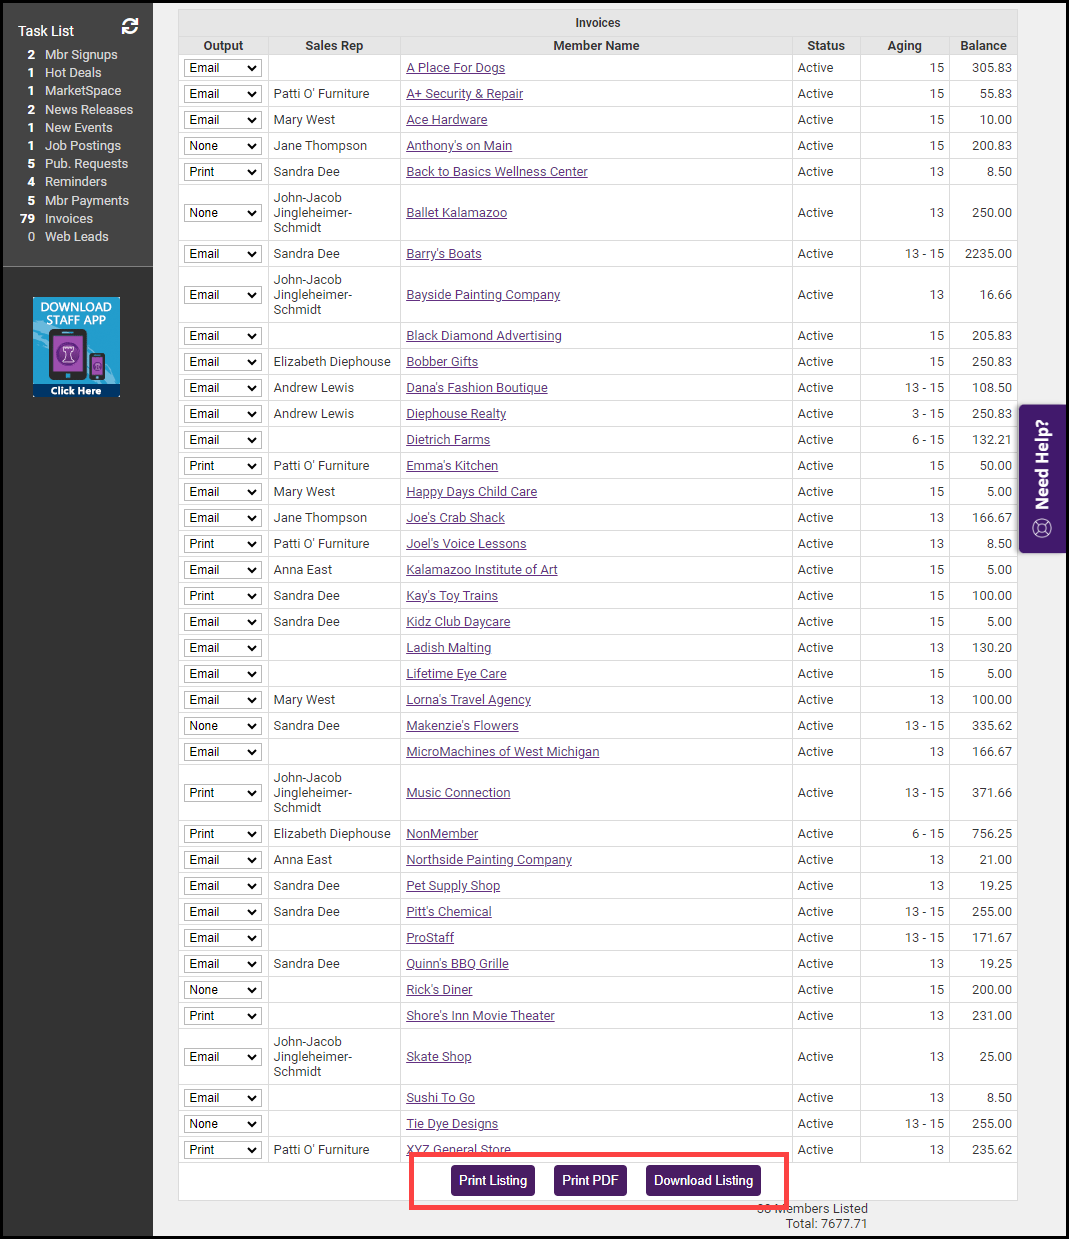
Click Refresh Listing. To save the report, select the Print Listing, Print PDF, or Download Listing buttons.
-
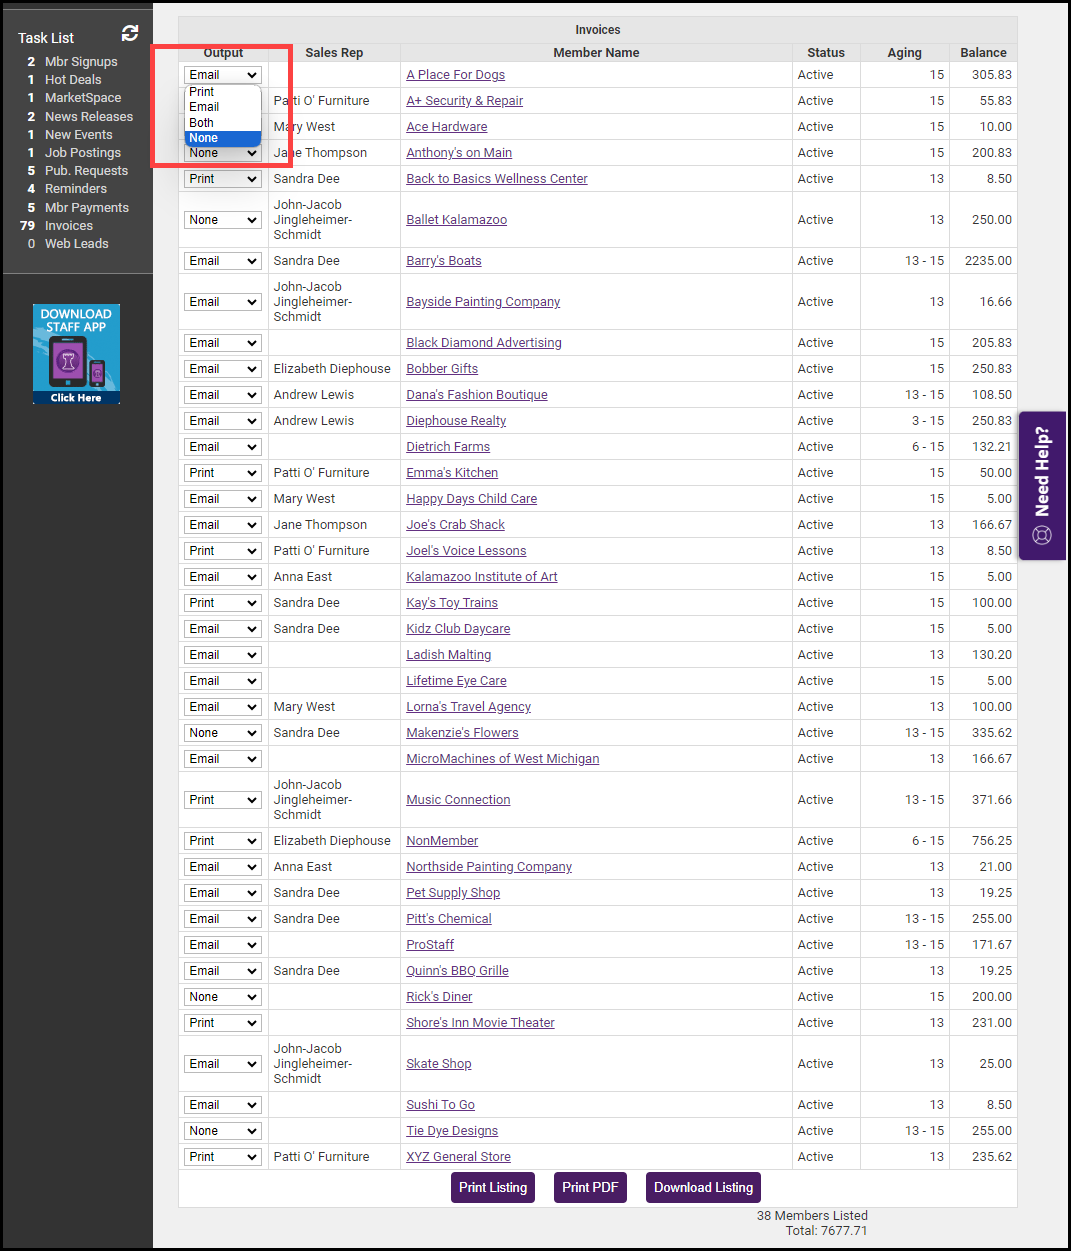
Double-check the Output column to ensure the correct delivery method is selected for each member. Select None in the Output column to exclude the member from receiving the Collection Letter at this time.
-
Click Create Letters.
-
Select the desired Delivery method.
-
Email: Ensure the Email From address and Subject Line and then click Send Emails. NOTE: If you wish, first click Preview Emails.
-
Print Letters: Choose the items you would like included in the letters. Include return address should be selected if you want your association return address to be placed at the top of the printed output. To log the letter to the members' Communication tab, click the Create communication log entries checkbox.
-
Print Mailing Labels: If needed, click Create Letters again and select Print Labels as the Delivery Method to print matching labels for the printed letters.
-
-
