Insert Graphic into Email

Adding graphics to your correspondence is a simple process that requires initially uploading the graphic to the secure ChamberMaster server. Once uploaded by a chamber staff member, it is available to all chamber staff for inclusion in correspondence. Most graphic file types may be uploaded including JPG, BMP, GIF, PNG, and WMF.
The editor can be accessed from multiple places within ChamberMaster. For one example, click New Email to Multiple Members in the Communication module. After selecting the desired recipients, the correspondence editor will display. Graphics may also be included in your signature block. Perform the same steps shown here but save it within your signature block.
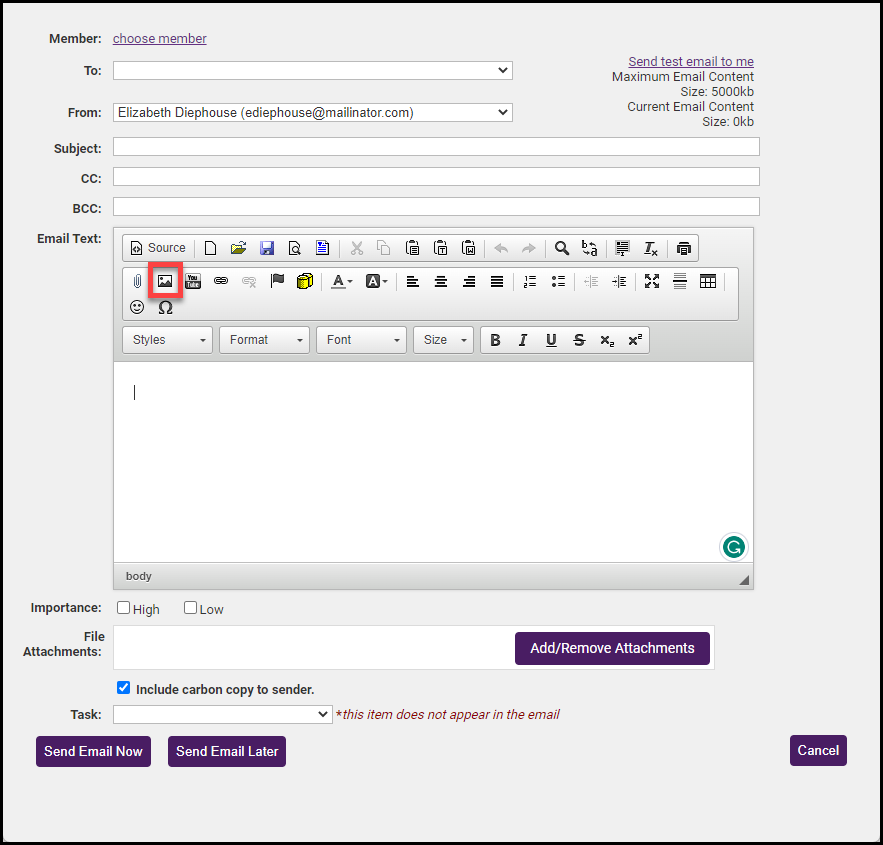
- In an email window, select the Image icon.
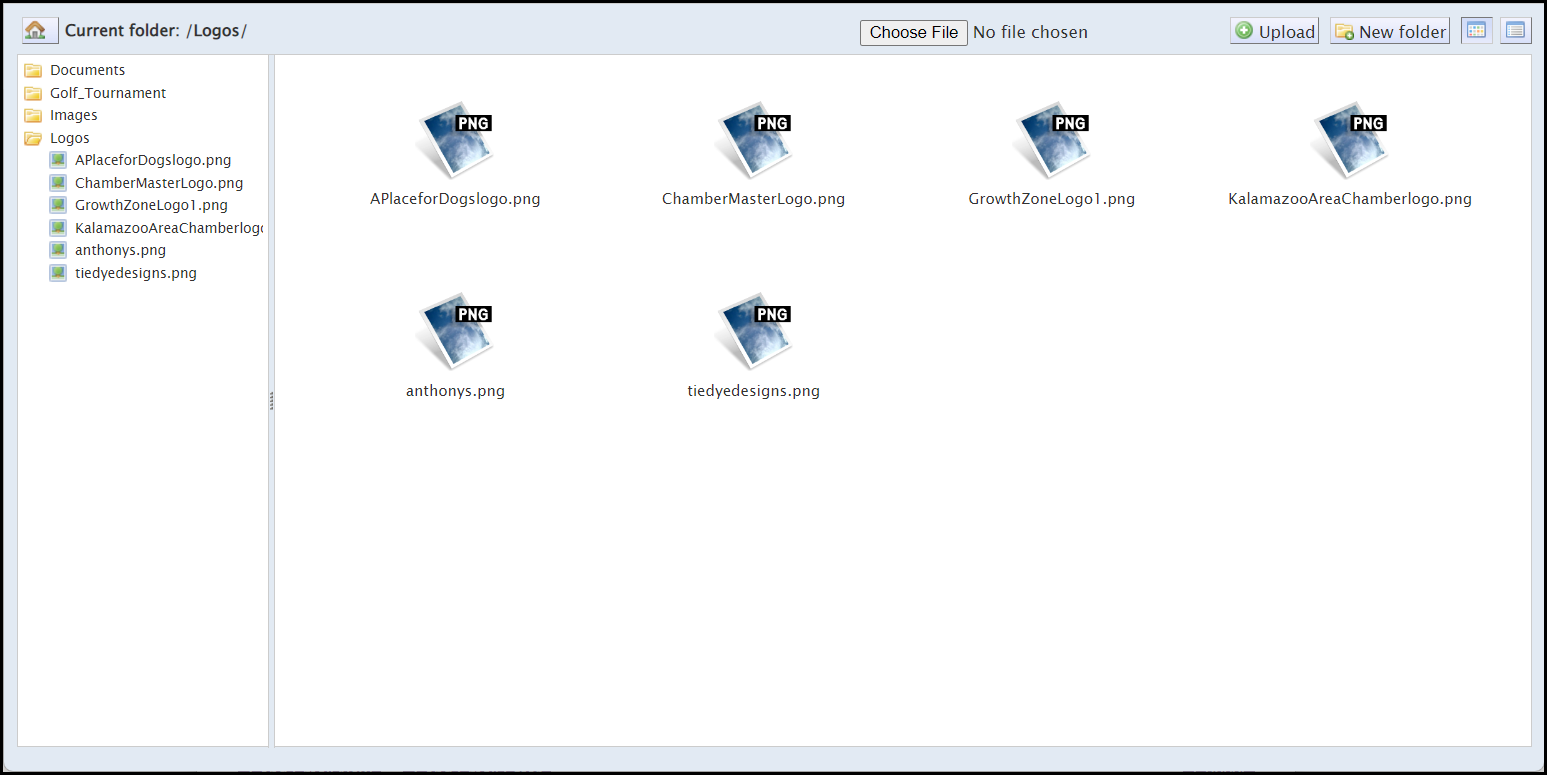
- In the Image Properties window, select Browse Server.

- Browse to find the desired file and click it to select. Or you may upload a new file to the ChamberMaster server by clicking Browse. If you choose to upload a new file to the secure ChamberMaster server, this file is also available to all chamber staff for inclusion in their documents.
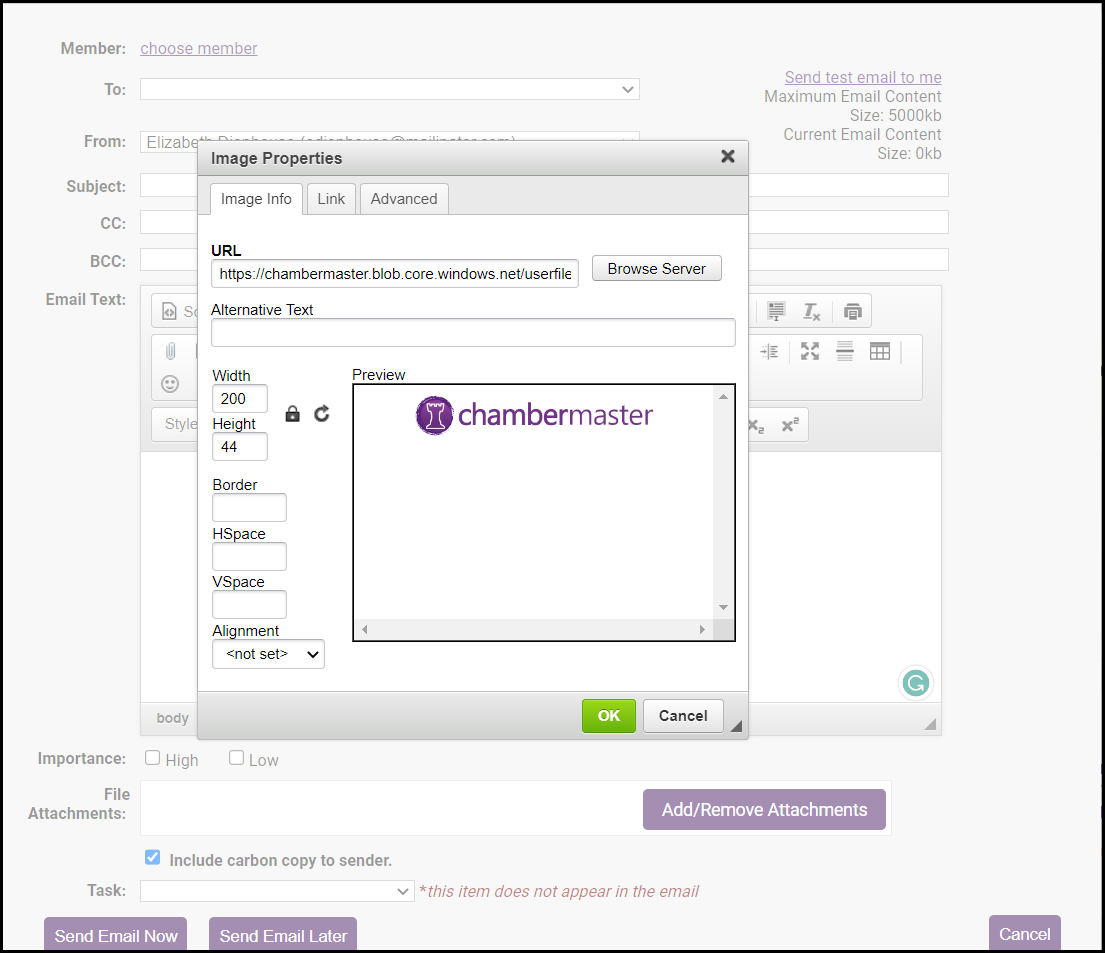
- Make any desired changes on the Image Properties screen and then click OK.

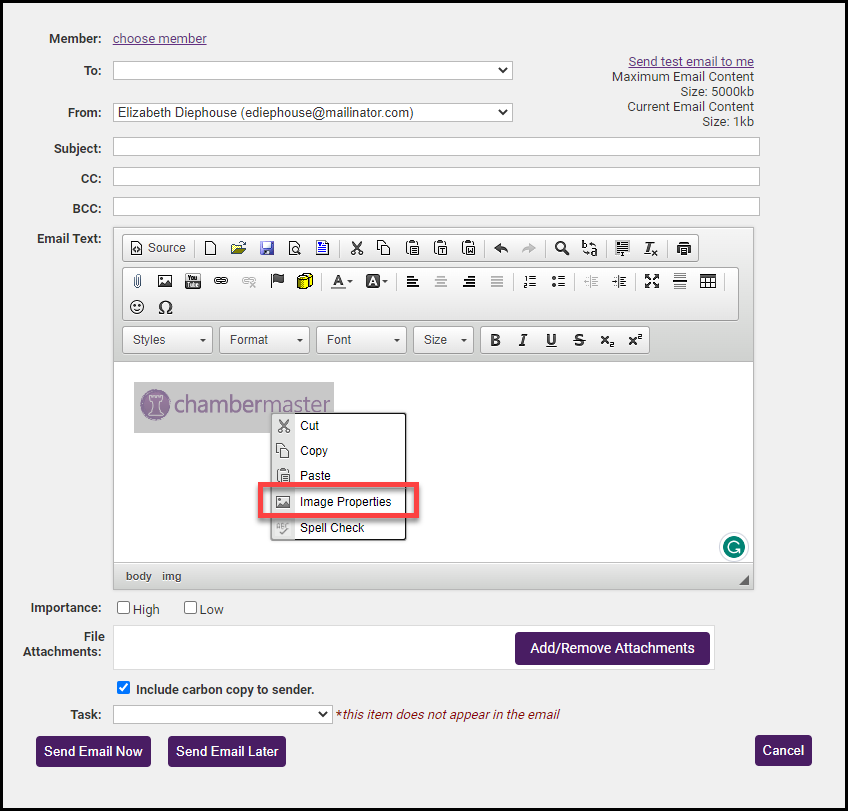
- Locate the graphic that you desire to edit on the editor screen.
- Right-click the graphic.
- Click Image Properties.
- Make desired changes. Options include the alternative text for the image, the image width/height, adding a border to the image, and the image alignment.
- Click OK.
Remove a graphic (from the ChamberMaster server)
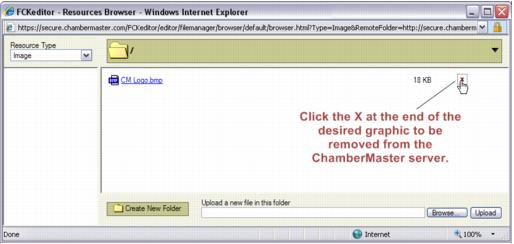
- Within the editor, click Insert/Edit Image.
- Click Browse Server.
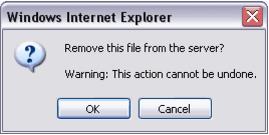
- Click the X at the end of the desired graphic to be removed from the ChamberMaster server.
- Click OK.
- Click Close.

