Add MarketSpace Items

-
Click MarketSpace in the left-hand menu.
NOTE: If you have renamed MarketSpace, your custom terminology will display in the navigation panel.

- Click Add New MarketSpace Item.
-
- Configure the following information:
- Click Select a Member to choose the member to be associated with this item. This option may be left blank if you are entering a MarketSpace item for a contact that is not in your database.
- Title: This is the title of the item that will be displayed in the search results for MarketSpace.
- Image: Click the Add button to upload an image to be displayed in the search results, as well as on the item page. For best results, upload an image that is 400 x 400. A larger image may be uploaded but will maintain the 1 x 1 aspect ratio. This provides a uniform look for the MarketSpace items on the public directory search results and fits in the space provided in all directory locations.
- Description: Provide a description of the item. Click the edit link to use the Rich Text Editor functions.
- Status: Select the desired status. If Approved, once the MarketSpace Item is saved, it will display on your website. If Unapproved, the item will not be displayed on your website.
- Priority: This determines the order in which items will be displayed on your website. Click the Priority link to edit priorities and associated levels. The default priority is configured under Setup > MarketSpace Settings.
- Publish Start Date/Publish End Date: Enter the first date and the last date you wish to publish this MarketSpace Item.
- Offer Start Date/Offer End Date: Enter the first date and the last date the offer within this MarketSpace Item is valid.
- Valid Dates Description: Enter additional details about the offer's valid dates.
- Short Description: The short description is displayed in the search results summary.
- Value: Enter the value of the MarketSpace Item.
- Detail URL: Enter the website address (URL) that customers can click to view more details about your offer. This link will be an option to click after the visitor has first clicked on the name of the Marketspace item (which displays the Details page with the full description, offer date, etc.).
- Offer URL: Enter the website address (URL) that customers can click to view more details about your offer to go directly to your own website and bypass the Details page with the description, logo, and offer dates of the item. The Offer URL link will open immediately when the visitor clicks on the name of the Marketspace item.
- Categories: Click the edit link to choose the MarketSpace category(ies) to which you wish to associate this offer.
- Click Save.

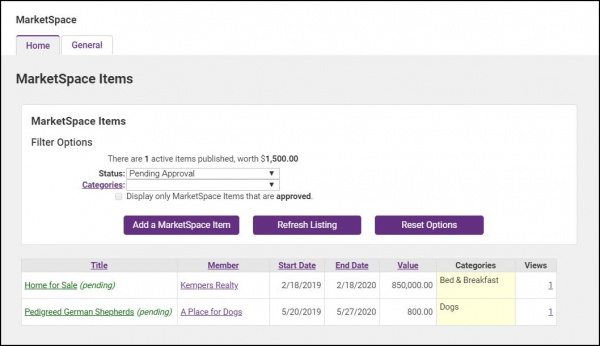
When MarketSpace Items are submitted by your members, you may configure your system to automatically approve, or you can review the submission and approve or decline. To approve a MarketSpace Item submission:
- Click MarketSpace in the Task List.
-
- Click the name of the MarketSpace item you wish to approve.
-
- Select Approved from the Status drop-down list.
- Click Save.