Setup Before Export
-
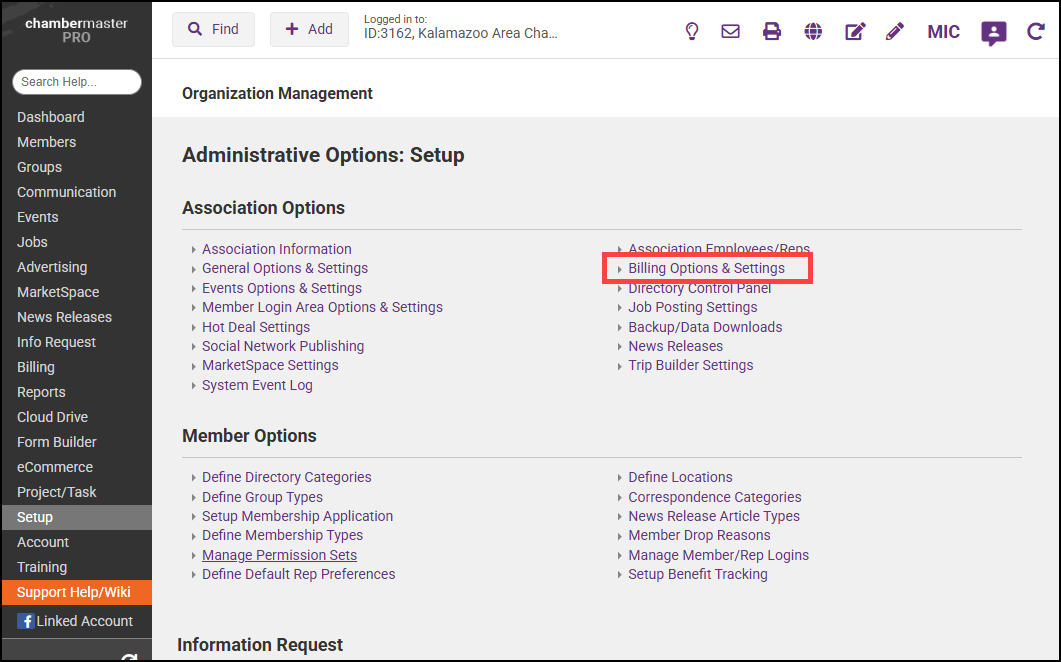
Select Billing Options & Settings from the Setup module.

-
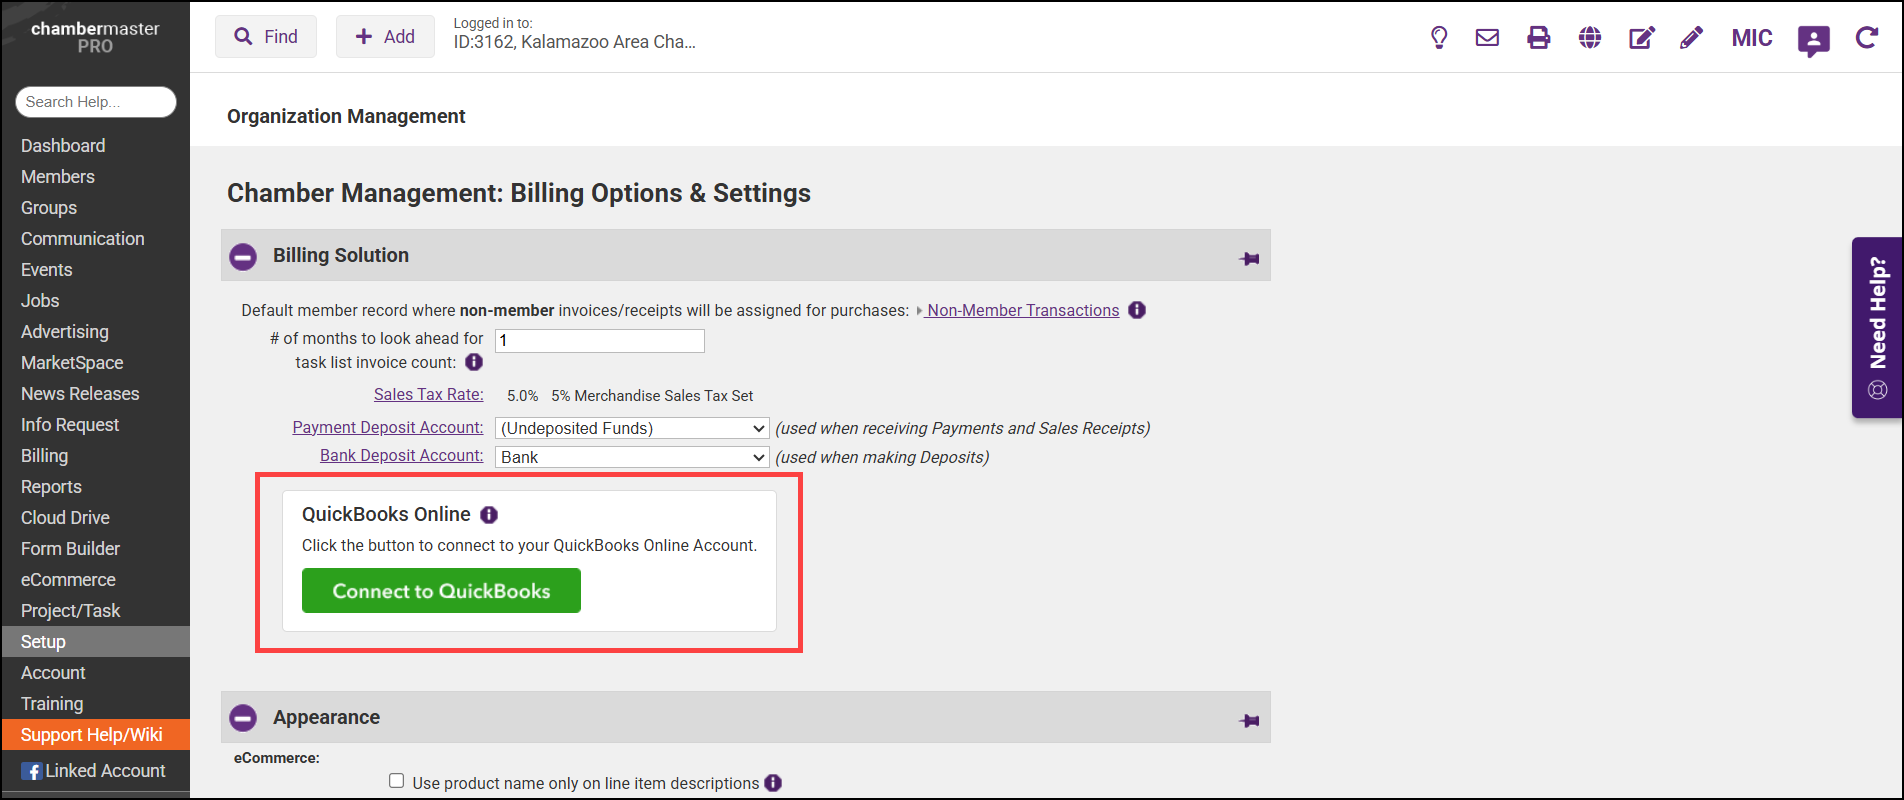
In the QuickBooks Online box, select the Connect to QuickBooks button.

-
Enter your QuickBooks online login information and say Yes to the connections.
-
Click Save. The screen should indicate that you are now connected to QuickBooks online.
-
Ensure your Chart of Accounts are set to match your accounts in QuickBooks.
Exporting Transactions
On a regular basis, push your billing transactions to QuickBooks Online. Follow the steps below to complete this process.
-
Go to the billing module and open the reports tab at the top.
-
In the Executive section click the Journal Entry Export - Accrual Basis or Journal Entry Export - Cash Basis depending on your accounting needs.
-
Select QuickBooks Online from the Format dropdown menu.
-
Select your date range and any other desired export options.
-
Click Refresh Report to generate your list of transactions.
-
Review the list for accuracy ensuring any transactions you wish to export are selected and then click the Export button.
-
The file is then transmitted to Quickbooks online and you will receive an email within a few minutes providing the status of that export.
As with all export options, ensure that your QuickBooks Online chart of account names and customer names matches exactly what is in your database before clicking Export. When a match is found, the transaction is automatically associated with the correct customer and account. If no match is found, the new customer will need to be added to QBO before exporting otherwise, an error will occur with that entry. Applying Payments in Quickbooks Online video here.
|
|
IMPORTANT: Due to how QuickBooks Online manages imported data, not all transactions will display under a Customer account in QuickBooks Online (QBO). In QBO if A/R isn't being affected journal entries will not show on a customer's record. You can verify all transactions that are imported into your QBO software by viewing the financial reports. |
QuickBooks Online Errors
401 Error: The unauthorized 401 error is a QuickBooks Online connection error.
-
Go to Setup.
-
Click Billing Options and Settings.
-
Click the Connect to QuickBooks button to disconnect and save. Refresh your page then go through the same process except this time when you click the Connect to QuickBooks button you enter your QuickBooks Online login information and say "yes" to the connection.
-
If that does not solve it, look in the Chart of Accounts in ChamberMaster and confirm that there are no spaces before or after the colon (:) between account:subaccount.


