Create Custom Rep Permission Sets

Reps may be limited in what they can access in the Member Information Center (MIC) by using Permission Sets. If the default Permission Sets of Primary, Billing, and Standard are not sufficient, you may create custom Permission Sets.
Tip: Take advantage of the default permission sets that are already created. You may find that these already have your desired permissions selected or that minor tweaking will make them work great for your needs. These default sets in combination with the automatic inheritance of these permissions will make handling permissions very simple.
- Click Setup in the left-hand navigation panel
- Click Manage Permission Sets

- Click the New Permission Set button. A new line will be added to the list of permission sets.
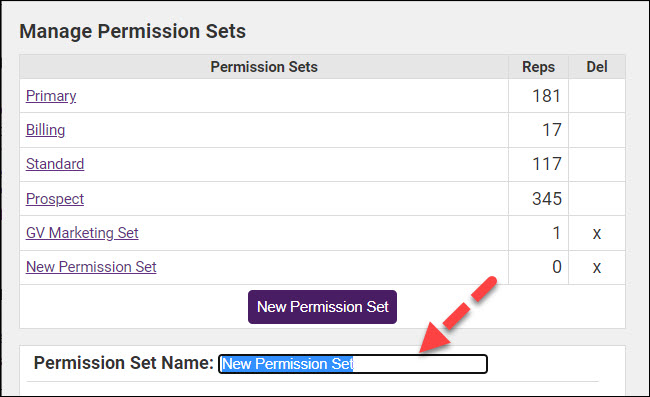
- Enter a Permission Set Name.
- Assign the permission level you wish for each of the areas in the MIC. See Definition of Permission Levels listed below. The checkbox must be selected in order to allow any permissions in this section. Removing the checkmark from Member Info would remove all access to the areas in that section. For example, "Member Info" must be selected to allow any permissions in this section.

- Click Save Permissions.
Definition of Permission Levels
- Read/Write: Full access is granted to this particular area.
- Read Only: Ability only to view this particular area.
- Disabled: This particular area is not visible at all.
- Enabled: This area is available (same as Read/Write).
- Register Only: available only on the Events selection (same as Read Only but allows event registration).

