With GrowthZone Pay, you members may easily store credit card or bank account information to be used for future purchases, and for recurring fee items, such as their membership dues. See Invite Members to Sign Up for Autopay for more information.
|
|
Did you know? Credit cards are stored at the Processor (Stripe) and are NOT stored on GrowthZone servers. |
With GrowthZone Pay, your members will be able to store credit cards in the Member Information Center (MIC). They can then notify you that they wish to use the stored payment profile for recurring fees. Click here to see how to store a payment profile in the MIC.
NOTE: The member must have permission to manage the company billing to store a credit card.
- In the MIC, click Account Settings in the upper right.
-
- Click Billing.
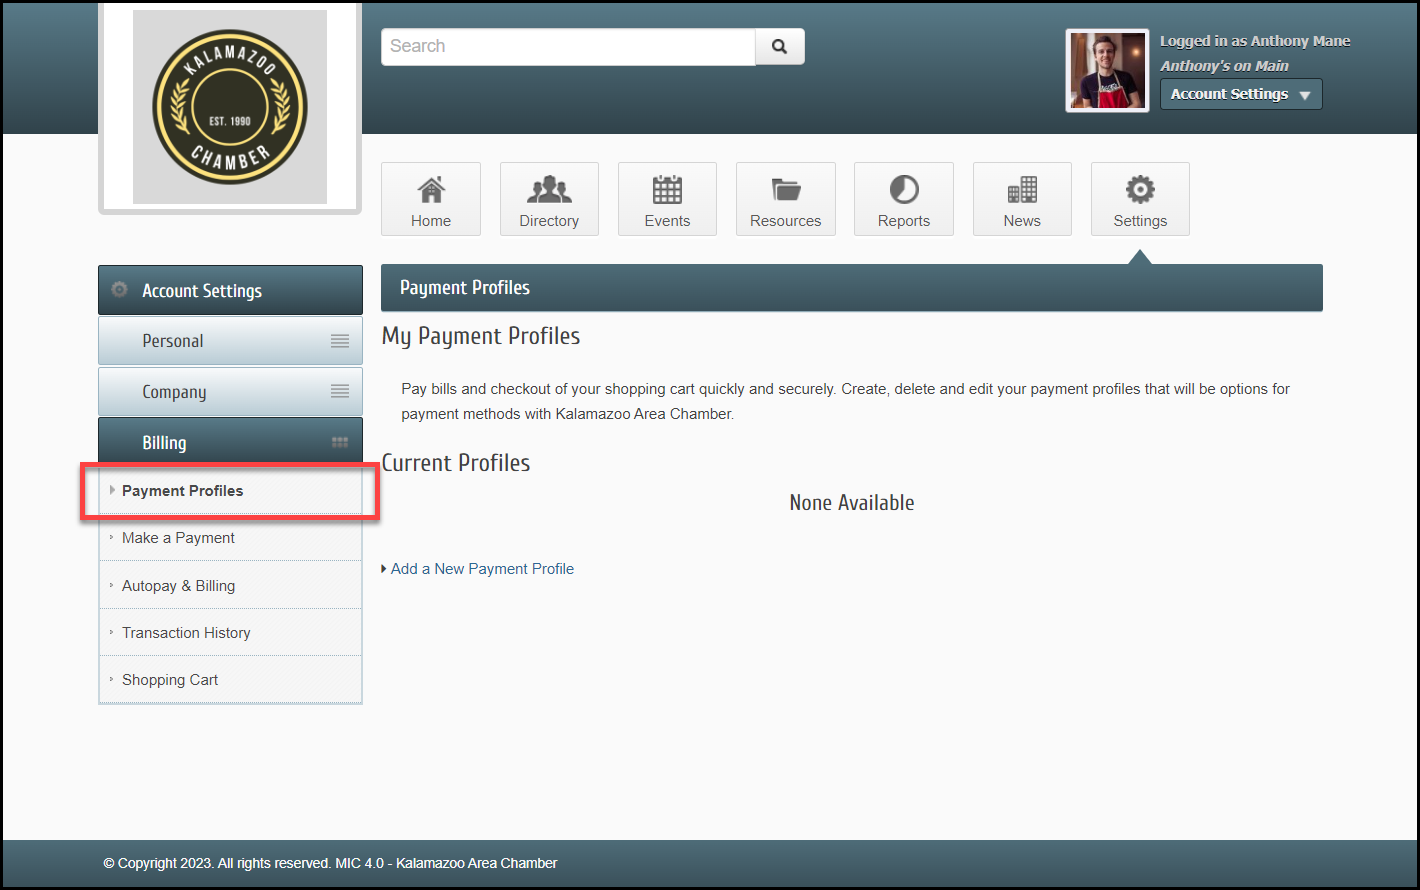
- In the left-hand navigation panel, click Payment Profiles.
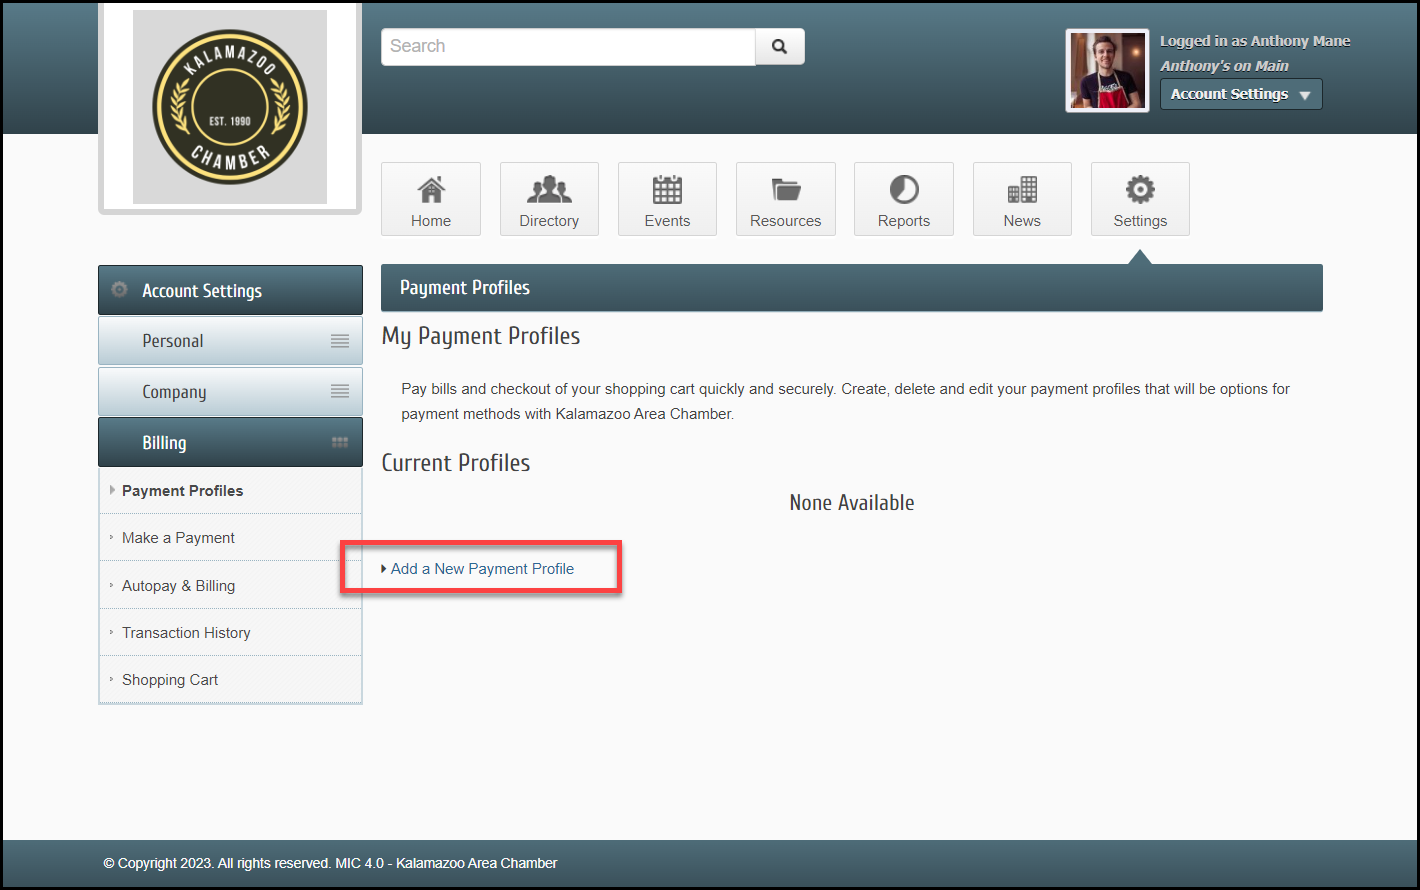
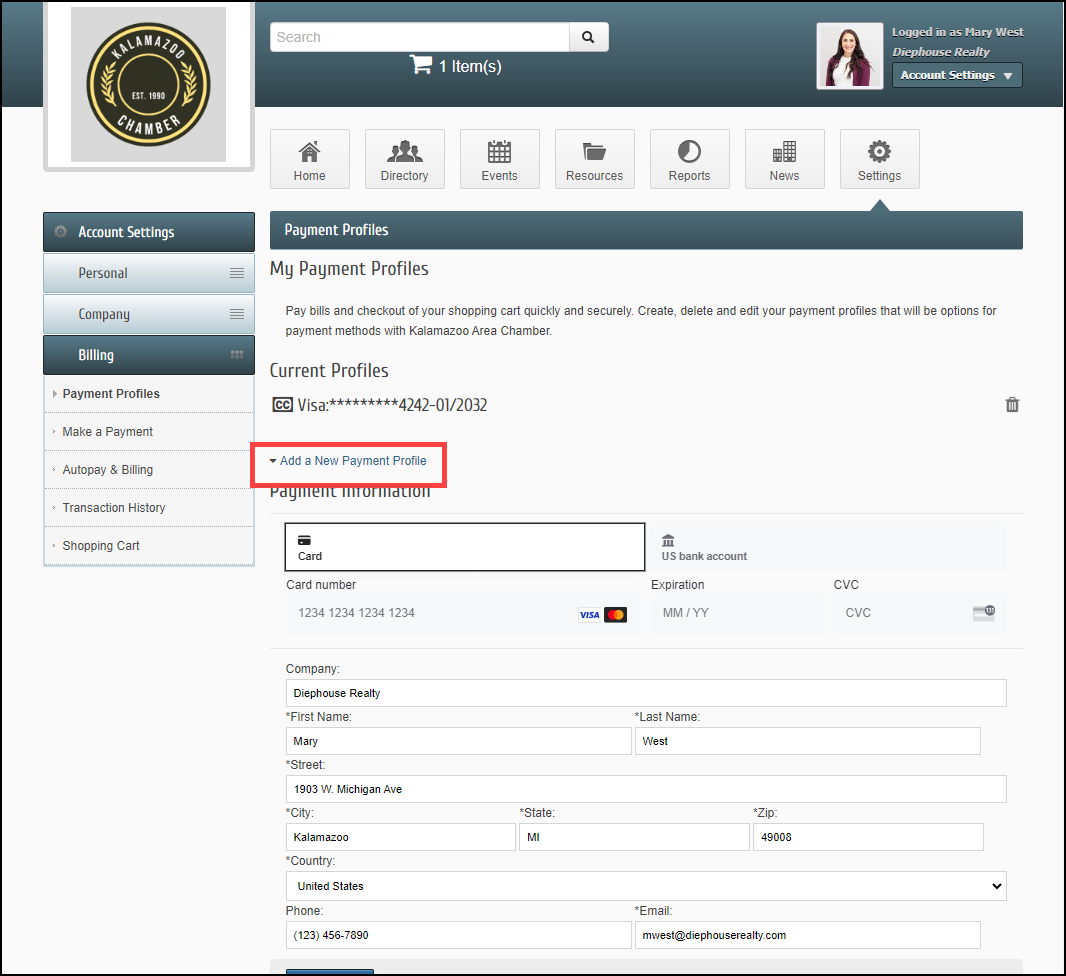
- Click Add a New Payment Profile.
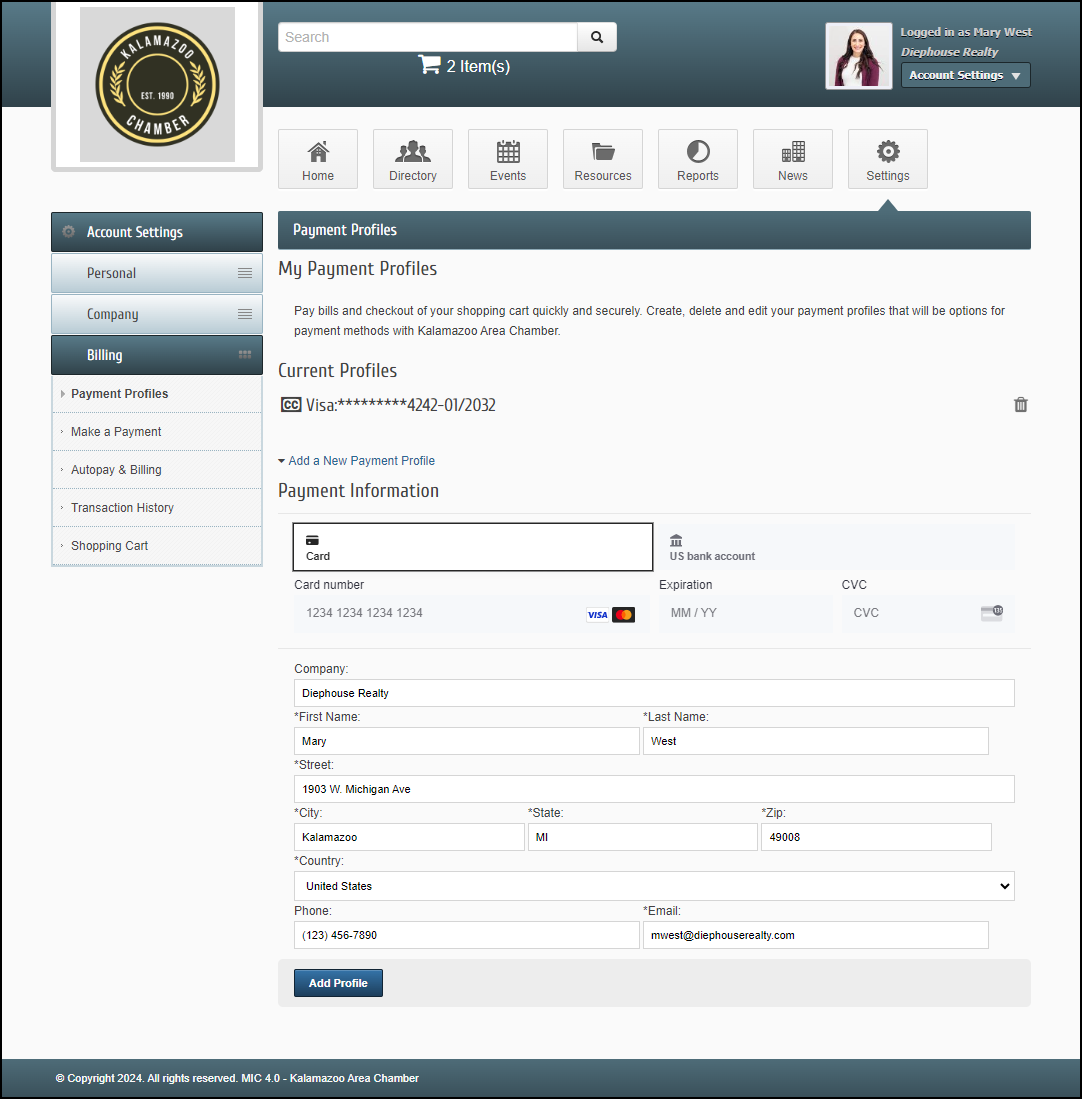
- Select Card and enter all required credit card information.
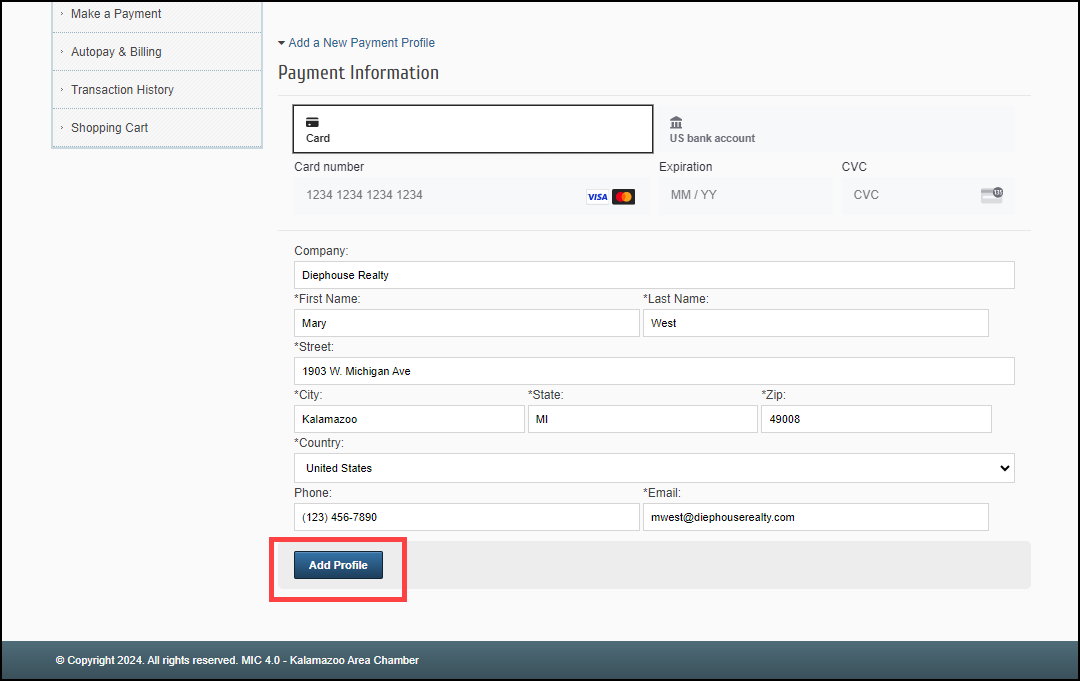
- Click Add Profile.
Storing Bank Account in the MIC
- In the MIC, click Account Settings in the upper right.
-
- Click Billing.
- In the left-hand navigation panel, click Payment Profiles.

- Click Add a New Payment Profile.
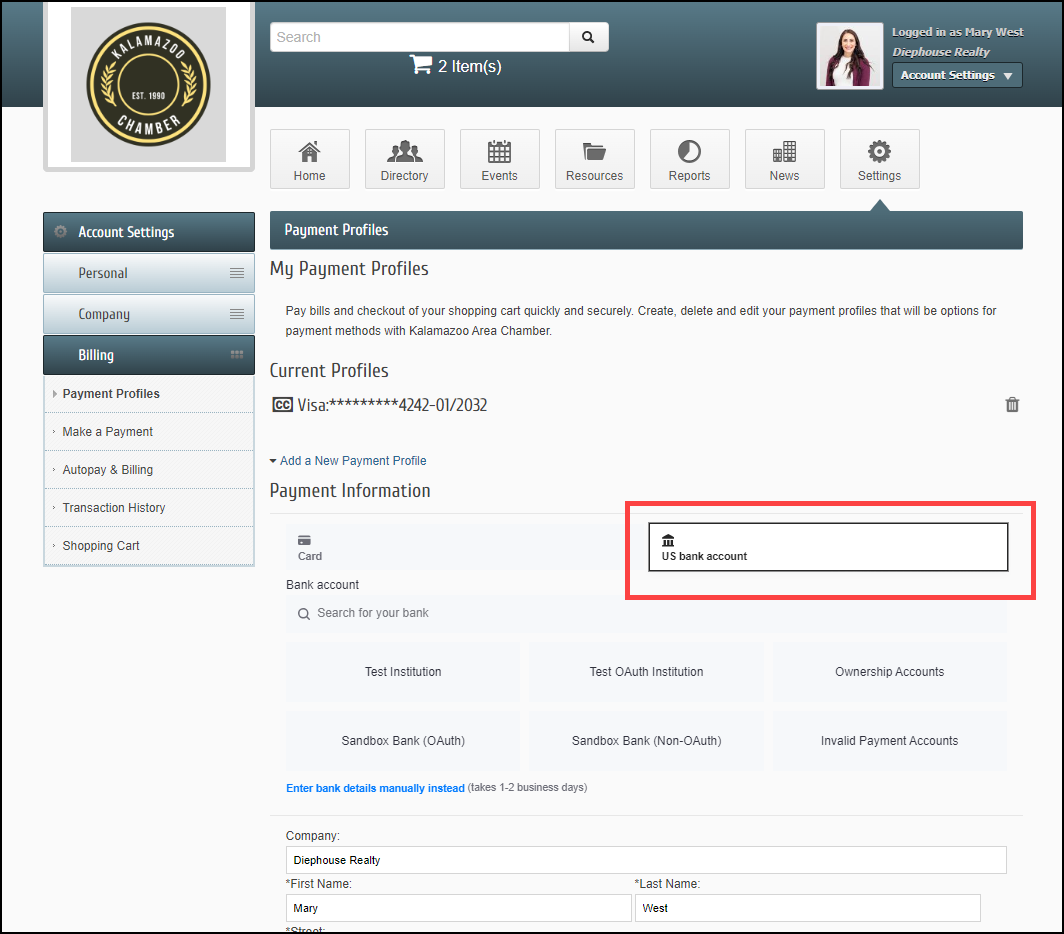
- Select US bank account.
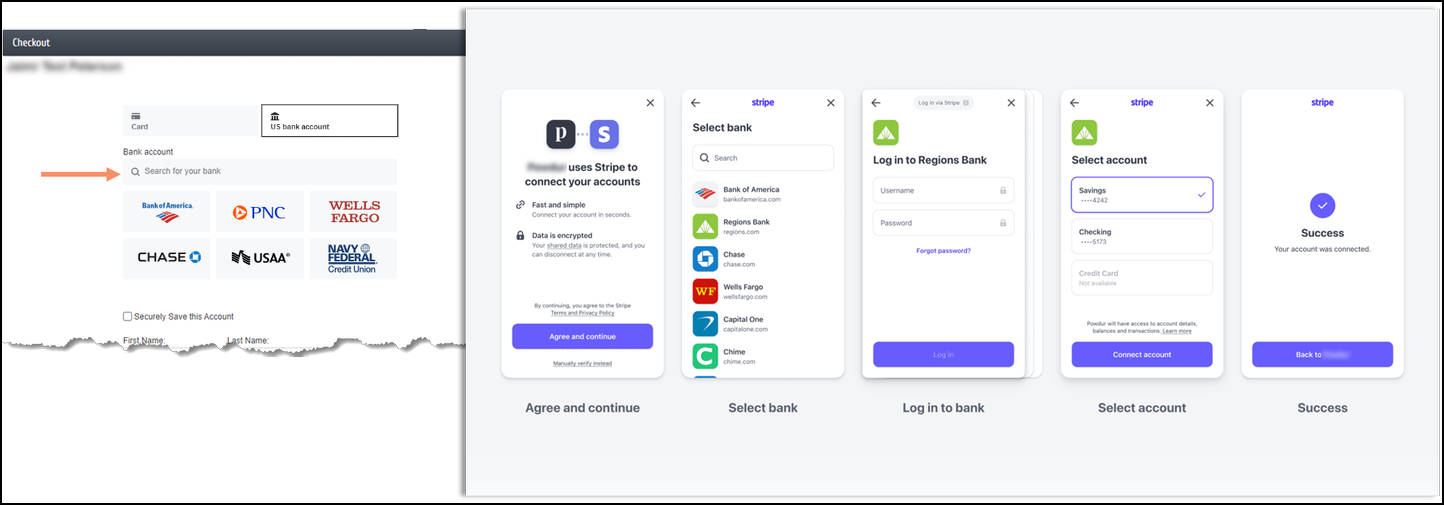
- Search for your bank and follow the prompts.
Note: For members with a bank that is unavailable through Financial Connections, bank accounts can be manually added via the MIC (Member Information Center) utilizing the 1-2 day micro-deposit account verification process. A deposit of $0.01 will be sent to your bank account with a verification code. This requires the bank account to be added and verified before it can be used during the checkout process.
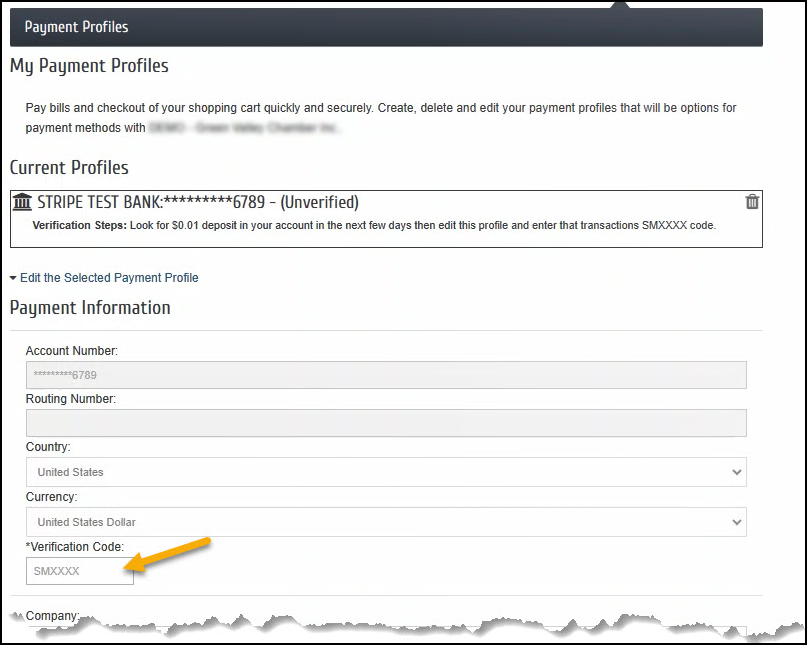
Complete Bank Account Verification
To verify the account, the member must look for two small deposits in the account. Once these deposits have been made, your member can return to complete the verification of the account.
- In the MIC, click Account Settings in the upper right.
-
- Click Billing.
- In the left-hand navigation panel, click Payment Profiles.

- Click the un-verified bank account, to expand the details.
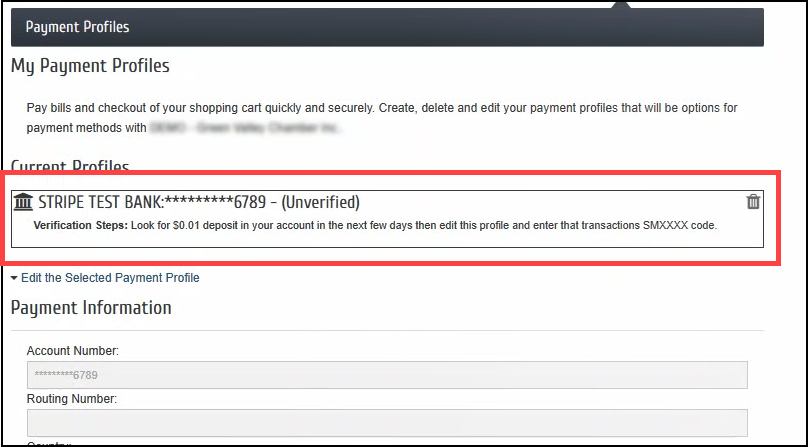
- Enter the verification code sent.
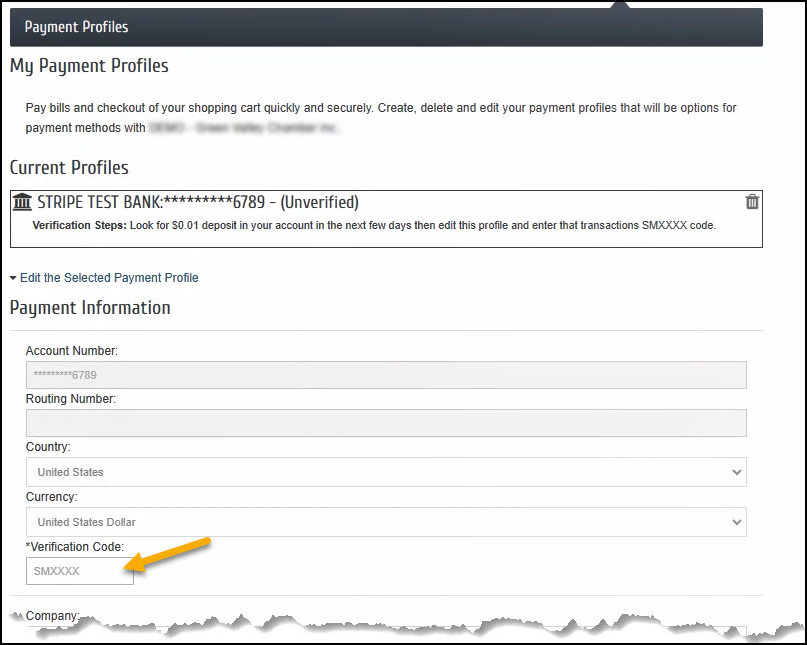
- Once the account has been verified, the bank account will be available for use.
NOTE: The ePayment Profile Report may be used to generate a list of your members who have stored bank account information, and whether the accounts are verified or unverified. See ePayment Profile Report.
Managing Autopayment
Within the MIC, members have the ability to see their stored payment profiles and change those payment profiles if necessary, including deleting a payment profile.
- In the MIC, click Account Settings in the upper right.
-
- Click Billing.
- In the left-hand navigation panel, click Payment Profiles.

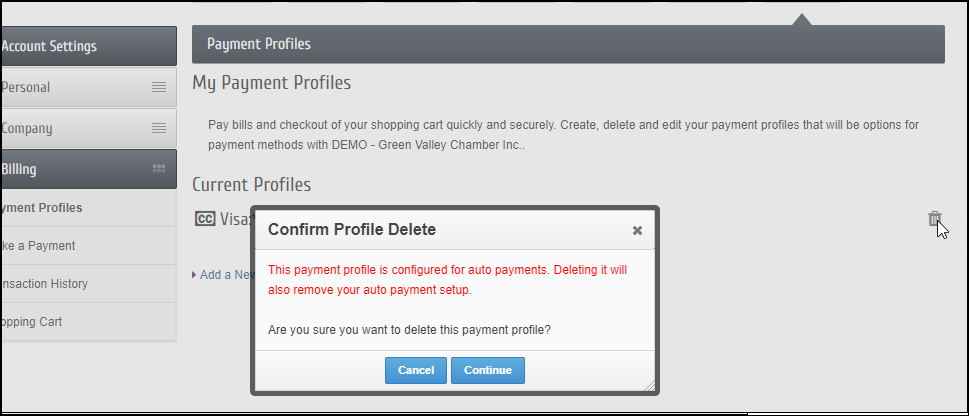
- To delete a Payment Profile, click the trashcan icon.

- Members will receive a popup message indicating this Payment Profile is configured for Autopay and will need to confirm they wish to delete this Payment Profile by selecting Continue.
- Staff will receive an email notification indicating a Payment Profile configured for Autopay has been deleted. The email address listed under Setup > Billing Options & Settings indicates which staff member will be notified. Note: if no email is selected here, the email under Setup > Association Information will be notified.


