Exporting Journal Entries for Sage 50 (UK Edition)

|
|
NOTE: Sage 50 exports will only work with Sage 50 products, and not with other Sage products such as Sage 100, Sage 300, etc. |
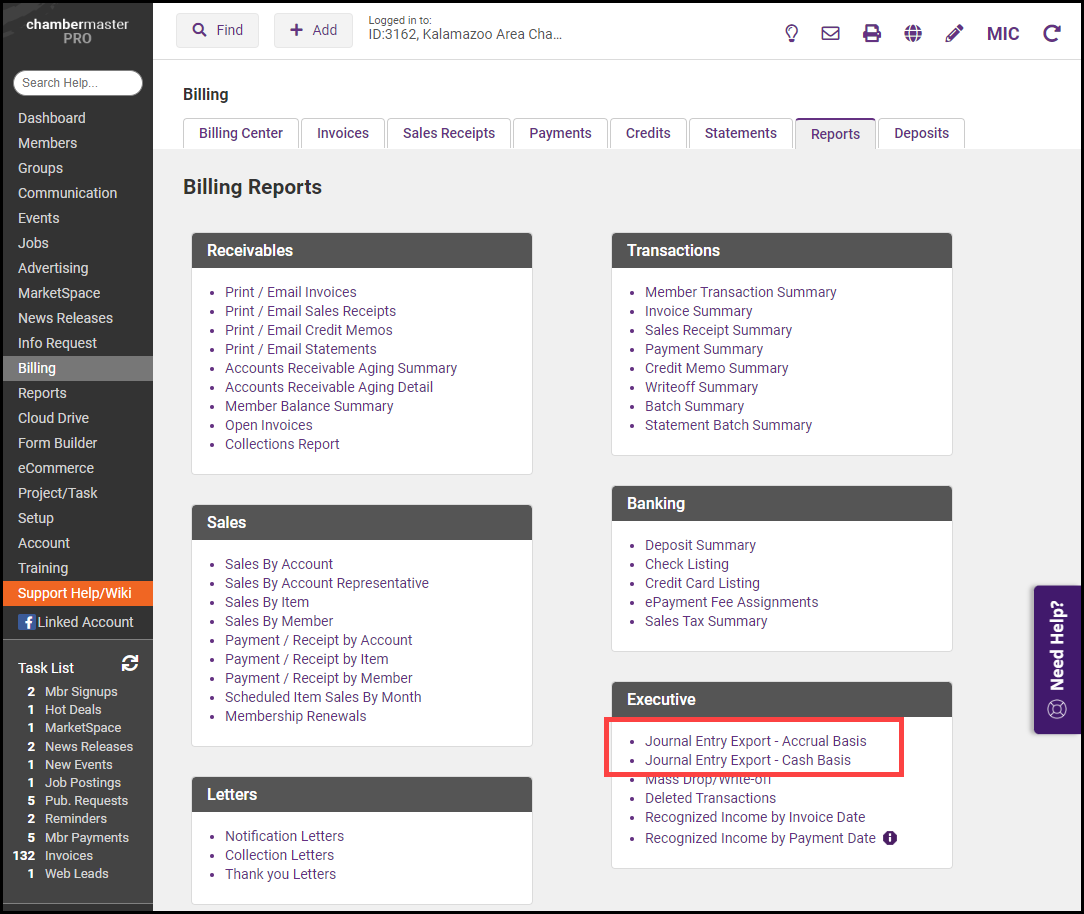
- Click Billing in the left-hand navigation panel.
- Click the Reports tab.
- Click Journal Entry Export – Accrual Basis or Journal Entry Export-Cash Basis in the Executive section.
-
Accrual Basis: will display ALL possible transactions that match the selected filter options.
-
Cash Basis: will display ONLY Payments and Receipts that match the selected filter options.
-
- Specify the desired date range in the Report From and Through fields.
- (Optional): Enable Show exported transactions if you wish to see previously exported transactions.
- (Optional): Enable Show Refunds. Refunds will not be included by default on the journal entry export for either cash or accrual basis but could be included by selecting the "Show Refunds" checkbox. The refund transaction is typically omitted from the export because the reversal is often handled in your accounting software through cutting a check or other manual reversals.
- Select Detail or Summary from the View drop-down list. If you wish to export the individual transactions for import into Sage 50, select Detail.
- Select Sage 50 (UK edition) from the Format list. NOTE: The option to select a format is only displayed if you have selected Detail above.
- Select a Deposits option:
- Exclude Deposit Transactions: If you received funds into Undeposited Funds, and then made a deposit in CM/MZ, select Exclude Deposit Transactions if you want to perform the deposit in QuickBooks. Your payments and receipts will then be displayed in the QuickBooks Banking, Make Deposits menu so you can create a lump sum deposit in QuickBooks and include other monies as well if desired.
- Show Deposit Transactions Individually: If you received funds into Undeposited Funds, and then made a deposit in CM/MZ, select Show Deposit Transactions Individually if you want this deposit brought through to QuickBooks. Your total deposit amount will be posted as a journal entry in your bank account in QuickBooks. *note - Follow-up in QuickBooks by clearing out the “in and out” transactions in the deposits screen. Select Banking, Make Deposits, and create a $0.00 deposit that includes both the positive payment amount and the negative deposit amount displayed.
- Route Directly to Deposit Accounts: If you received funds into Undeposited Funds, and then made a deposit in CM/MZ, select Route Directly to Deposit Accounts if you’d like to bypass the Undeposited Funds account and deposit directly in your bank account in QuickBooks. You will not be able to perform a deposit in QuickBooks, instead, the individual payment amounts will be posted as a journal entry on your bank account in QuickBooks and the appropriate customer account in Accounts Receivable.
- (Optional) Select an Item Type. This will allow you to filter the journal entries to a specific item type.
- (Optional) Select a Class. This will allow you to filter the journal entries to a class.
- Click Refresh Report.
- Review the Journal Entry Detail Report for any errors. Fix as needed. All entries are selected by default for export, you may de-select any entries that you do not wish to export.
- Click the Export button. The Journal Entry Export file will be downloaded. Save the file and import it to Sage 50 following Sage 50 instructions.

