
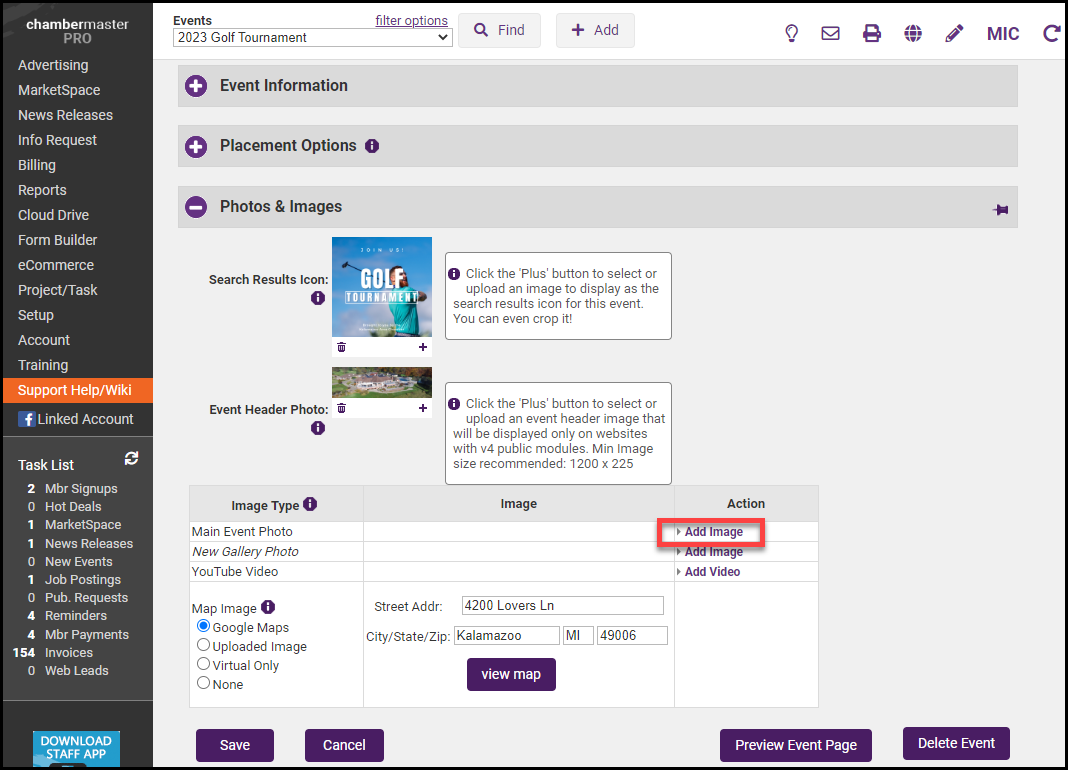
Photos, images, a map, and a video may be added to the event page. One photo may be added as a Main Event photo that is automatically positioned within the event description area, and/or multiple photos may be included in the Photo Gallery which displays in thumbnail size at the bottom of the event page but will be enlarged when a consumer clicks the image. Images are automatically resized to accommodate the space allowed. Images must be .jpg or .gif.

Add a Search Results Icon
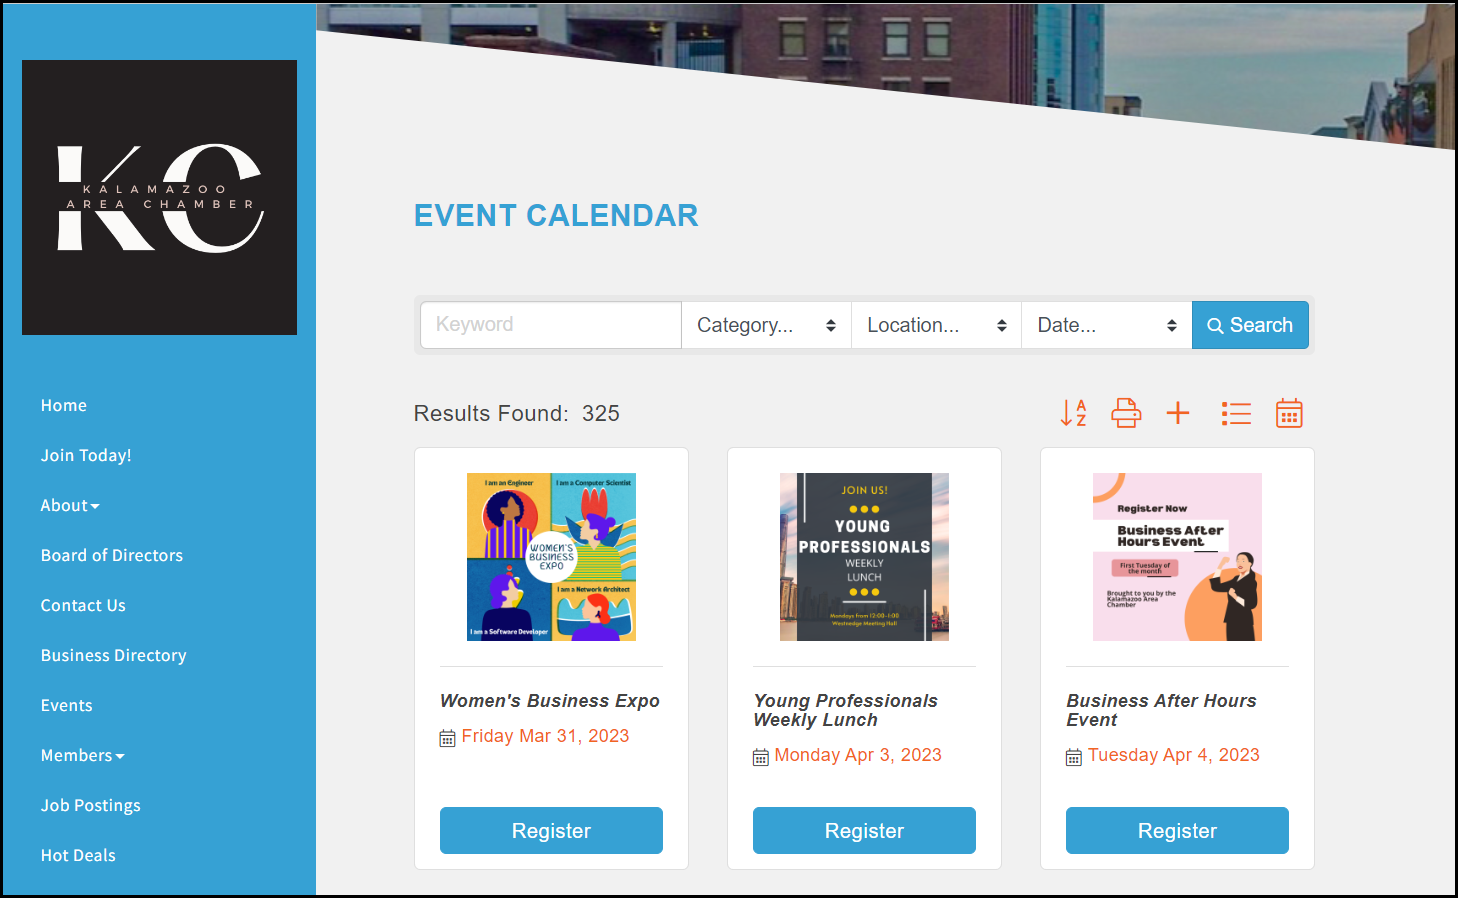
The Search Results Icons appear for visitors viewing/searching your public Event Calendar on your website. These images also display in a smaller size when the Event Page is selected.
- Select the General tab for the event.
- In the Photos & Images section, select the plus icon in the Search Result Icon section.

- Click an existing file, or click Upload to navigate to the desired file.
- Click Select.
- Crop the image if needed.
- Click Crop & Save.
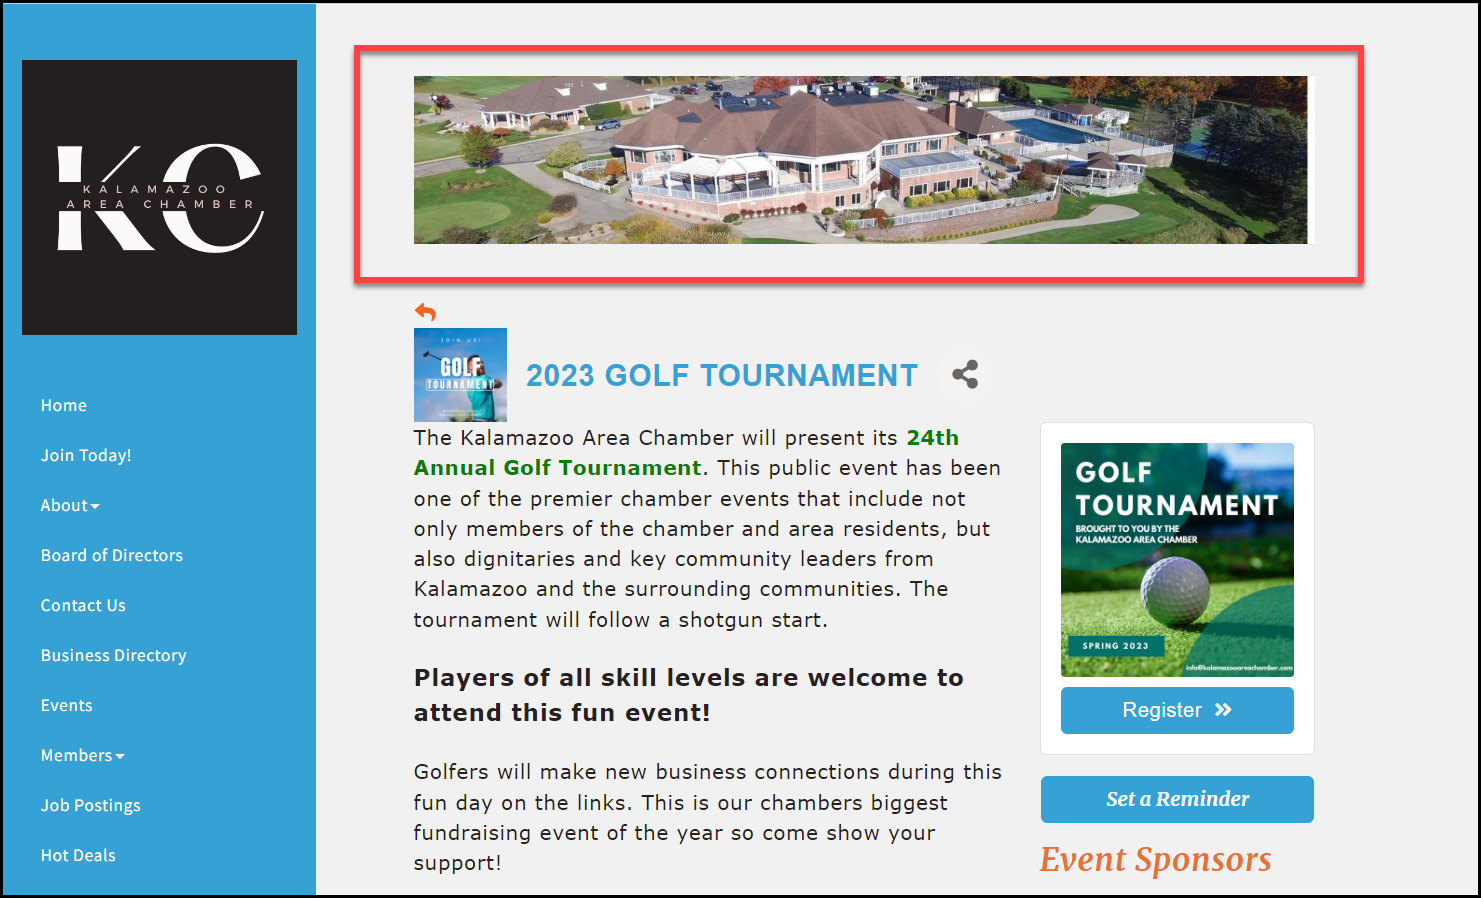
One of the first things visitors to your event page will notice is the header. Grab their attention with a splashy header that will make them want to learn more.
- Select the General tab for the event.
- In the Photos & Images section, select the plus icon in the Event Head Photo section.

- Click an existing file, or click Upload to navigate to the desired file.
- Click Select.
- Crop the image if needed.
- Click Crop & Save.
|
|
NOTE: For best results, upload an image that is a minimum of 1200 x 225. A larger image will be downsized appropriately but will maintain the aspect ratio so as not to distort the image. A smaller image will not be increased to avoid distortion. |
- Select the General tab for the event.
- In the Photos & Images section, select Add Image next to the Main Event Photo area.
- Select Choose File to navigate to the desired file on your device.
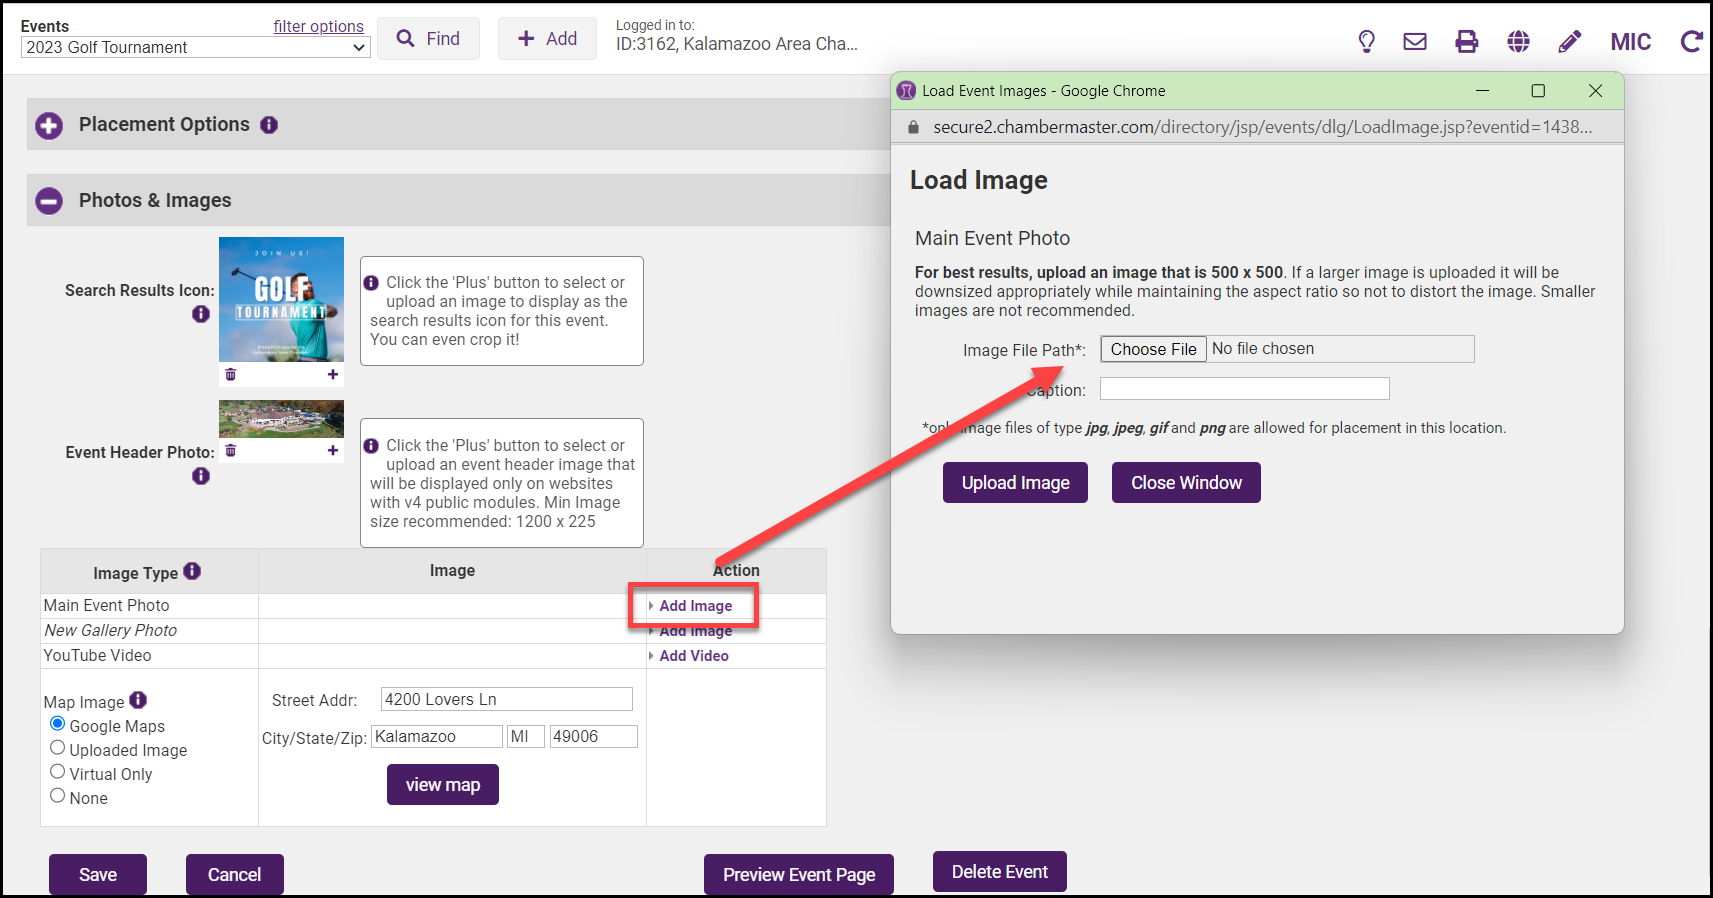
- Click Select and then Upload Image.
- Once the image appears in the Load Image pop-up window, you may add a caption to the image.
- Select Close Window.
- To remove or change the Main Event Photo, select Change Image or Remove Image.
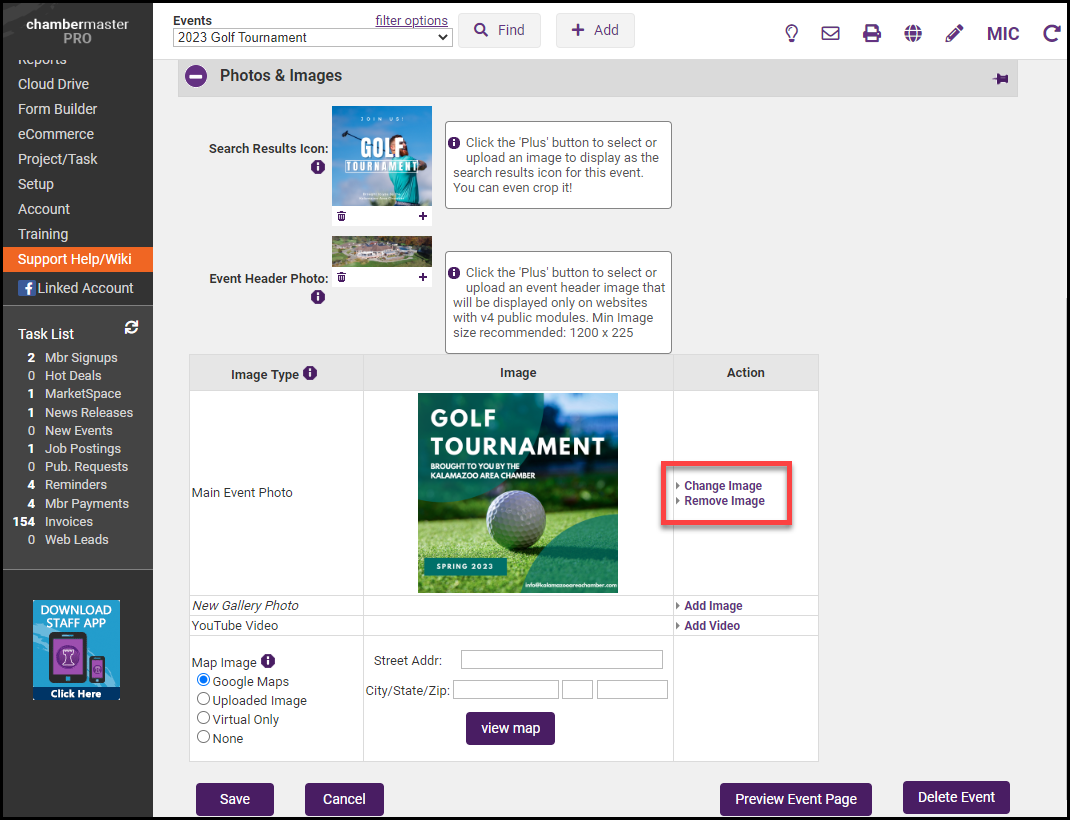
NOTE: Only one Main Event photo may be added which is automatically positioned within the event description area. However, Gallery Photos may contain multiple images which display in thumbnail size at the bottom of the event page but will be enlarged when a consumer clicks the image. Photos may also be added to the Event Description. Click Add/Edit Image while editing the description text.
|
|
NOTE: If you are auto-posting your events to Facebook, must be 500 x 500 for Facebook to pull in the auto-post. |

