Add New Benefit Items

When you create Benefit Packages, any active Benefit Items will be available to add to the package. When a Benefit Item has been created, it is available for selection in all of your benefit packages, not just the one within which you created it.
-
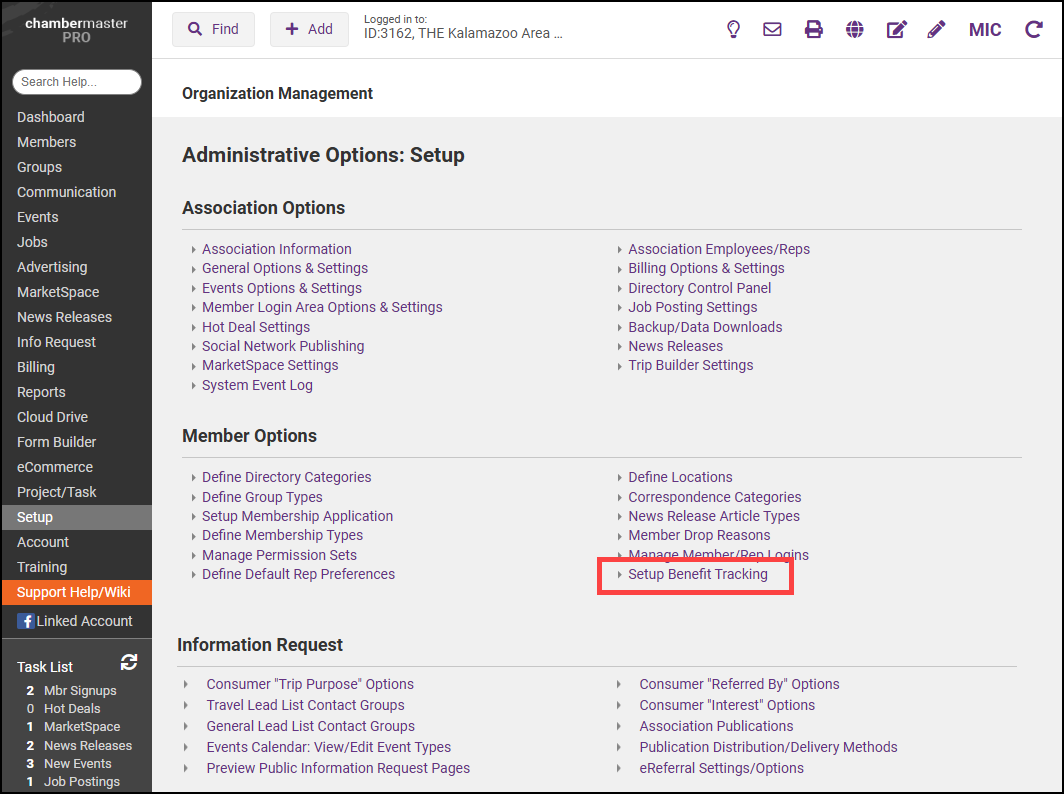
Click Setup in the left-hand navigation panel.
-
Click Setup Benefit Tracking in the Member Options section.
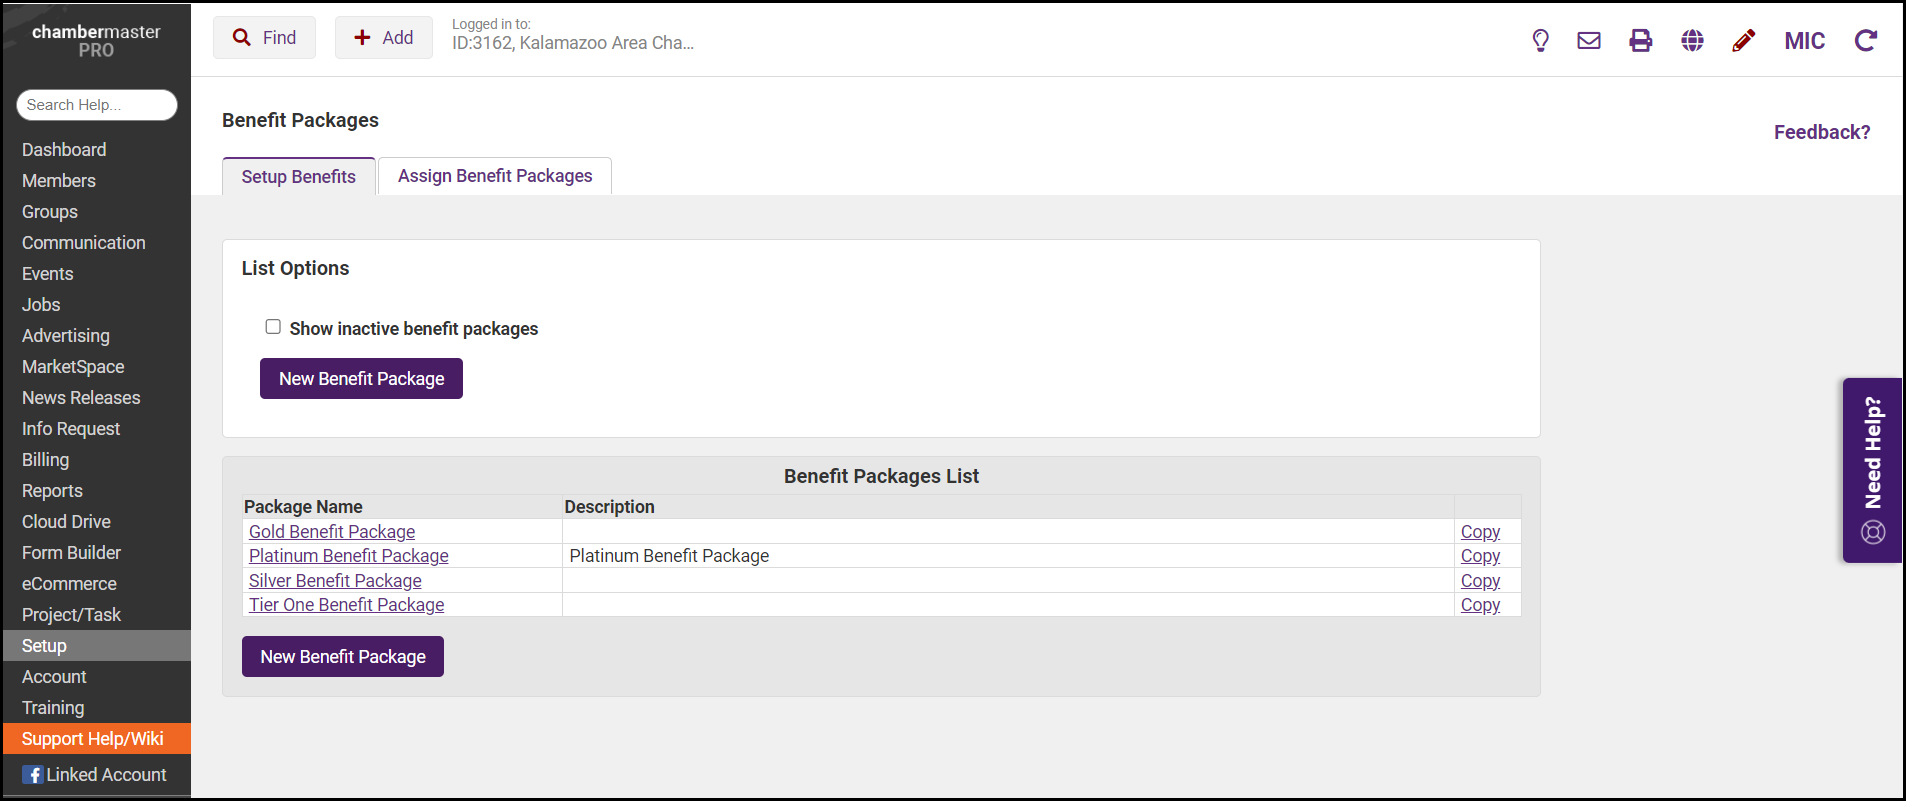
- Click the Benefit Package to which you wish to add the new Benefit Item.
-
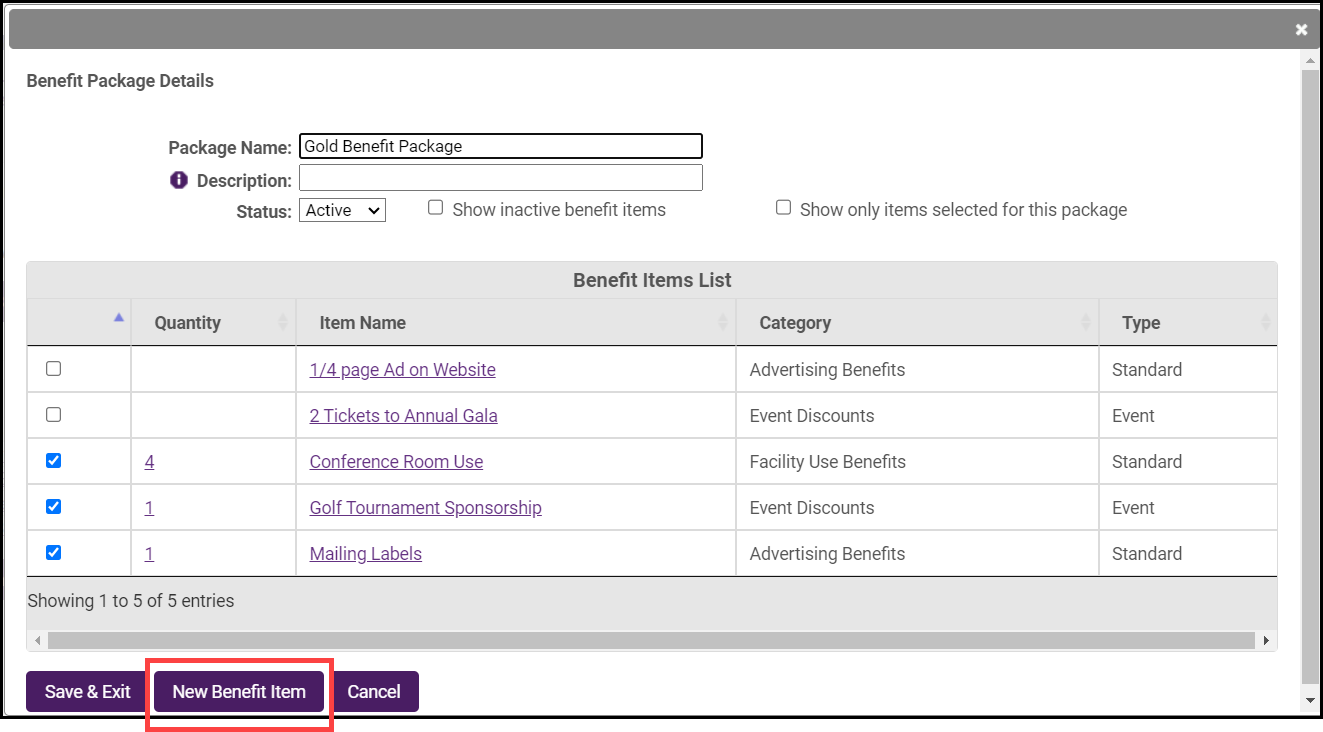
Click New Benefit Item.
- Enter the details for the Benefit Item.
- Enter a Name for the benefit item. This name will be displayed to the member when indicating what benefit items are used/available.
- Select a Category for this benefit item. Categories are a way by which you will be able to report on the various benefit items. It will help in presenting a summarized view of used/available (75% of Facility Use Benefits have been used, 50% of Event Discounts, 80% of Advertising Benefits used, etc.). Default Categories are been seeded into the system: Advertising Benefits, Event Discounts, Facility Use Benefits, and Other Money-Saving Benefits. You can add additional categories by clicking the Manage Categories link.
- Select the Benefit Type.
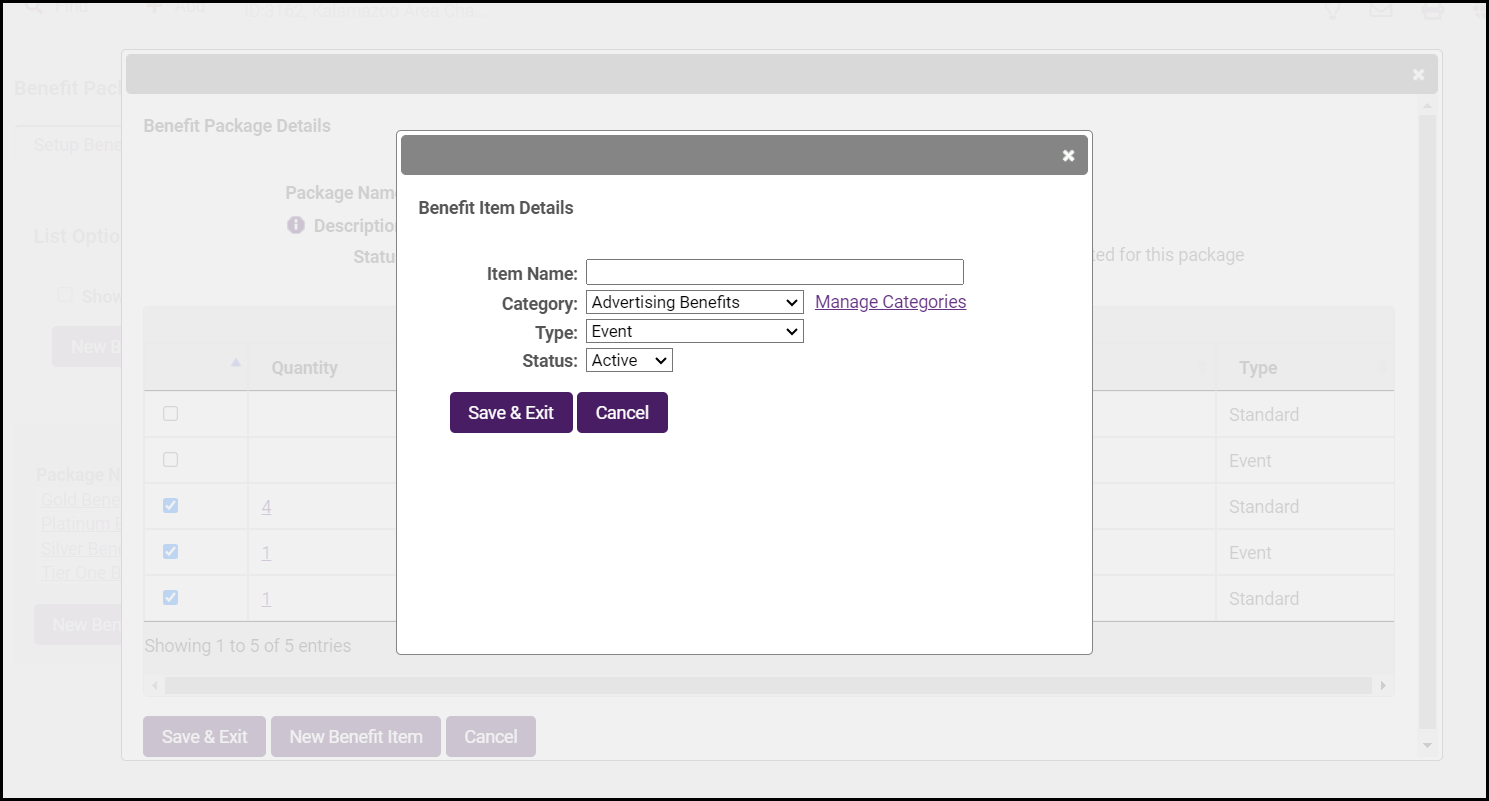
- Click Save & Exit. Additional Benefit Items can be added by repeating this process.

