
Customers with GrowthZone Pay can automatically charge recurring ePayment fee assignments on a specific day of the month - all without having to log in or even click a button. To get started, see Enable Autopay of Payment Profiles.
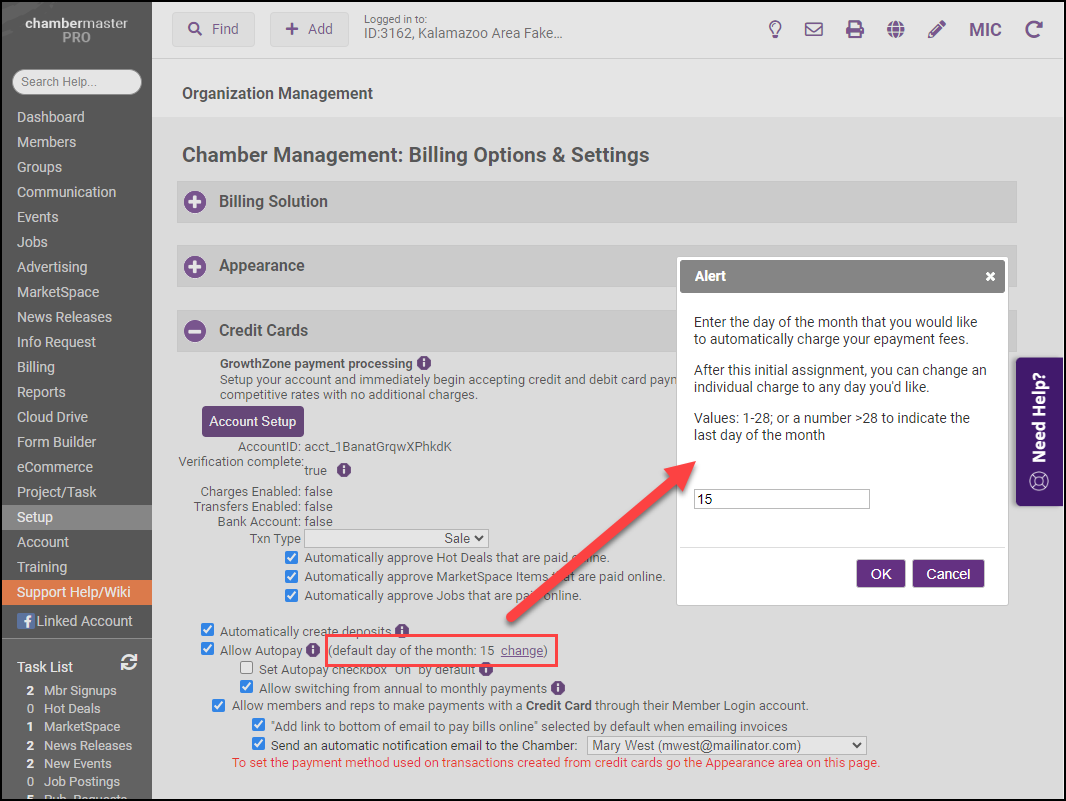
With this option enabled, you'll be asked to select the desired day of the month that you would like to have the charges automatically run. Select a default but then feel free to assign a unique day of the month on an individual basis. On the specified day, typically between 1 am and 5 am CST, charges will be processed against the stored Payment Profiles, and emails will be sent to the customer and your staff.
NOTE: Entering a number greater than 28 indicates the last day of the month, whatever that may be.
After payment has been automatically charged, a batch will be created and can be viewed in the Batch Summary found on the Billing > Reports tab. No more intervention is needed on your part – the charges will occur on that selected day just as if you had manually run the batch yourself.
Enabling Autopay will also automatically include the option for applicants to opt-in to Autopay when filling out the Membership Application, as well as paying for an existing recurring payment (such as a renewal).
- GrowthZone Pay must be set as your payment processor
- You must have no members set up with Manual ePayment assignments. Run the ePayment Fee Assignment Report and filter to ePayment Type = Manual to check if you have any manual fee assignments.
- A Bank Deposit Account must be assigned under Setup > Billing Options & Settings > Billing Solution.
|
|
NOTE: When you enable Autopay ALL members that you have set up for Autopay will be charged automatically. It is not possible to enable Autopay for some members and generate epayment batches manually for others. |
- Click Setup in the left-hand navigation panel.
- Click Billing Options & Settings in the Association Options section.
- Expand the Credit Cards section.
- Select Allow Autopay under the Credit Cards section.
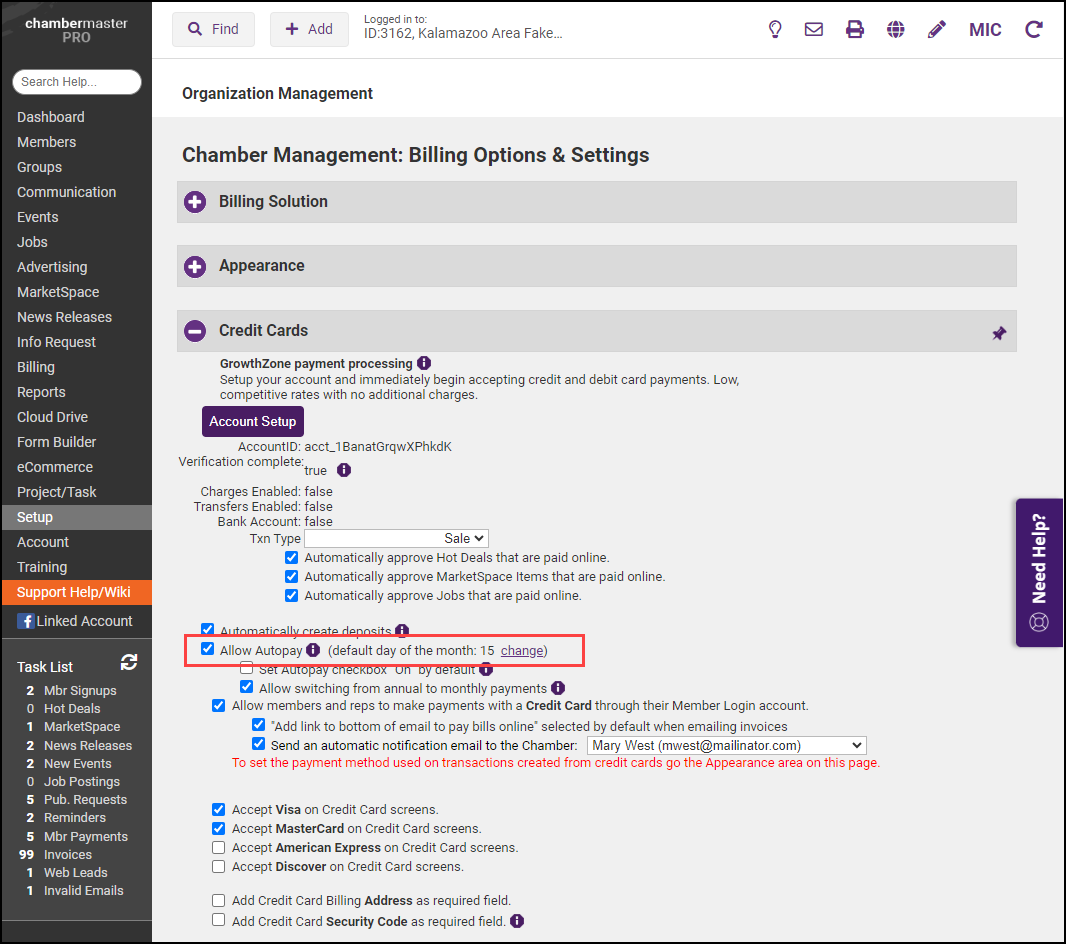
- Enter a number for the day of the month you would like your charges to occur. Setting this number places this value on all epayments that are currently assigned. It also will be the default value for any new assignments added to members later on.
- Double-check the default settings configured for Payment Terms, Messaging, and A/R Account under Setup > Billing Control Panel. These are the settings that will be used to create the invoice when the Autopay occurs. These should already be correct because they are already used as your defaults.
- Click Save.
See GrowthZone Pay Initial Setup for more information.
|
|
NOTE:
|
You can view the upcoming Autopay charges by clicking Invoices in the Task List.
- Click the view this month's auto-charges link in the Actions column.

- On the ePayment Fee Assignment screen, filters will be set to the month displayed in the Assigned Fees for the list shown on the Uncreated Invoices screen. You can change the filtering options as needed.
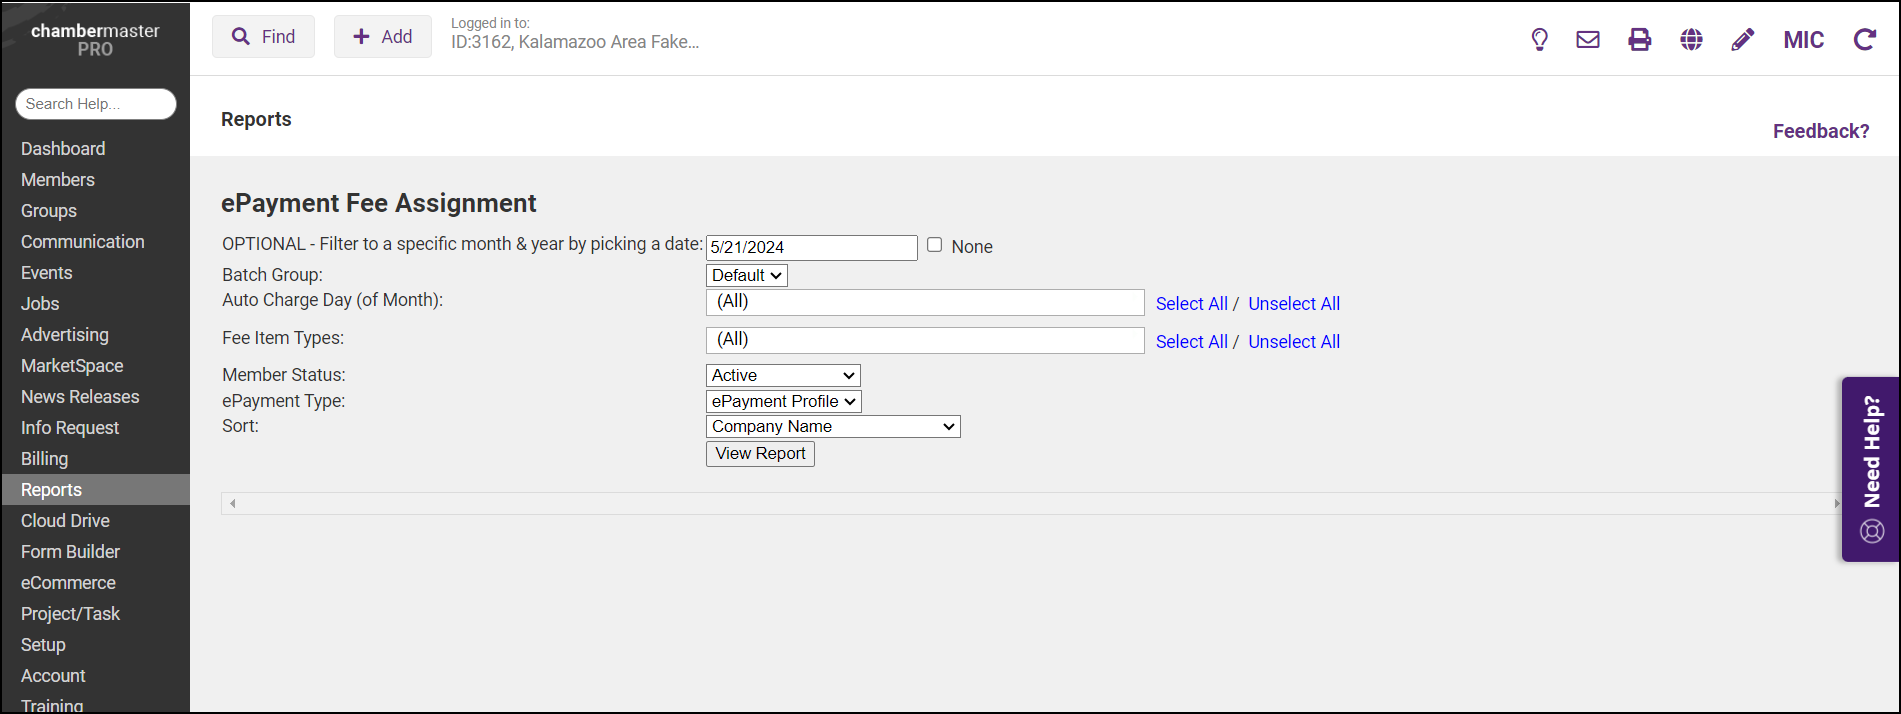
- Click Refresh Report.
ePayment Autopay Reporting
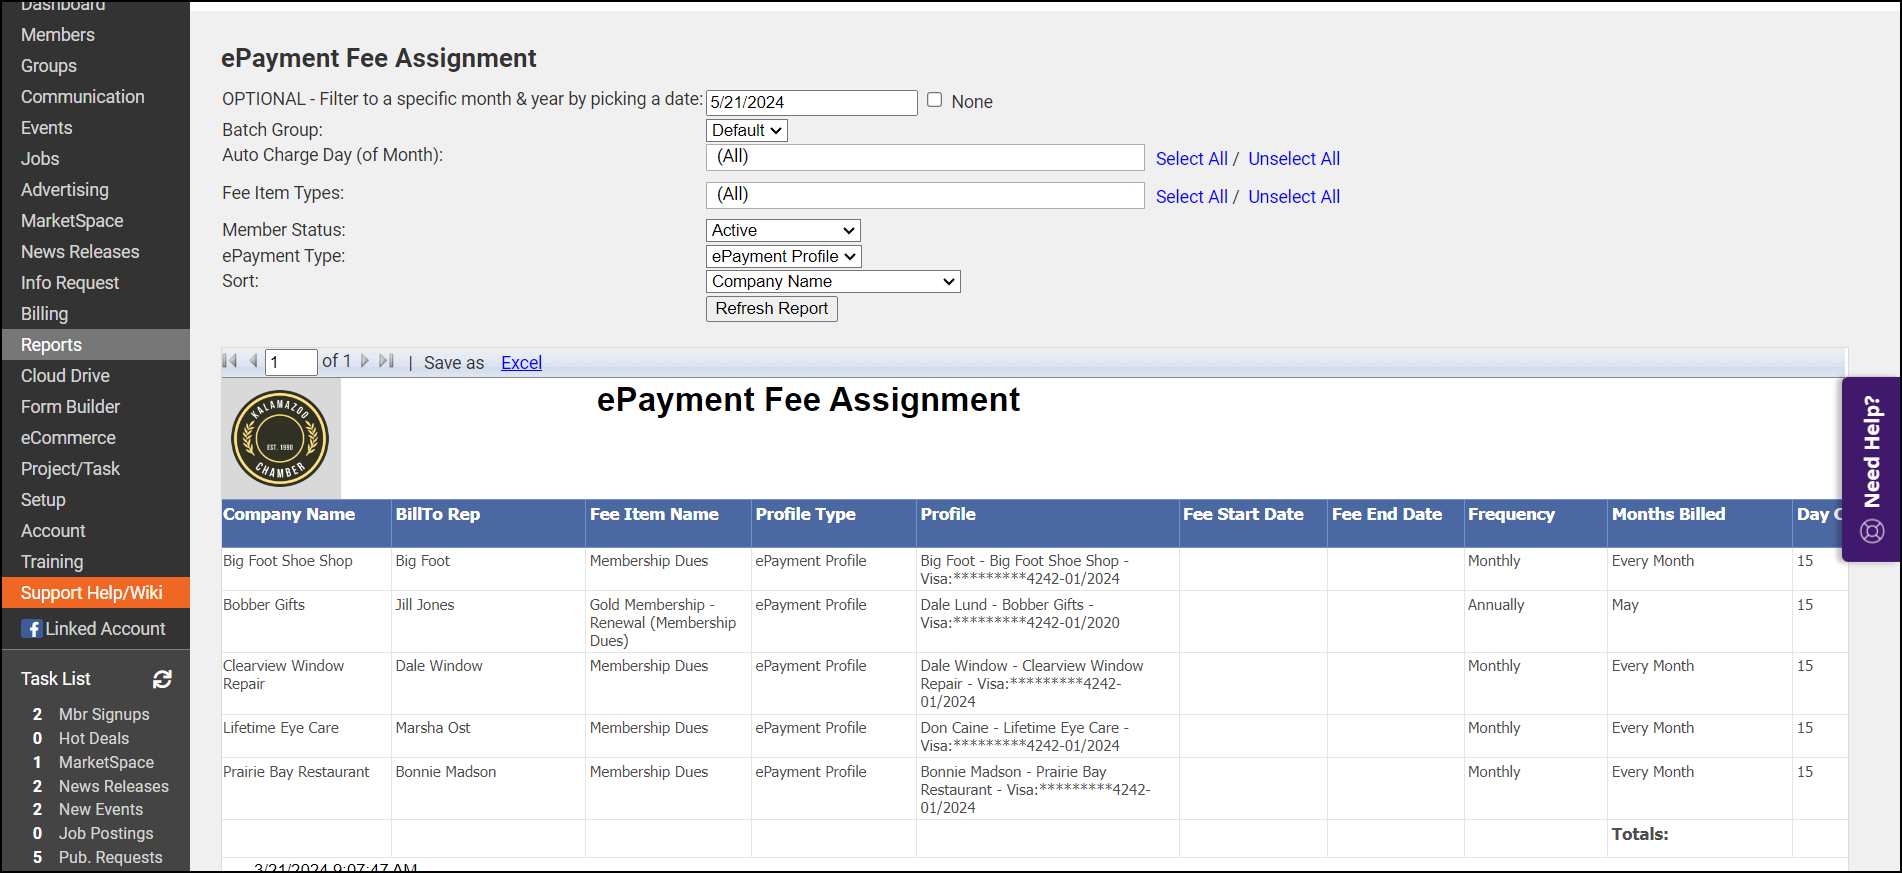
The ePayment Fee Assignment report can be used to view what days the payments are scheduled to run.
The Automated ePayment Transactions Report can be used to view the success or failure of ePayment processing.
After an ePayment has been paid, a batch will be created and can be viewed in the Batch Summary found on the Billing > Reports tab. You can view the details of any batch from here.

