Manage Member Custom Fields

Custom Fields are designed to give ultimate flexibility in managing your data. When adding a custom field, you will create a database field that is available across all member records for tracking additional desired information. Custom Member fields are used in the following manner:
- Are viewed on each member's record.
- Are included as fields on a custom report.
- Are included in the download from a custom report.
- Are used to filter the records in the Members module.
- Are included in the Membership Application
- Are made available to members to view and/or modify within the Member Information Center (v4 only)
- It May be included as a search filter within the member directory within the Member Information Center (v4 only)
Note: Additional custom fields may also be created to use for individual representatives, event registrations, and within your groups.
Custom Field Types
- Text: Displays a field where text can be entered. Maximum size: 8000 characters
- Boolean (True/False): Displays a check box that can be selected or cleared.
- Date/Time: Displays a field where a date can be entered in many formats i.e. 9-7-06, 9-7-06, Sep 7 2006, Sep 7 06, 9/7/06 but once saved, will always display in the following format: 09/07/2006
- Number - Integer: Displays a field where whole numbers may be entered. Maximum size: 10 whole numbers
- Number - Decimal: Displays a field where numbers with up to 2 decimal values may be entered. Maximum size: 14 whole numbers, 2 decimal values
- Drop Down List: Displays your designated list of options that may be selected.
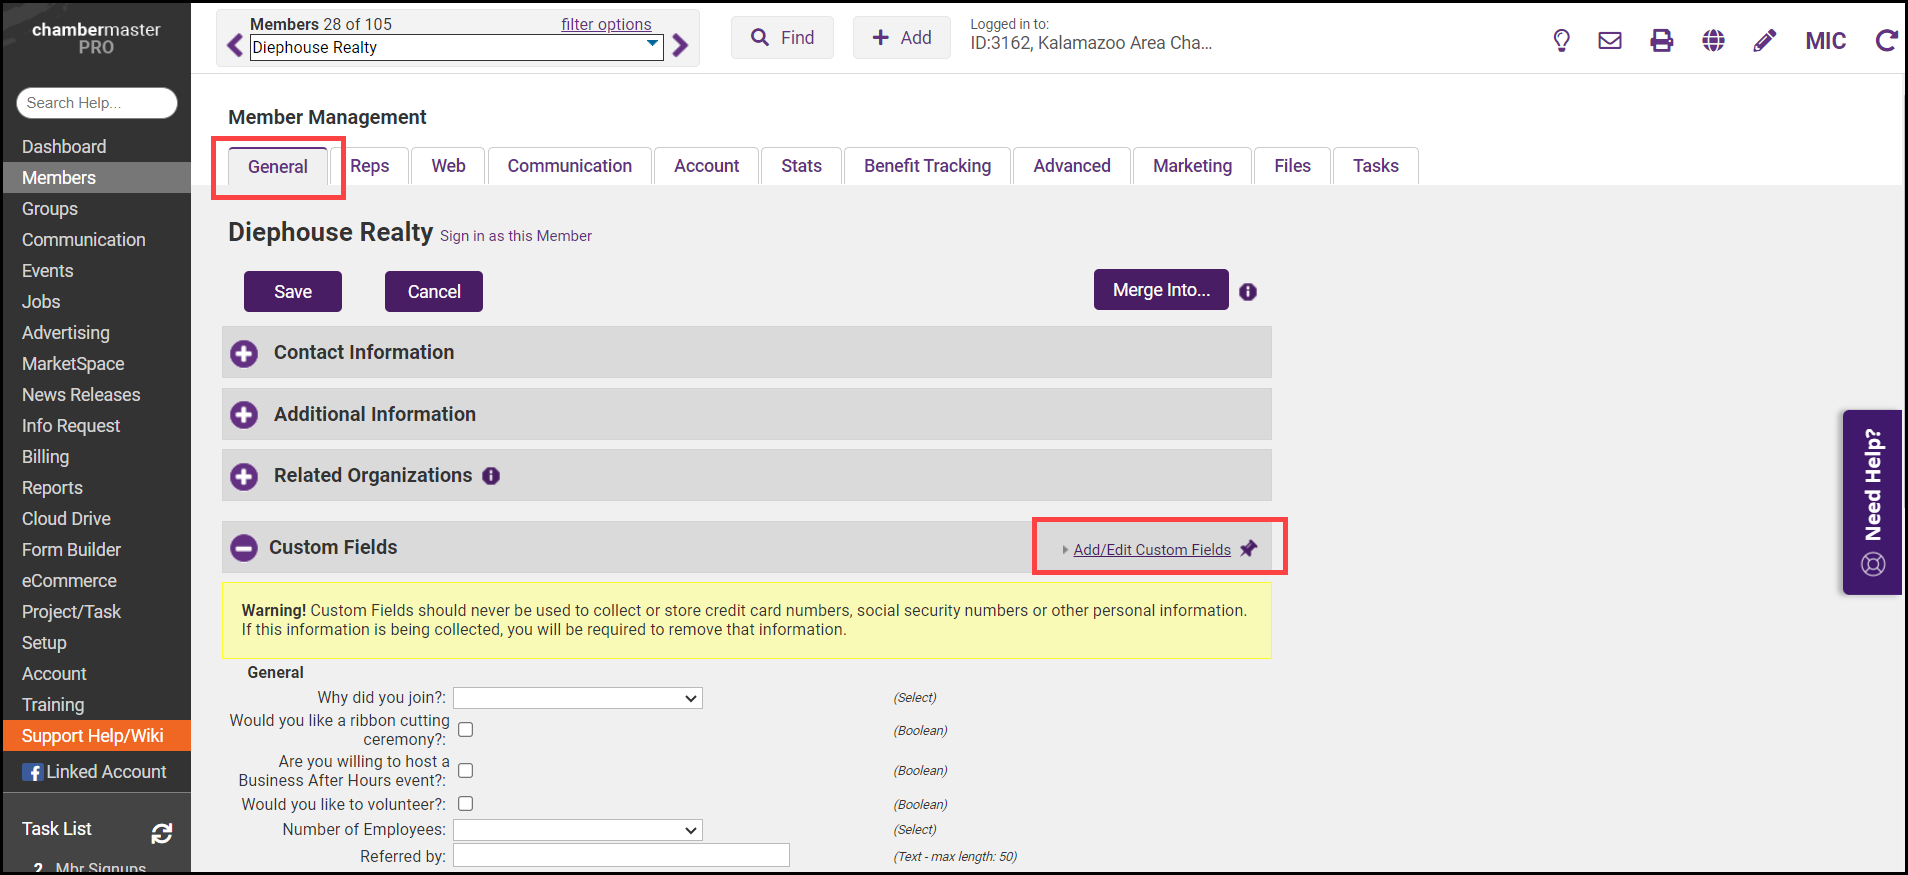
- On the member's General tab click Add/Edit Custom Fields in the Custom Fields area.
-
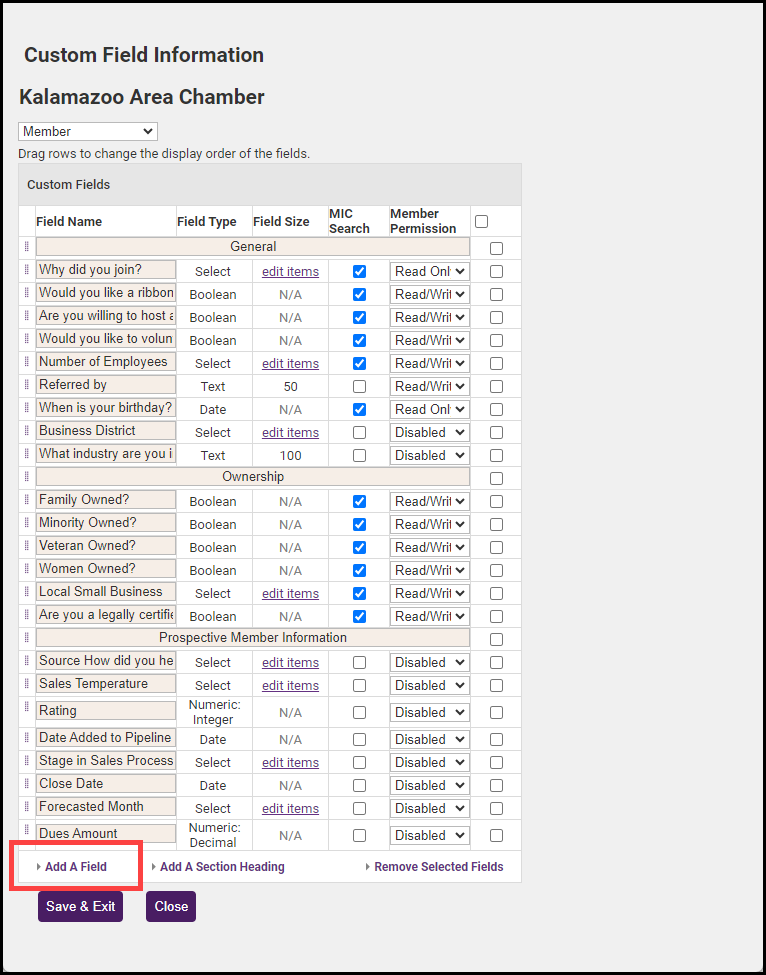
Click Add a Field.
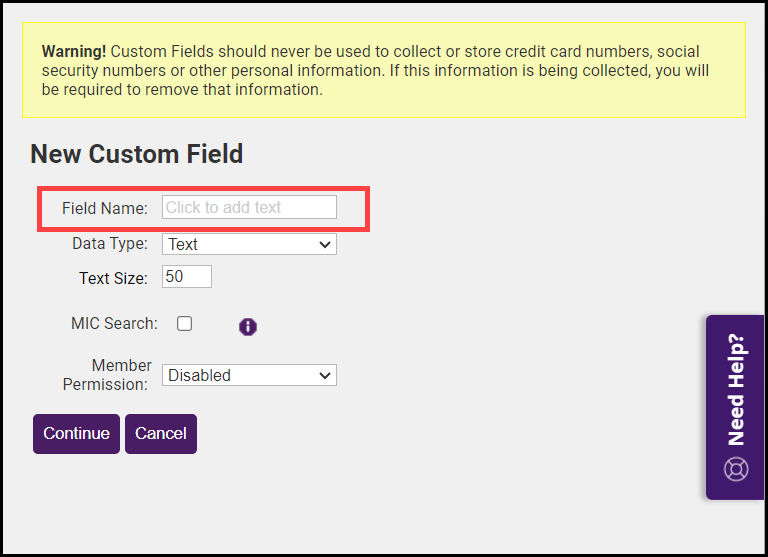
- In the New Custom Field window, enter the desired Field Name (Maximum characters: 128).
-
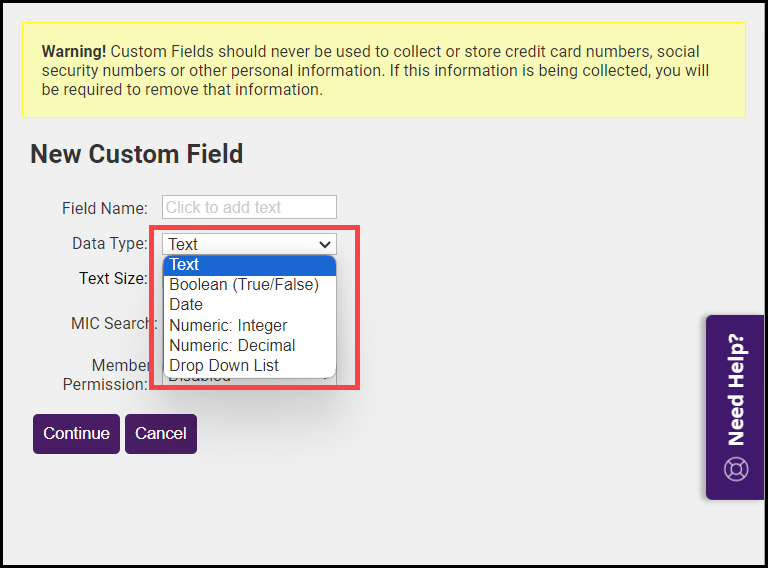
Select how you would like to collect the data using the Data Type dropdown menu.
- If the selected data type is Text, enter the desired Text Size.
- If the selected data type is Drop Down List, enter the desired list of items.
- Click Continue.
- Click Save & Exit. If you have a large number of custom fields, you can then create section headers to organize them.
- On the member's General tab, click Add/Edit Custom Fields in the Custom Fields area.
- Click the check box at the end of the row of the Field Name that you wish to remove.
- Click Remove Selected Fields.
- Click Save & Exit.
NOTE: Removing a custom field will also remove all data collected from that custom field. Use caution when deleting custom fields.
- On the member's General tab, click Add/Edit Custom Fields in the Custom Fields area.
- Click on the text of the Field Name.
- Make the desired field name change.
- Click Save & Exit.
- On the member's General tab, click Add/Edit Custom Fields in the Custom Fields area.
- Click and drag the field to the desired location.
- Click Save & Exit.

