The Billing Options & Settings allow you to establish defaults for such things as the number of days ahead of the renewal month you wish the Task List to notify you that invoices need to be created, default invoice and statement templates you wish to use, credit card processing/manual e-payment settings, etc.
- Click Setup in the navigation panel.
- Click Billing Options & Settings in the Billing Section.
-
-
Billing Solution: Configure the following as applicable:
-
Default member record where non-member invoices/receipts will be assigned for purchases: Select the member record to which invoices for non-members will be attached. This is used in instances where a non-member makes a payment (perhaps registering for an event). The system needs a record on which to log those invoices.
-
# of months to look ahead for task list invoice count: Enter the number of months in advance that you wish to create your membership renewal invoices. This setting will then trigger the task list to display the invoices pending for that period.
-
Sales Tax Rate: Select the default sales tax rate to be used.
-
Payment Deposit Account: Select the default deposit account to be used when receiving payments or processing sales receipts.
-
Bank Deposit Account: Select the default deposit account to be used when depositing funds.
-
Quick Books Online: If you are using QuickBooks online, click on the QuickBooks Online Connection button. Enter your QuickBooks online login information and say yes to the connections.
-
-
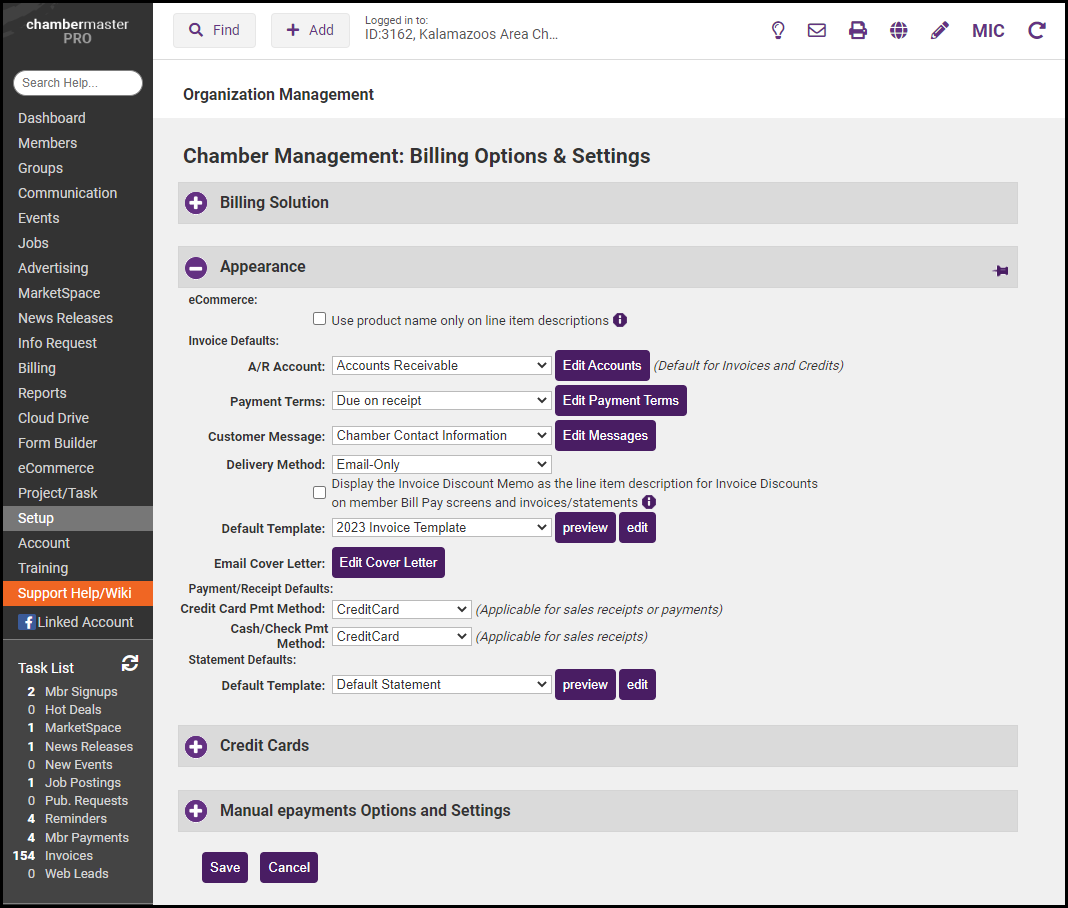
Appearance: Configure the following as applicable:
-
A/R Account: Select the A/R account to be used by default. NOTE: If you are using multiple A/R Accounts be sure to select the A/R Account that is used for event invoicing. This way, any auto-generated invoices will report to the proper A/R Account. You may edit (or add new accounts) by clicking the Edit Account button.
-
Payment Terms: Select the payment terms that you wish to use by default. You will be able to override these terms as needed when creating an invoice, best practice is to select the terms that you use the most frequently. You can add or edit terms by clicking the Edit Payment Terms button.
-
Customer Message: Select or create a Customer Message that will be included on your invoices by default. When you are creating invoices, you will be able to select the message you wish to apply from a drop-down list.
-
Delivery Method: Select your preferred delivery method for invoices. You will have the ability to override this option when delivering invoices. It's best practice to select the method that you use the majority of the time.
-
Display the Invoice Discount Memo as the line item description for Invoice Discounts on member Bill Pay screens and invoices/statements: If this setting is enabled, the Memo field (your custom message) will be displayed to members when they view a Discount line item on their invoices, statements, on their Bill Pay screen or in their Transaction History. When this setting is off, Discount line items will display the word "Discount" in member-facing locations. NOTE: The Memo field is available when creating/editing an Invoice Discount. For instance, when editing an Invoice that has a remaining balance, click Add a Discount. The next window has a Memo field where you can make comments or notes about the purpose and reason for a discount.
-
Default Template: Select the invoice template you want the system to use by default. You will have the ability to override the template when creating invoices as needed. It's best practice to select the template that you use most frequently.
-
Email Cover Letter: Create or edit the email template that you wish to use, by default, when delivering your invoices (email). You will have the ability to override the cover letter when delivering invoices. It's best practice to select the cover letter that you use the most frequently.
-

-
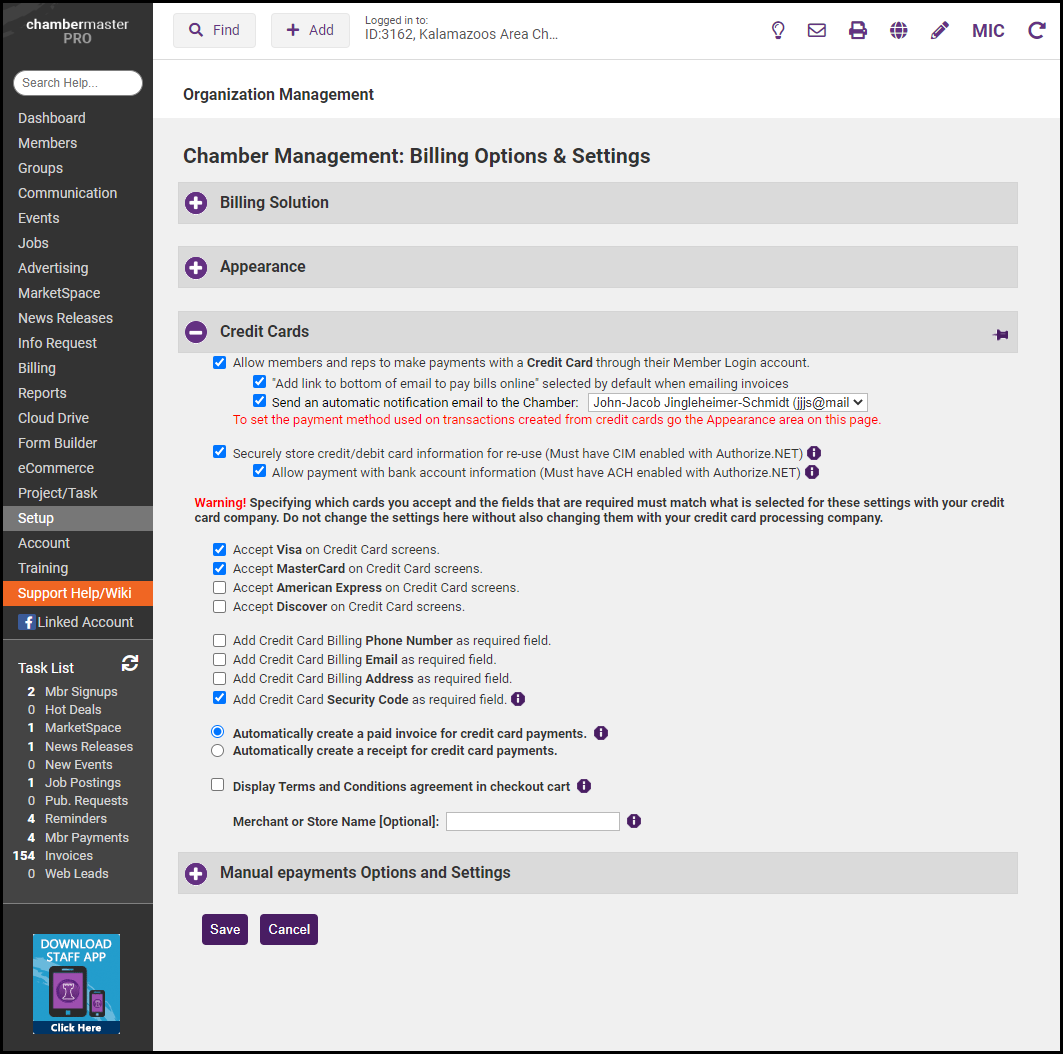
Credit Cards: GrowthZone will assist you with the initial setup of the credit card processing.
-
Automatically create deposits (GrowthZone Pay only): If this setting is enabled, when deposits are made to your bank account a matching deposit will be made in the database. This will make it easier for you to reconcile your credit cards.
-
Allow Autopay: Automatically charge recurring epayment fee assignments (stored credit/debit/bank accounts) on a specific day of the month - all without having to log in or even click a button. When enabling, you'll be asked to select the desired day of the month you'd like to have the charges automatically run. Select a default but then feel free to assign a unique day of the month on an individual basis. No more intervention is needed on your part – the charges will occur on that selected day just as if you had manually run the batch yourself. See Set Up Autopay of Payment Profiles for further details.
-
Allow switching from annual to monthly payments: Enable this option if you want new and existing members to have the ability to switch from Annual to Monthly billing. See Enable Switching from Annual to Monthly Payments.
-
Allow members and reps to make payments with a Credit Card through their Member Login account: Enable this option if you would like members to be able to make payments via the MIC.
-
Add link to bottom of email to pay bills online: Enable this option to make it easy for your members to pay invoices by clicking on the payment link in the email.
-
Send an automatic notification email to the Chamber: Enter the email address of the staff person who should be notified when a member pays online.
-
Choose the credit cards that you will accept: The method by which you control which cards can be used is dependent on your credit card processor.
-
Credit card processing security: Choose how you would like the credit card processor to verify the use of a credit card (Add Credit Card Billing Address as a required field and/or Add Credit Card Security Code as a required field)
-
Automatically create a paid invoice for credit card payments (Recommended): When members/reps pay for items such as Hot Deals or Job Postings, Point of Sale in the StaffApp, etc. (excluding event registrations which have their own settings per event), a paid invoice will be created for that member/rep. Membership applications that are approved automatically will also create a paid invoice.
-
Automatically create a receipt for credit card payments: items such as Hot Deals or Job Postings, Point of Sale in the StaffApp, etc. (excluding event registrations which have it's own settings per event), a sales receipt will be created for that member/rep. Membership applications that are approved automatically will also create a receipt.
-
Display Terms and Conditions agreement in checkout cart: This agreement statement will appear in all locations where the new checkout cart is in place which includes member payments from the Member Information Center, purchases of jobs and deals, and the updated beta event registration.
-
Merchant or Store Name [Optional]: If you choose to fill in this information we will use it to generate an additional message on Credit Card Purchase Receipts that will read: Important: This charge will appear as [Your Merchant or Store Name] on your Credit Card statement. The actual text that appears on a customer or member's credit card statement is not controlled by this setting. The actual text that appears on their credit card statements is dependent upon your settings within your credit card processor's merchant account.
-
-
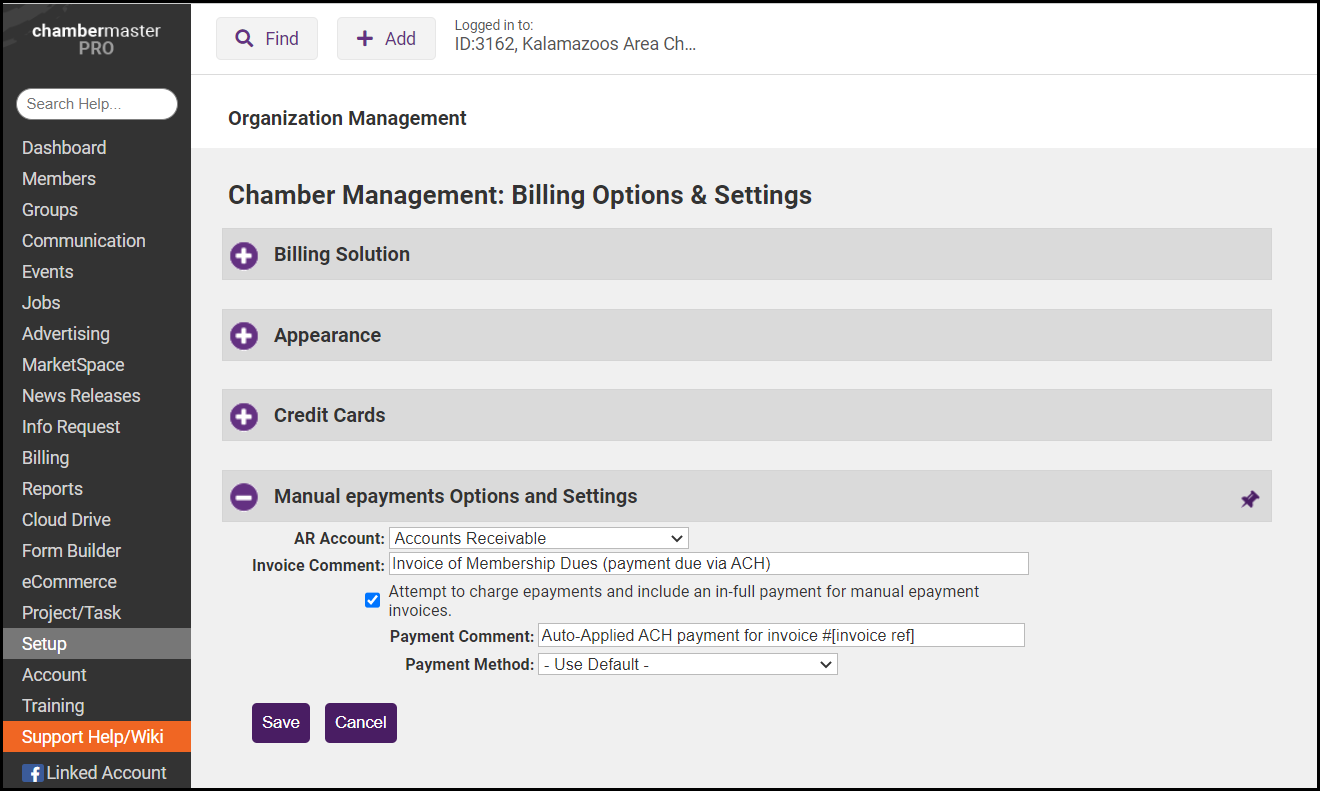
Manual epayments Options and Settings: Manual epayments mean that the financial transaction is done using a 3rd party or other outside financial institution. You are using ChamberMaster/MemberZone to create the billing transactions (usually an invoice and automatically applied payment)
- AR Account: Select the A/R account to be used for manual epayments
- Invoice Comment: Enter the comment you would like included on manual epayment invoices
- Attempt to charge epayments and include an in-full payment for manual epayment invoices: By enabling this setting the system will automatically create a payment against invoices that are marked for manual epayment.
- Payment Comment: This comment is displayed on the payment receipt
- Payment Method: Select the term you wish to use for payments made via manual epayment. This will easily allow you to report on repayments.