You are using an unsupported browser. Please update your browser to the latest version on or before July 31, 2020.
close
You are viewing the article in preview mode. It is not live at the moment.
Home > Reports - CM/MZ > Member Reports > Custom Representative Report
Custom Representative Report
print icon

The Custom Representative Report allows you to generate a customizable report to get specific information about your representatives. For example, you can use the customer representative report to generate a report of representatives who do not have login credentials to the MIC.


  1. Click Reports in the left-hand navigation panel.
  2. Enter Custom in the Report Finder text box.
  3. Click Search.
  4. Click the green arrow icon adjacent to Custom Representative Report.
  5. Expand the Available Fields links to view fields that can be included in your report. For Example: If you wish to include the rep's first and last name, click the Rep Personal Information link.
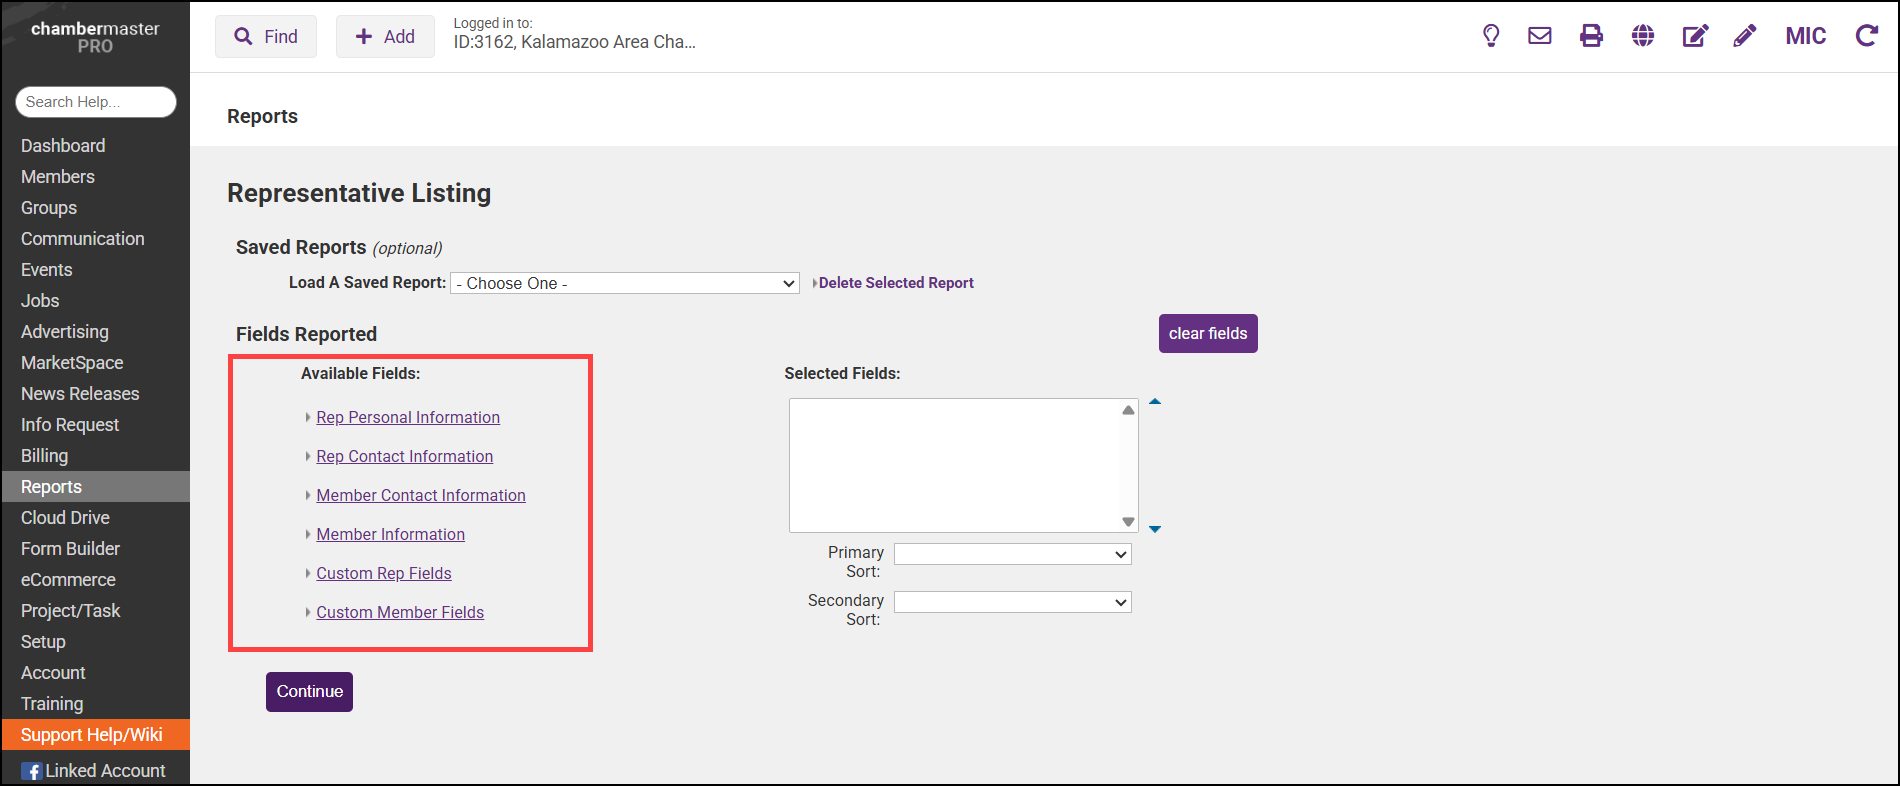
  6. Click the checkbox(es) for the fields you wish to include in the report. They will be displayed in the Selected Fields box.
  7. (Optional) Select a Primary Sort from the drop-down list. This allows you to configure how the output of the report will display. For Example: If you wish to sort report output by the last name. If no selection is made the report will be sorted by the first item in the Selected Fields.
  8. (Optional) Select a Secondary Sort option from the drop-down list. Use this option if you have selected a Primary Sort and then wish to sort by a secondary option.
  9. Click Continue.
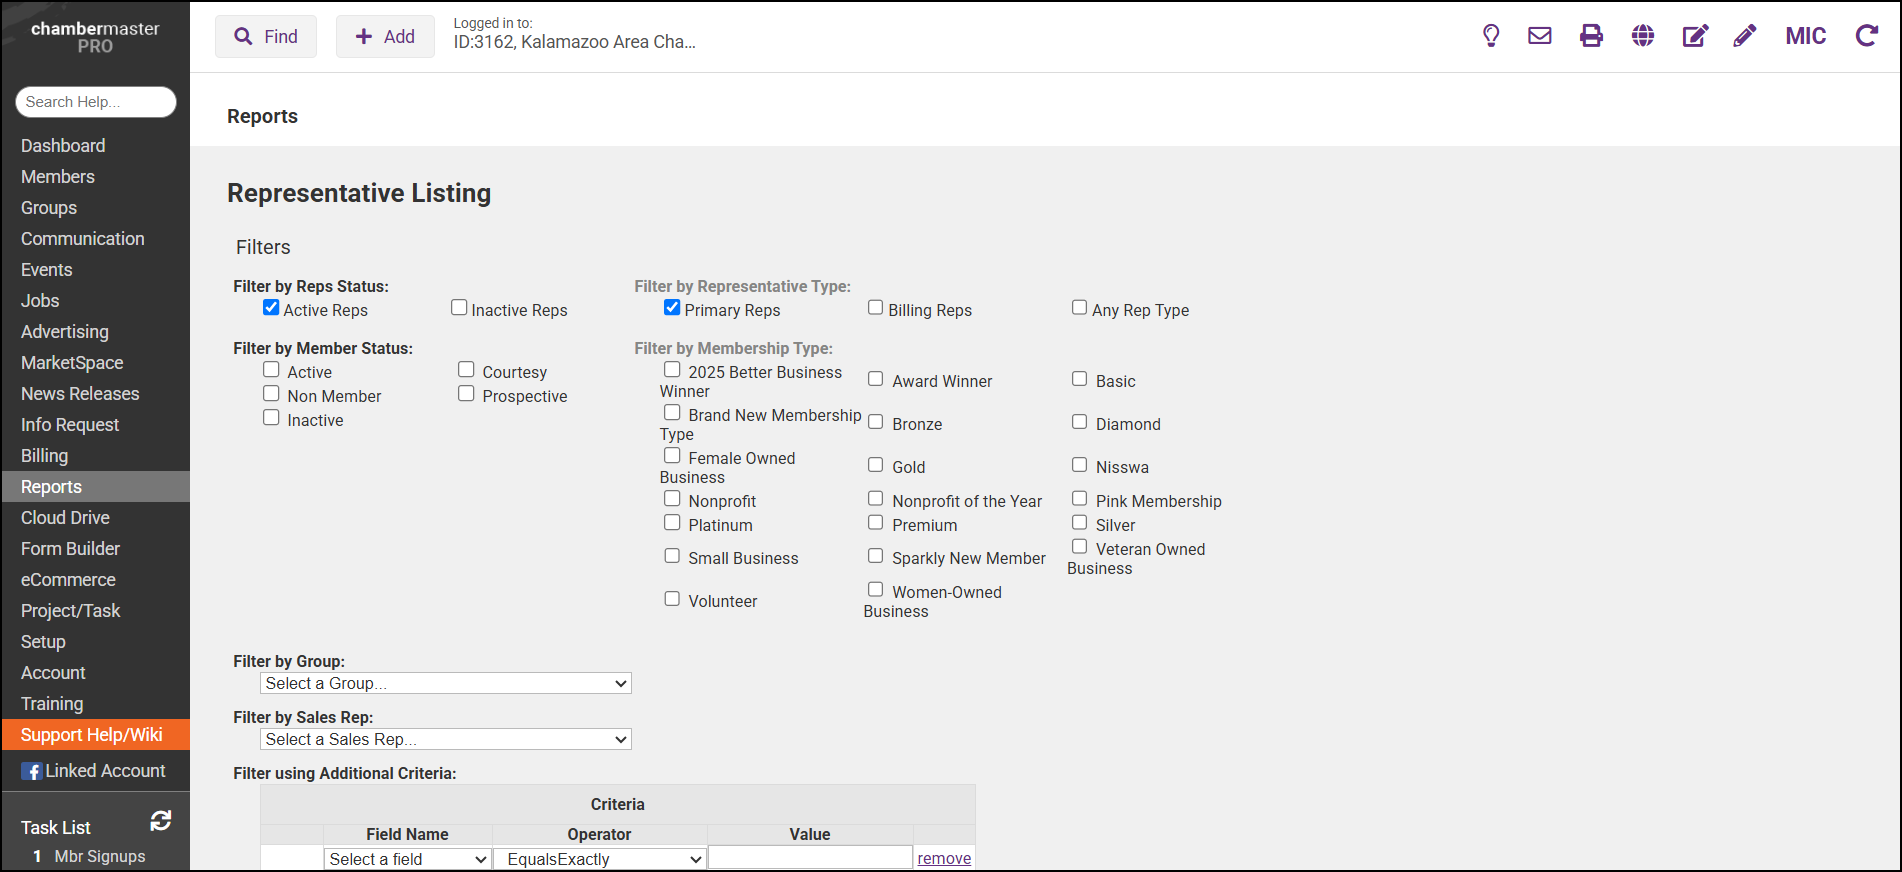
  10. Select any additional filters that you would like to (Optional):
    • Filter by Reps Status: Select the desired status(es) of the reps to include in your report.
    • Filter by Representative Type: Select the desired representative type(s). For Example: If you wish to only include billing reps in your report, click the Billing Reps check box.
    • Filter by Member Status: Select the desired member status(es). For Example: If you wish to only include prospects in your report, click the Prospects check box.
    • Filter by Membership Type: Select the desired membership type(s) to limit the report output to just those types.
    • Filter by Group: Select a group, if you wish to filter the results to just a specific group.
    • Filter by Sales Rep: Select a sales rep, if you wish to filter the results to a specific sales rep.
    • Filter using Additional Criteria: This option allows you to filter based on additional criteria. For Example: if you wish to view all reps that do not have an email address, set your filters as shown below.
  1. Select a desired report format:
  • Table Style: Select this option to display each field in the report in a separate column, as shown below.


  • Directory Style: Select this option to display each field in the report on a new line. Click Show field names for all data reported if you wish to include the names of the fields in your report. As shown below.
  1. Click View/Print Report.


You can create a group from the results of your Custom Representative Report. This unique, custom group can be used throughout the software as recipients of emails, event invitations, or as a record of those meeting your specific criteria at that point in time.

  1. Create your report as described in Custom Representative Report
  2. Click View/Print Report.
  3. Verify the displayed contacts are those that should be included in the group.
  4. Click Create Group.
  5. Type the New Group Name in the text box.
  6. Click Submit. The group has now been created, and you can update/edit it within the Groups module.
Feedback
1 out of 1 found this helpful

scroll to top icon