A custom Membership Application may be integrated with your website so that applicants may complete the form online, which places the member in your database without further entry on your part.
- Plus or greater is required to receive credit card payments with the application.
- Your web designer or our integration team must place a link on your website that points to the Membership Application.
- Administrator-level permissions are required to set up the Membership Packages.
|
|
NOTE: Further details on integrating your Membership Application form into your website can be found in our ChamberMaster/MemberZone Quick Guide. |
- Select the Setup module on the left-hand menu.
- In the Member Options section, select Setup Membership Application.
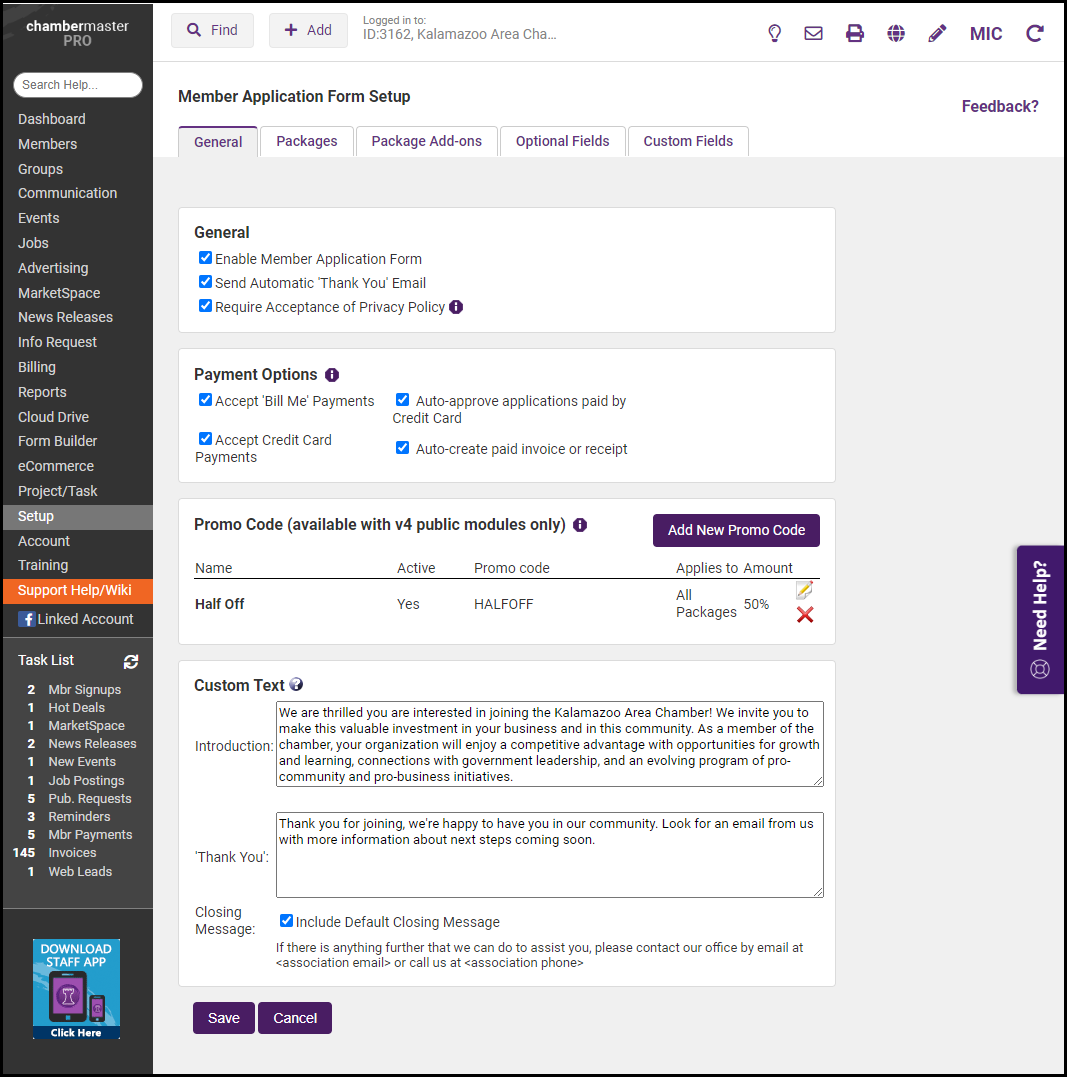
- Configure the General section:
- Enable Member Application Form must be checked for the application to be available for integration to your website.
- Send Automatic 'Thank You' Email sends email to the member when they complete the application. You can modify some of the wording in the Custom Text 'Thank You' section.
- Require Viewing of Privacy Policy: select this option if your applicants must accept your terms/conditions to apply for membership. If this setting is enabled, a checkbox will be displayed at the end of the membership application, above the submit button. The statement "I have read and accept the privacy policy of "Your Chamber/Association Name". I grant "Your Chamber/Association Name" permission to contact me regarding my account, news, updates, and offers."' See Configure User Agreement/Privacy Policy for further information.
- Configure the Payment Options section:
- Accept 'Bill Me' Payments allows a user to complete the application without paying online. A staff person would then invoice the applicant for their membership fees.
- Accept Credit Card Payments allows a user to complete the application and pay for their selected membership package and package add-ons at the time of their application. R
- Auto-approve applications paid by Credit Card automatically activate a member who pays their application fees online. This option shows only when accepting credit card payments is enabled.
- Auto-create paid invoice or receipt automatically creates the billing transaction(s) when a member pays online. This option is only available when both accept credit card payments and auto-approve applications paid by credit card are enabled. When using this option, the following must apply:
- Under the Optional Fields, Primary & Billing Rep must be required, as well as the email address.
- Under the packages tab, the packages need to be assigned to a fee item.
- Provide Promo Codes for Membership Application if desired.
- Configure the Custom Text section:
- Introduction: This text will show at the top of the member application page, just below the title.
- Thank You: This text will show after the application is submitted and on the automatic thank you email if enabled above.
- Closing Message: This default text will be included after your "Thank You" text when the application is submitted. The checkbox allows you to enable/disable the default Closing Message.

Packages Tab
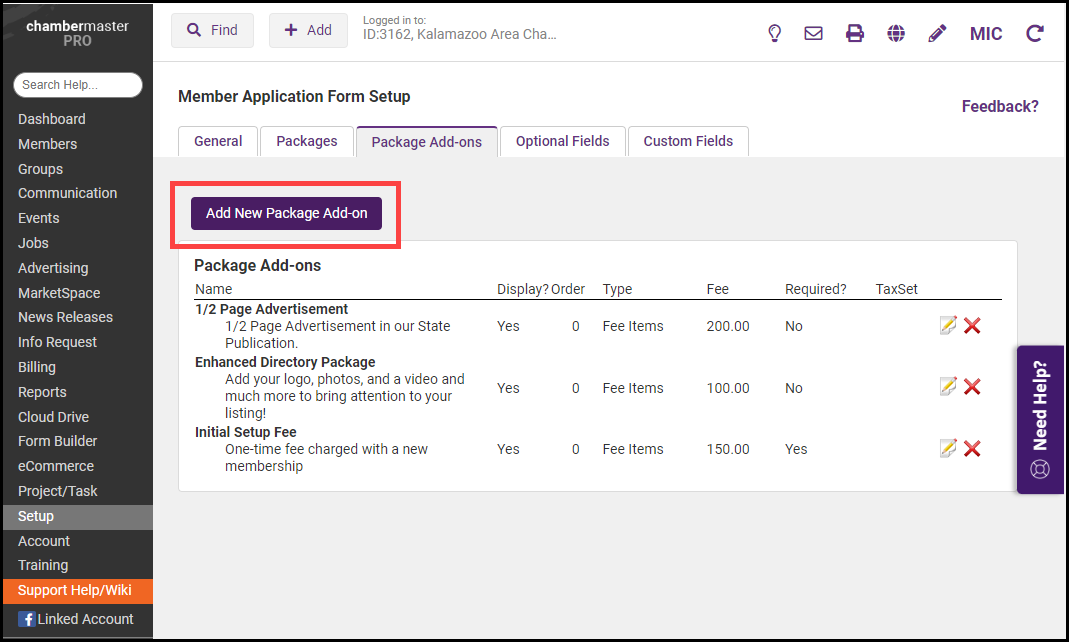
Package Add-ons are items that would be in addition to a Membership Package. Examples would be an additional contribution, an advertising location on your website, or an enhanced website listing (Requires Premier or Pro Editions). This can also be used for a required add-on, such as a membership application fe,e by making the add-on a required item.
Create Package Add-ons
-
Click Add New Package Add-on.

-
Populate the Add-on Name and description. Both will be visible on the online application.
-
Display Add-on: This should be checked for the item to show on the online application.
-
Display Order: lower numbers show higher in the list of add-on items.
-
Required Add-on: makes this add-on a requirement. Useful for items such as a member application fee.
-
Fee Type:
-
Fee: Select this to specify a dollar amount for this package but not directly associate it with a fee item. With Fee selected, the Fee Amount field must be filled in.
-
Tax Set: Specifies the tax set for the fee.
-
Fee amount: Set the amount for that package add-on.
-
-
Fee Items: Select this to specify a particular fee item that should populate when creating the invoice/receipt for this member. With Fee Items selected, the Amount and Fee Item Name must be filled in.
-
Amount: Set the amount for that fee in the package add-on.
-
Fee Item Name: Select a fee item from your fee item list for this package add-on.
-
-
-
Click Save.
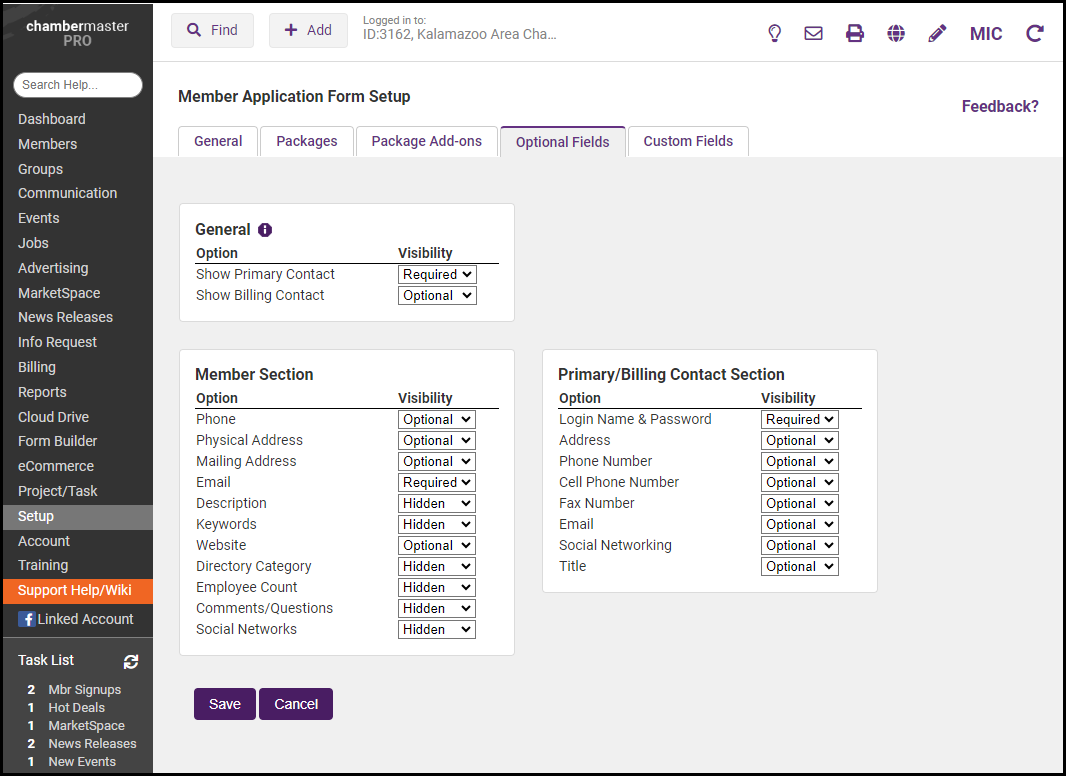
The Optional Fields available are those standard with the Membership Application. You can configure which ones you wish to display, display, require, or hide.
- Hidden fields will not be included on the online application screen.
- Optional fields will be displayed, but the applicant is not required to fill them out.
- Required fields will be displayed and must be filled in.
View and Edit Optional Fields
-
Select Setup in the left-hand navigation panel.
-
Click Setup Membership Application in the Member Options section.
-
Click the Optional Fields tab.
- Make desired changes.
- Click Save.

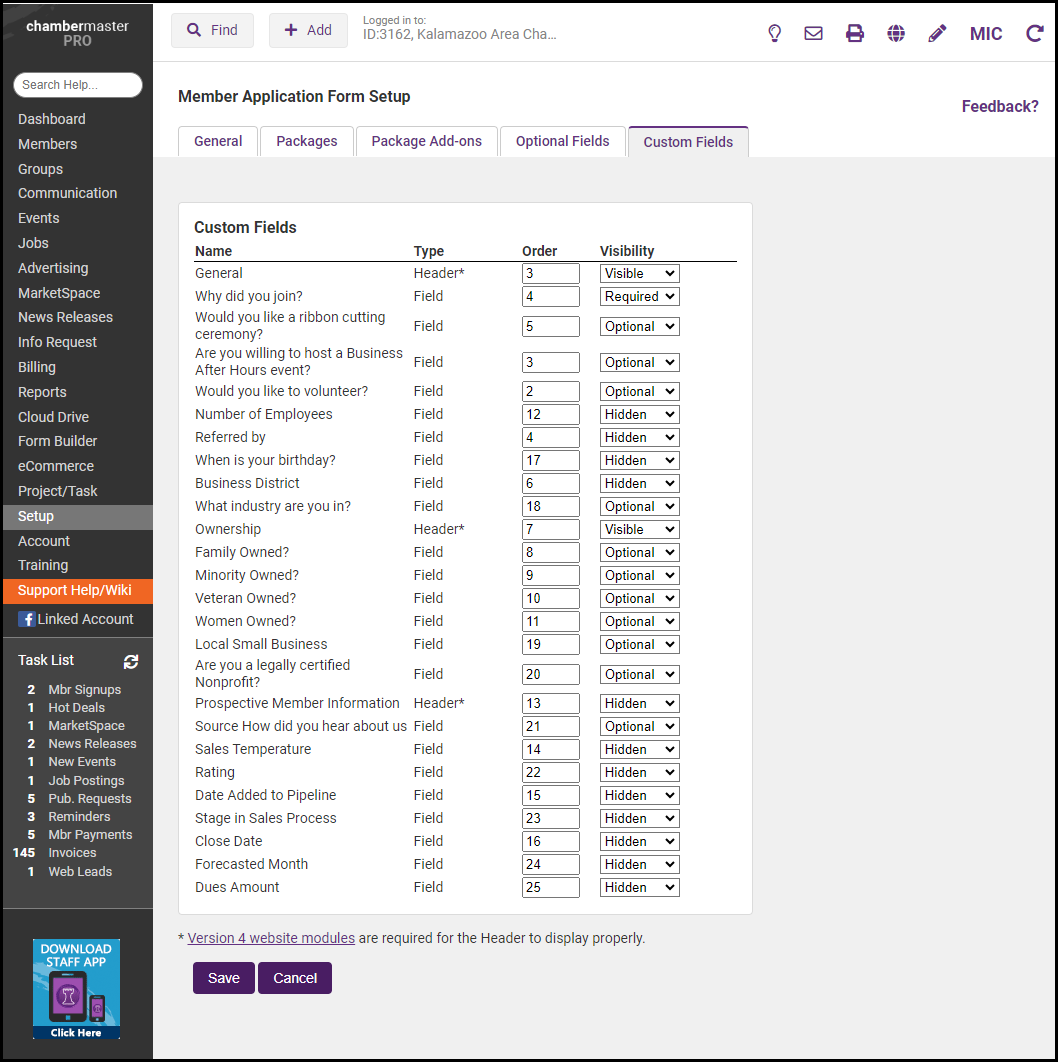
On the Membership Application Custom Fields tab, you can select the custom fields you wish to include on your Membership Application form. See Member Custom Fields for steps on setting up custom fields.
- Select Setup in the left-hand navigation panel.
-
Click Setup Membership Application in the Member Options section.
-
Make desired changes.
-
Click Save.


