Configure Content to Automatically Publish to Facebook

Once you have connected to your Facebook account, you can select what you wish to publish, the posting window, and the messages to be included.
-
Click Setup in the left-hand menu.
- Click Social Network Publishing in the Association Options section.
- In the Settings Section, configure the following as needed.
- Items to Publish: Tick the checkboxes for the items that you would like to publish to Facebook. Items that can be published are Events, News, New Members, Hot Deals, and Job Postings.
- Event Publish Flags: Select the calendars from which events should be published. For example, if you only wish to publish events that are visible on your website calendar, tick the checkbox for Public Calendar Events.
- Publish events: If you are publishing events, enter the number of days before an event that you would like to publish. NOTE: Events are only automatically published to Facebook one time.
- Enter the start time and end time for publishing your events. This is the window within which new items will be published on Facebook.
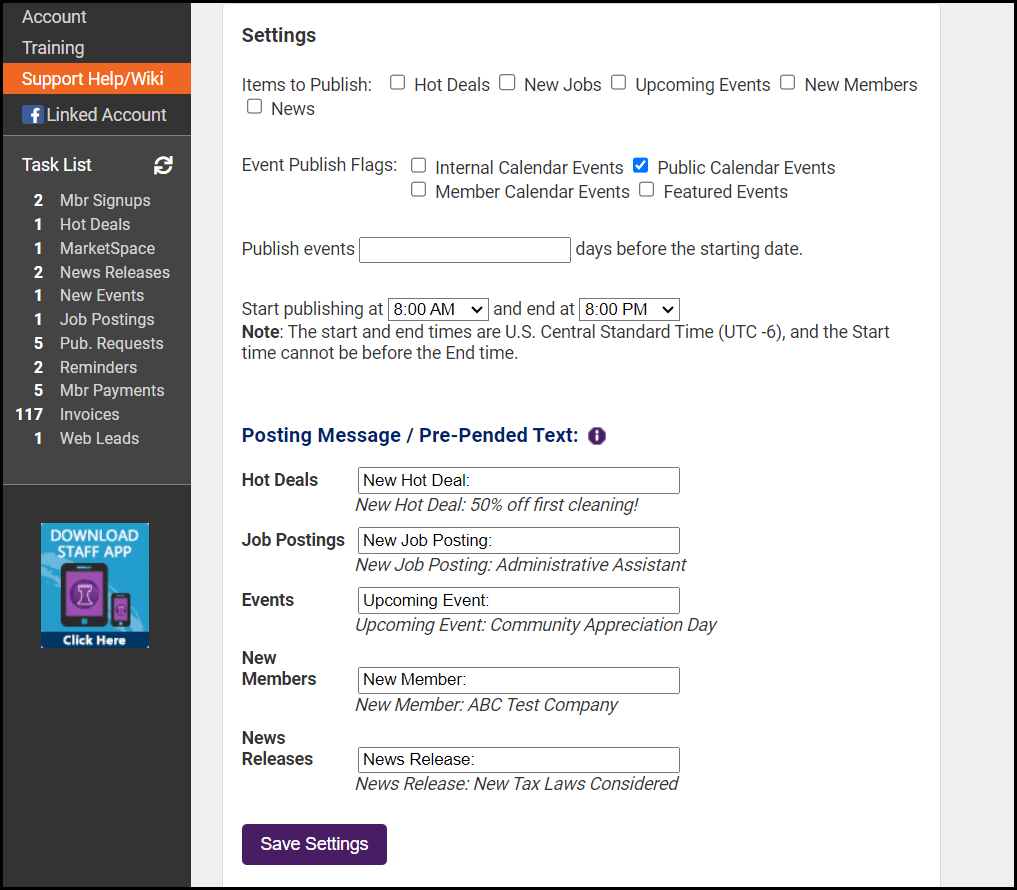
- In the Posting Message/Pre-Pended Text section, configure the following as needed. The Posting Message text is text added to the very beginning of the title for the item being published and is meant to give the reader more information about what kind of post they are reading.
- Hot Deals: By default, Hot Deals includes the post message "New Hot Deal:".
- Job Postings: By default, Job Postings include the post message "New Job Posting:"
- Events: By default, events include the post message "Upcoming Event:"
- New Members: By default, New Members include the post message "New Member":
- News Releases: By default, News Releases include the post message "New News Release:"
- Click Save Settings.
|
|
NOTE: The logo that you have uploaded in your General Assocation Information will be displayed next to Facebook posts. If you do not have a logo uploaded, the post will display a Powered by ChamberMaster logo. |

